Ricoh GR III/x Essential Street Photography Settings Guide
Like all of my photography guides and articles, this content is, and always will be, freely available.
However, if this Essential Guide helped you better understand your camera, introduced you to features you hadn't considered, or simply made your experience a little easier, you can support my work in two simple ways.
You can purchase the PDF version of this guide for the symbolic price of $1, or, if you'd prefer, you can simply buy me a coffee through Buy Me a Coffee.
Your support helps cover the time invested in researching, writing, photographing, editing, and designing guides like this, allowing me to continue creating free resources for the photography community.
Thank you for reading, and thank you to everyone who chooses to support what I do.
Note II: This guide is also compatible with the RICOH GR IIIx. The settings, menus, and overall workflow remain the same. The only major difference is the focal length: the GR IIIx features a 40mm equivalent lens instead of the GR III’s 28mm equivalent lens. Adjust your composition and shooting approach accordingly.
Introduction
I created this guide to share my personal approach to street photography with the Ricoh GR III, breaking down the essence of how I use this camera and showing the settings that I consider truly essential, as well as the ones I believe can be ignored in order to achieve a faster, simpler and more intuitive shooting experience.
Over the past few months, I have talked extensively about this camera. The Ricoh GR III has been the protagonist of many long-form YouTube videos, countless photography walks abroad, and several articles and videos dedicated to the accessories that, in my experience, genuinely improved the way I interact with it.
However, there is one thing I have never really covered in depth: the settings I personally use every day, and more importantly, how I configured the camera’s interface and controls to make it more responsive and better suited for street photography.
Before we begin, there is something important to clarify.
This is not meant to be a complete Ricoh GR III/x manual.
The settings I will show you are not necessarily the ones that will perfectly match your style, habits, or creative process.
They are simply the choices that, after spending a significant amount of time with this camera, have become essential to my own workflow.
Think of this as a personal recipe rather than a universal instruction manual.
Take what works for you, ignore what does not.
PT.I
Shooting Modes
Before diving into individual settings, let's talk about the shooting modes I use most frequently with the Ricoh GR III.
Listed from the ones I use the most to the least:
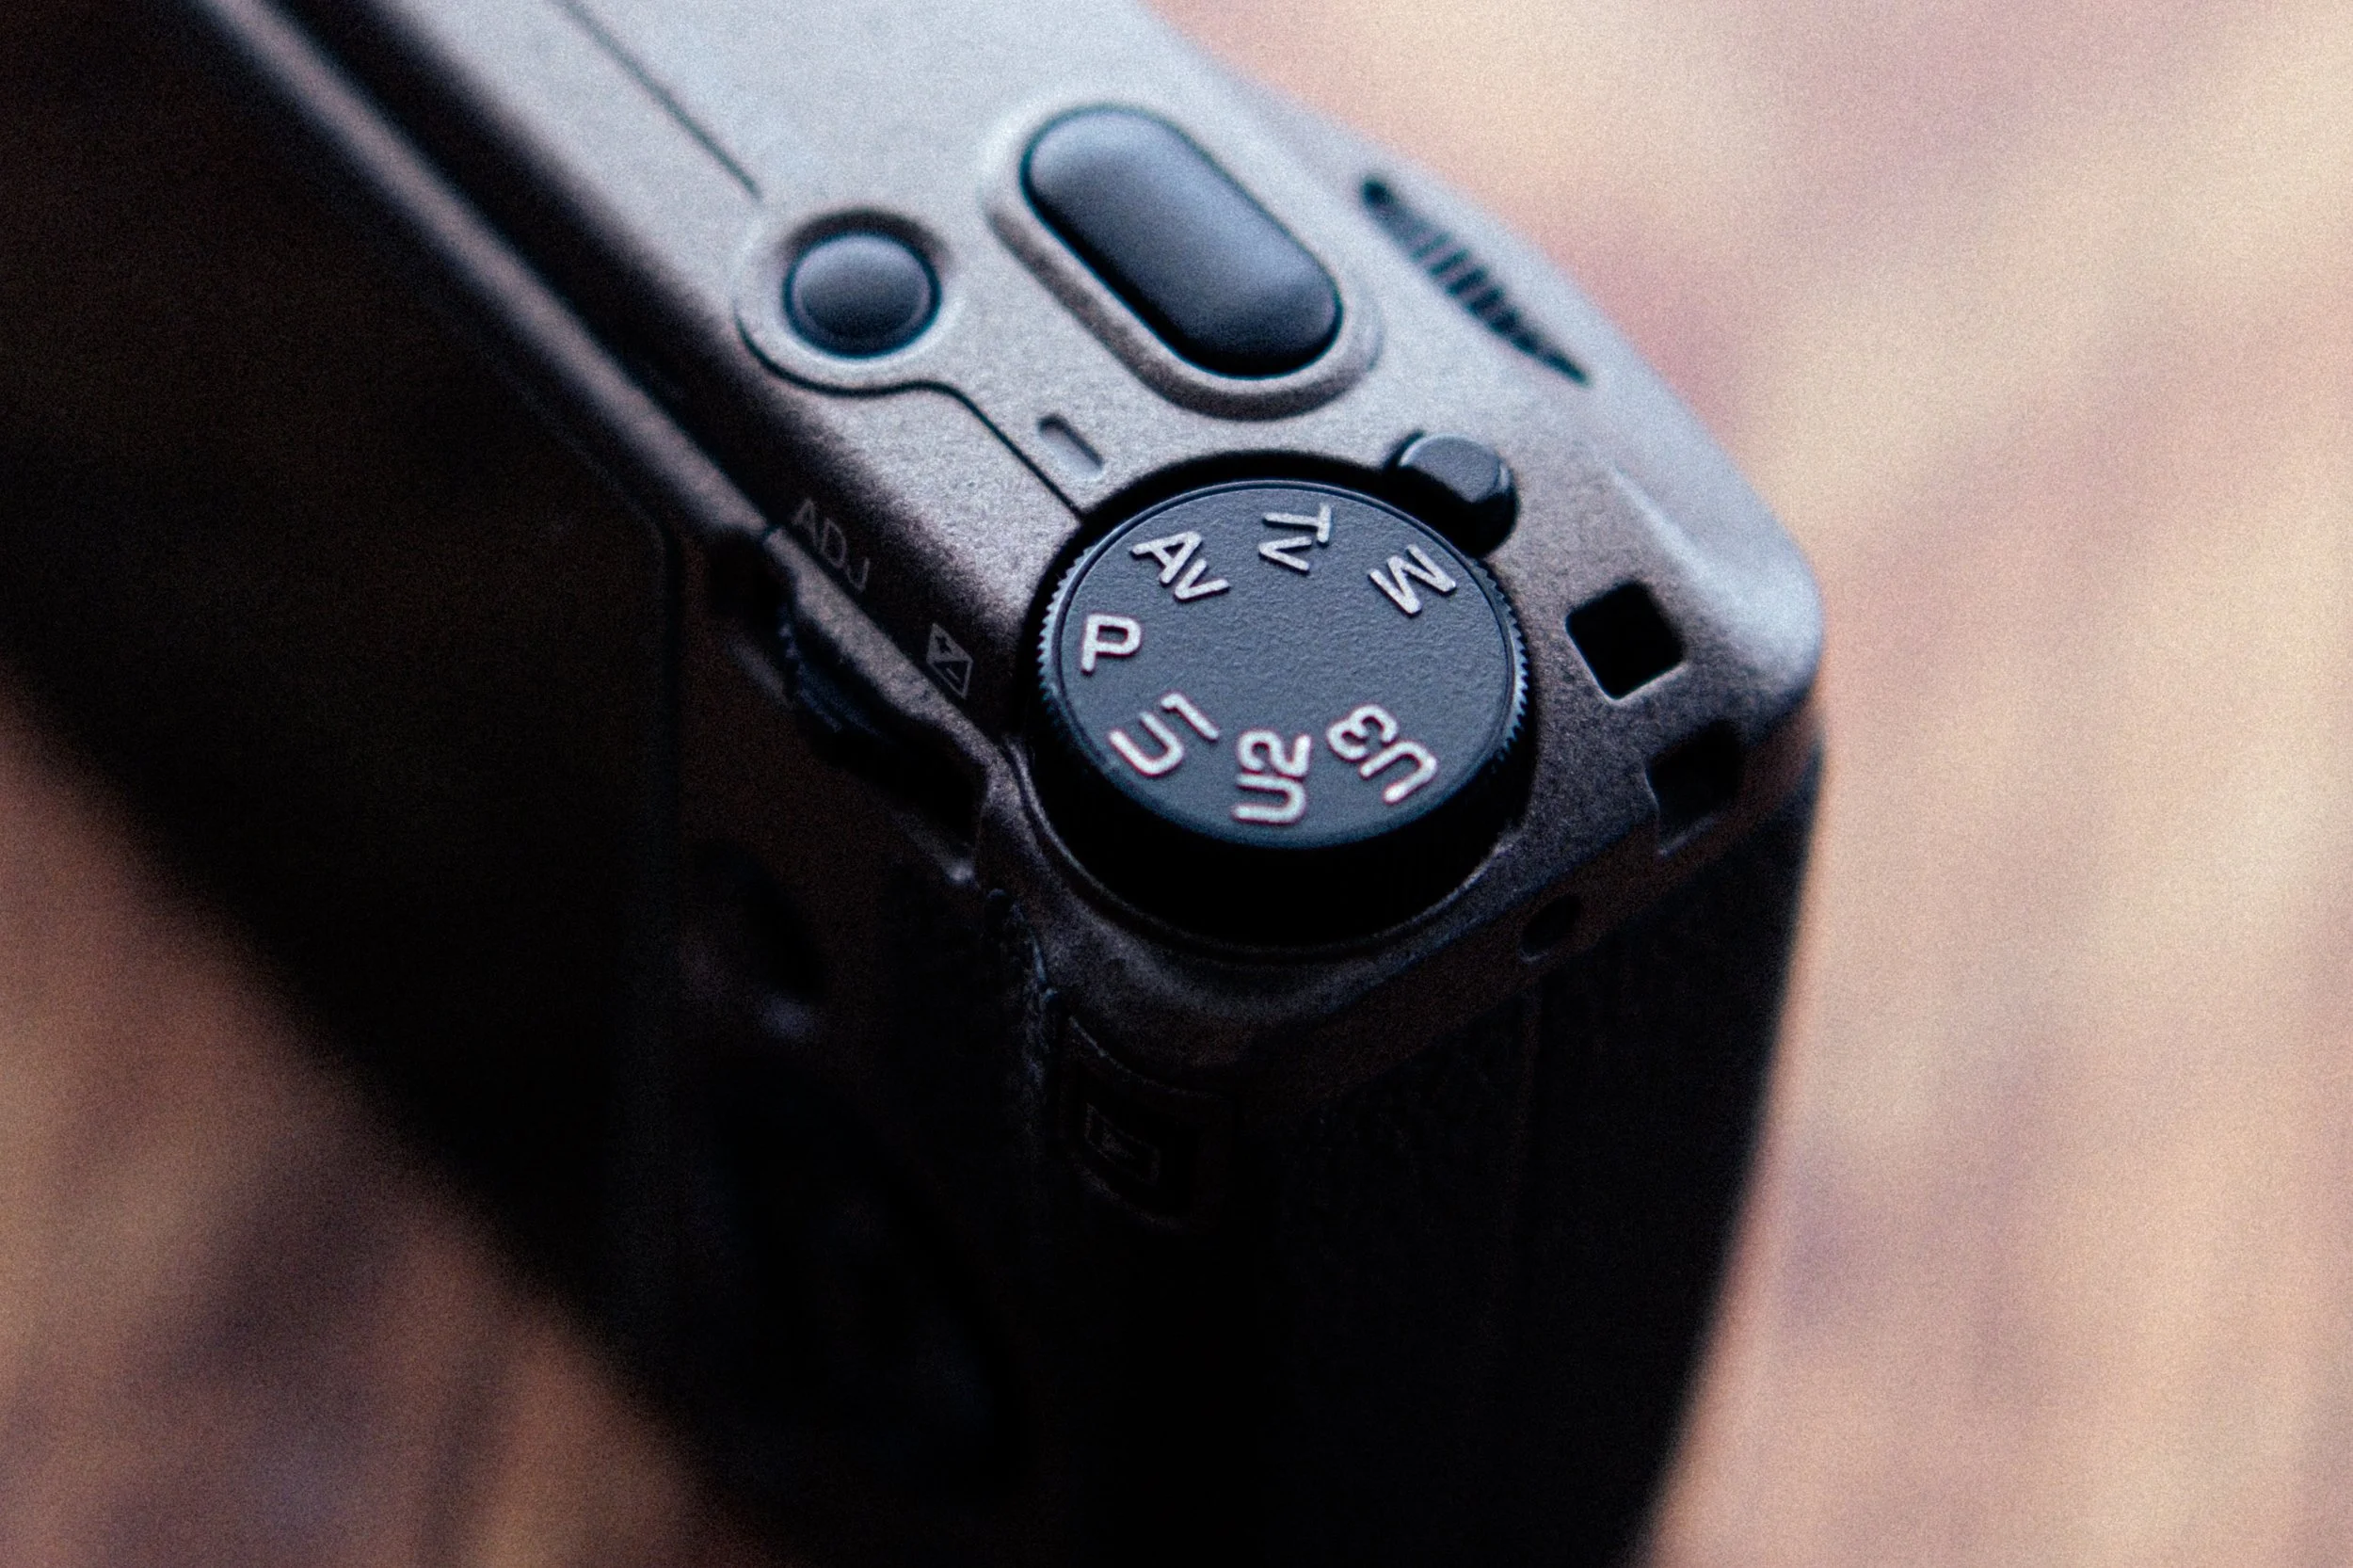
Aperture Priority
Manual Mode
Shutter Priority
Program Mode (P)
Aperture Priority
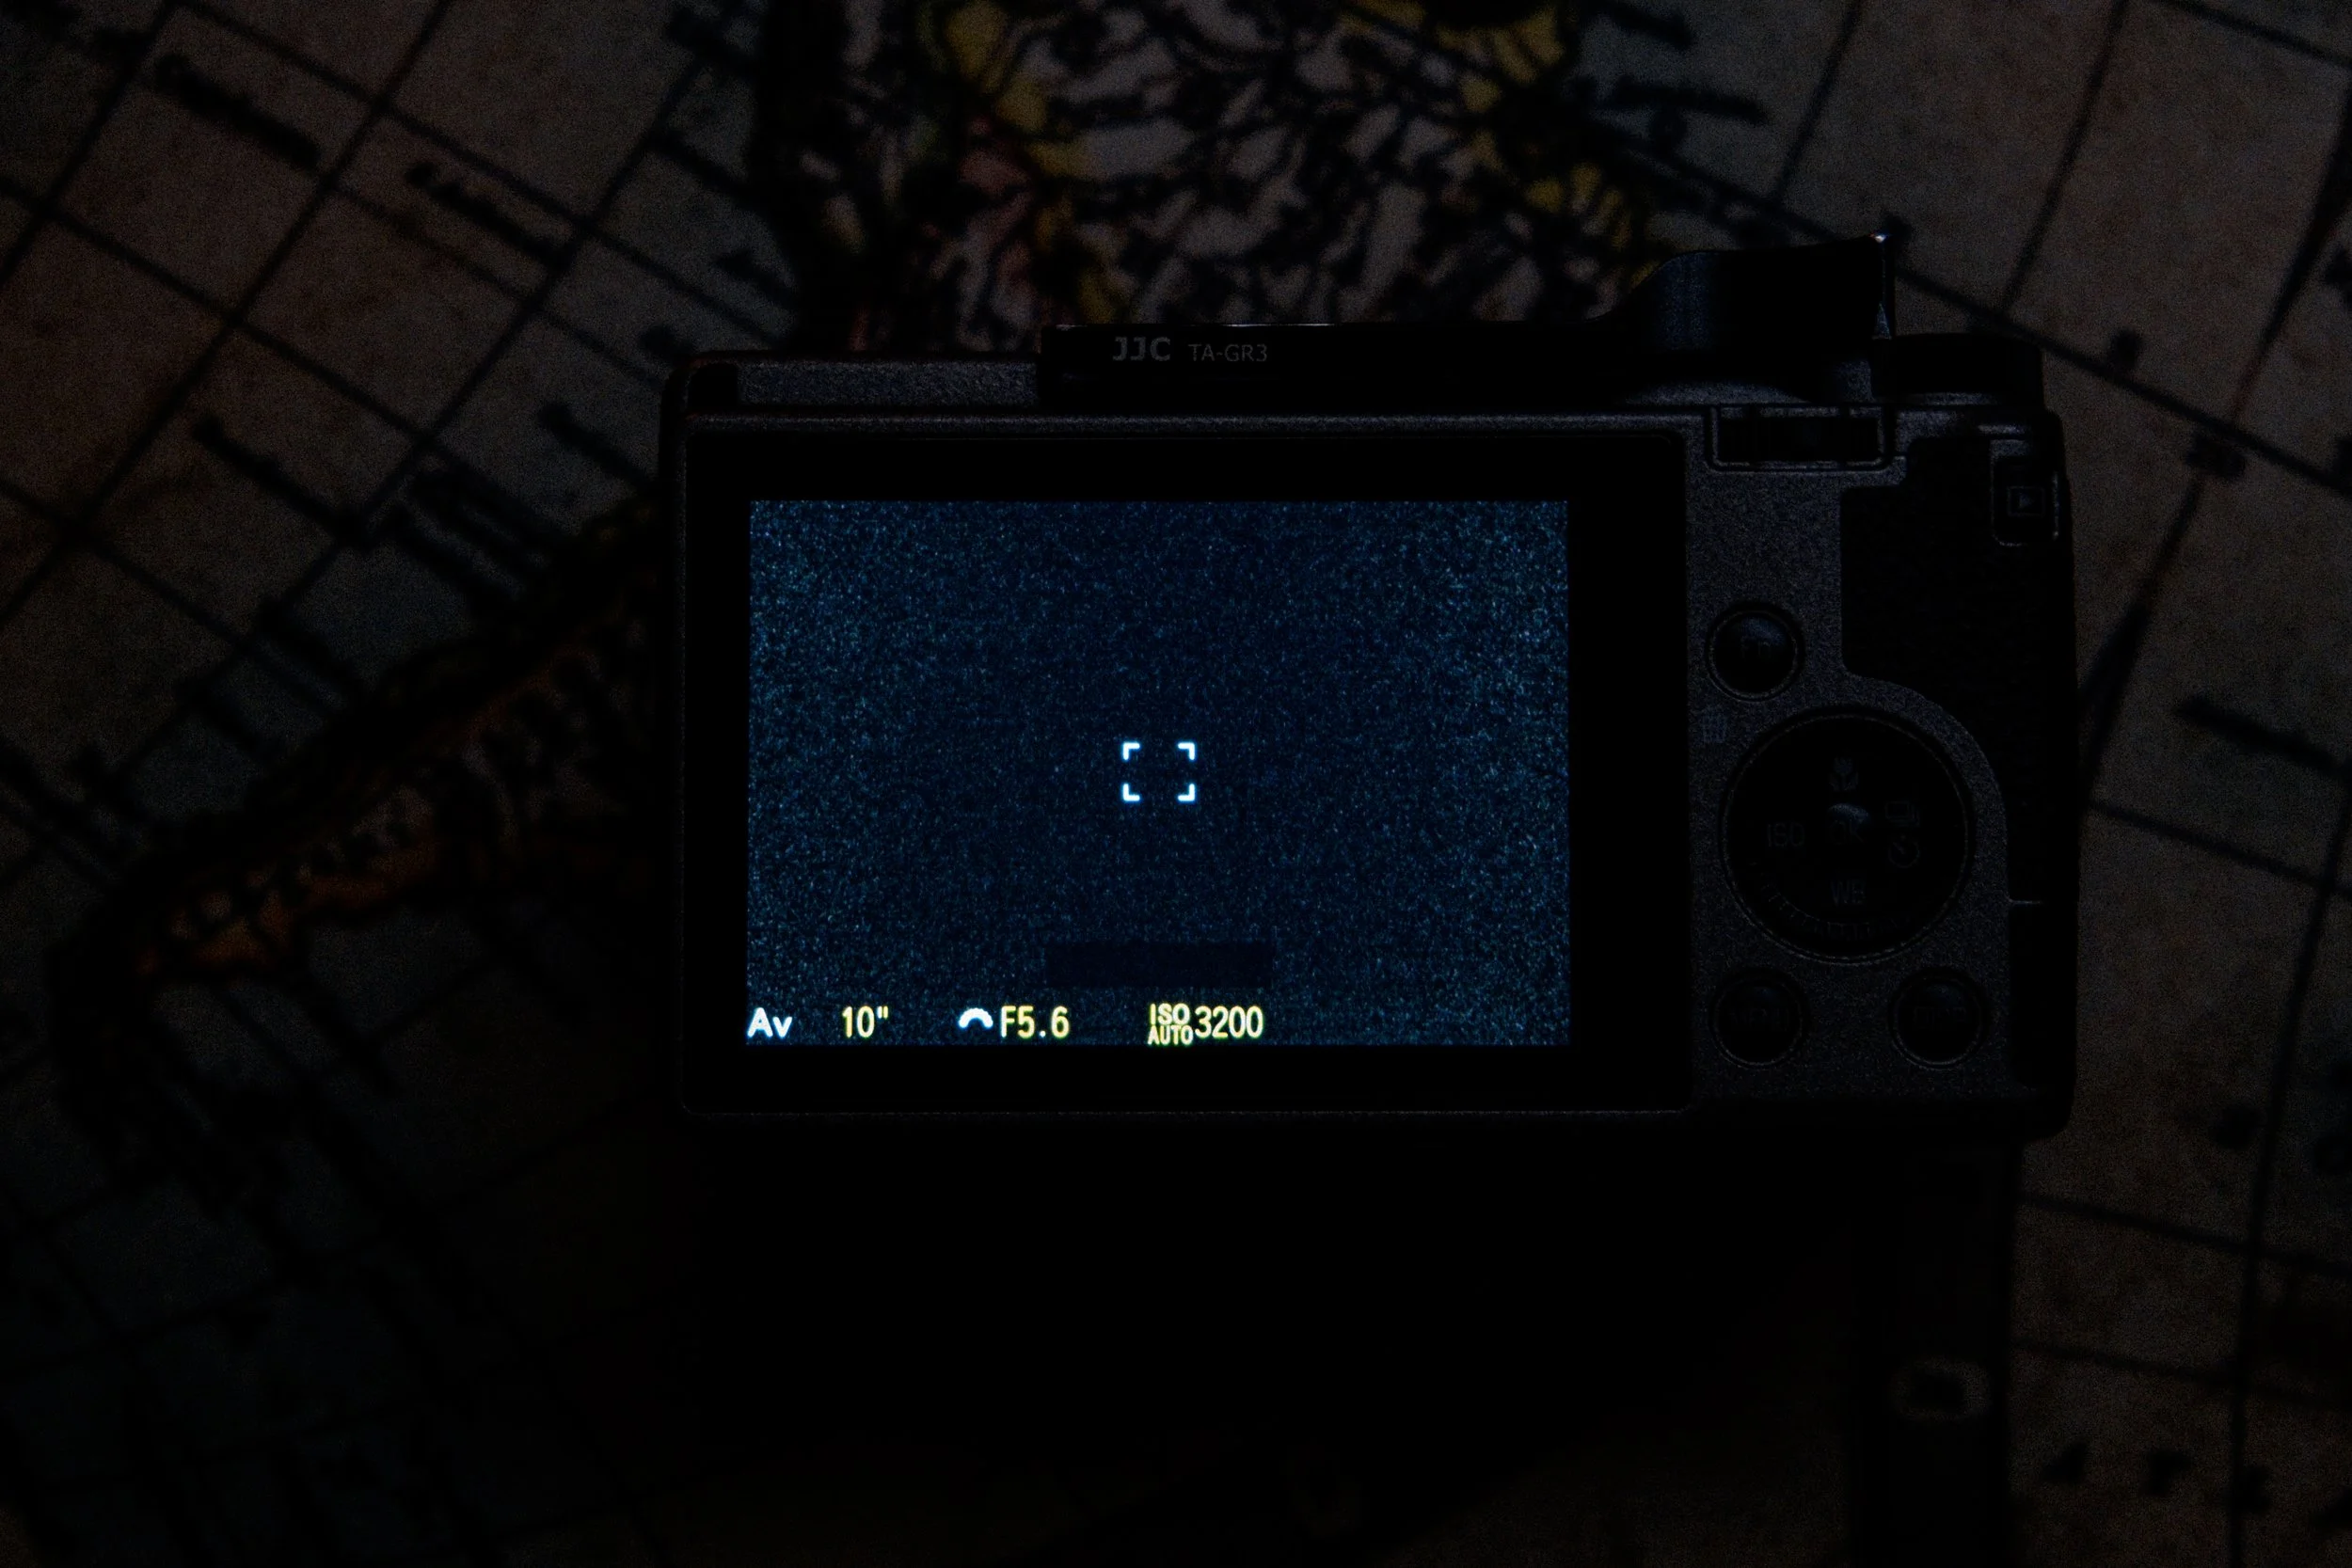
This is without a doubt the mode I use the most with the GR III.
Perhaps this comes from my habit of shooting with prime lenses on my Fujifilm cameras, where controlling aperture has always been a fundamental part of my photographic process.
Being able to decide how much of the scene I want in focus, how the image should feel, and how the depth of field should interact with the subject is something I personally find extremely valuable.
With the GR III and its 28mm equivalent lens (40mm for the IIIx version), aperture is not as critical as it may seem. Due to the wide field of view, I usually shoot at relatively narrow apertures such as f/8 or f/11.
However, having direct control over it remains essential for my workflow.
Manual Mode
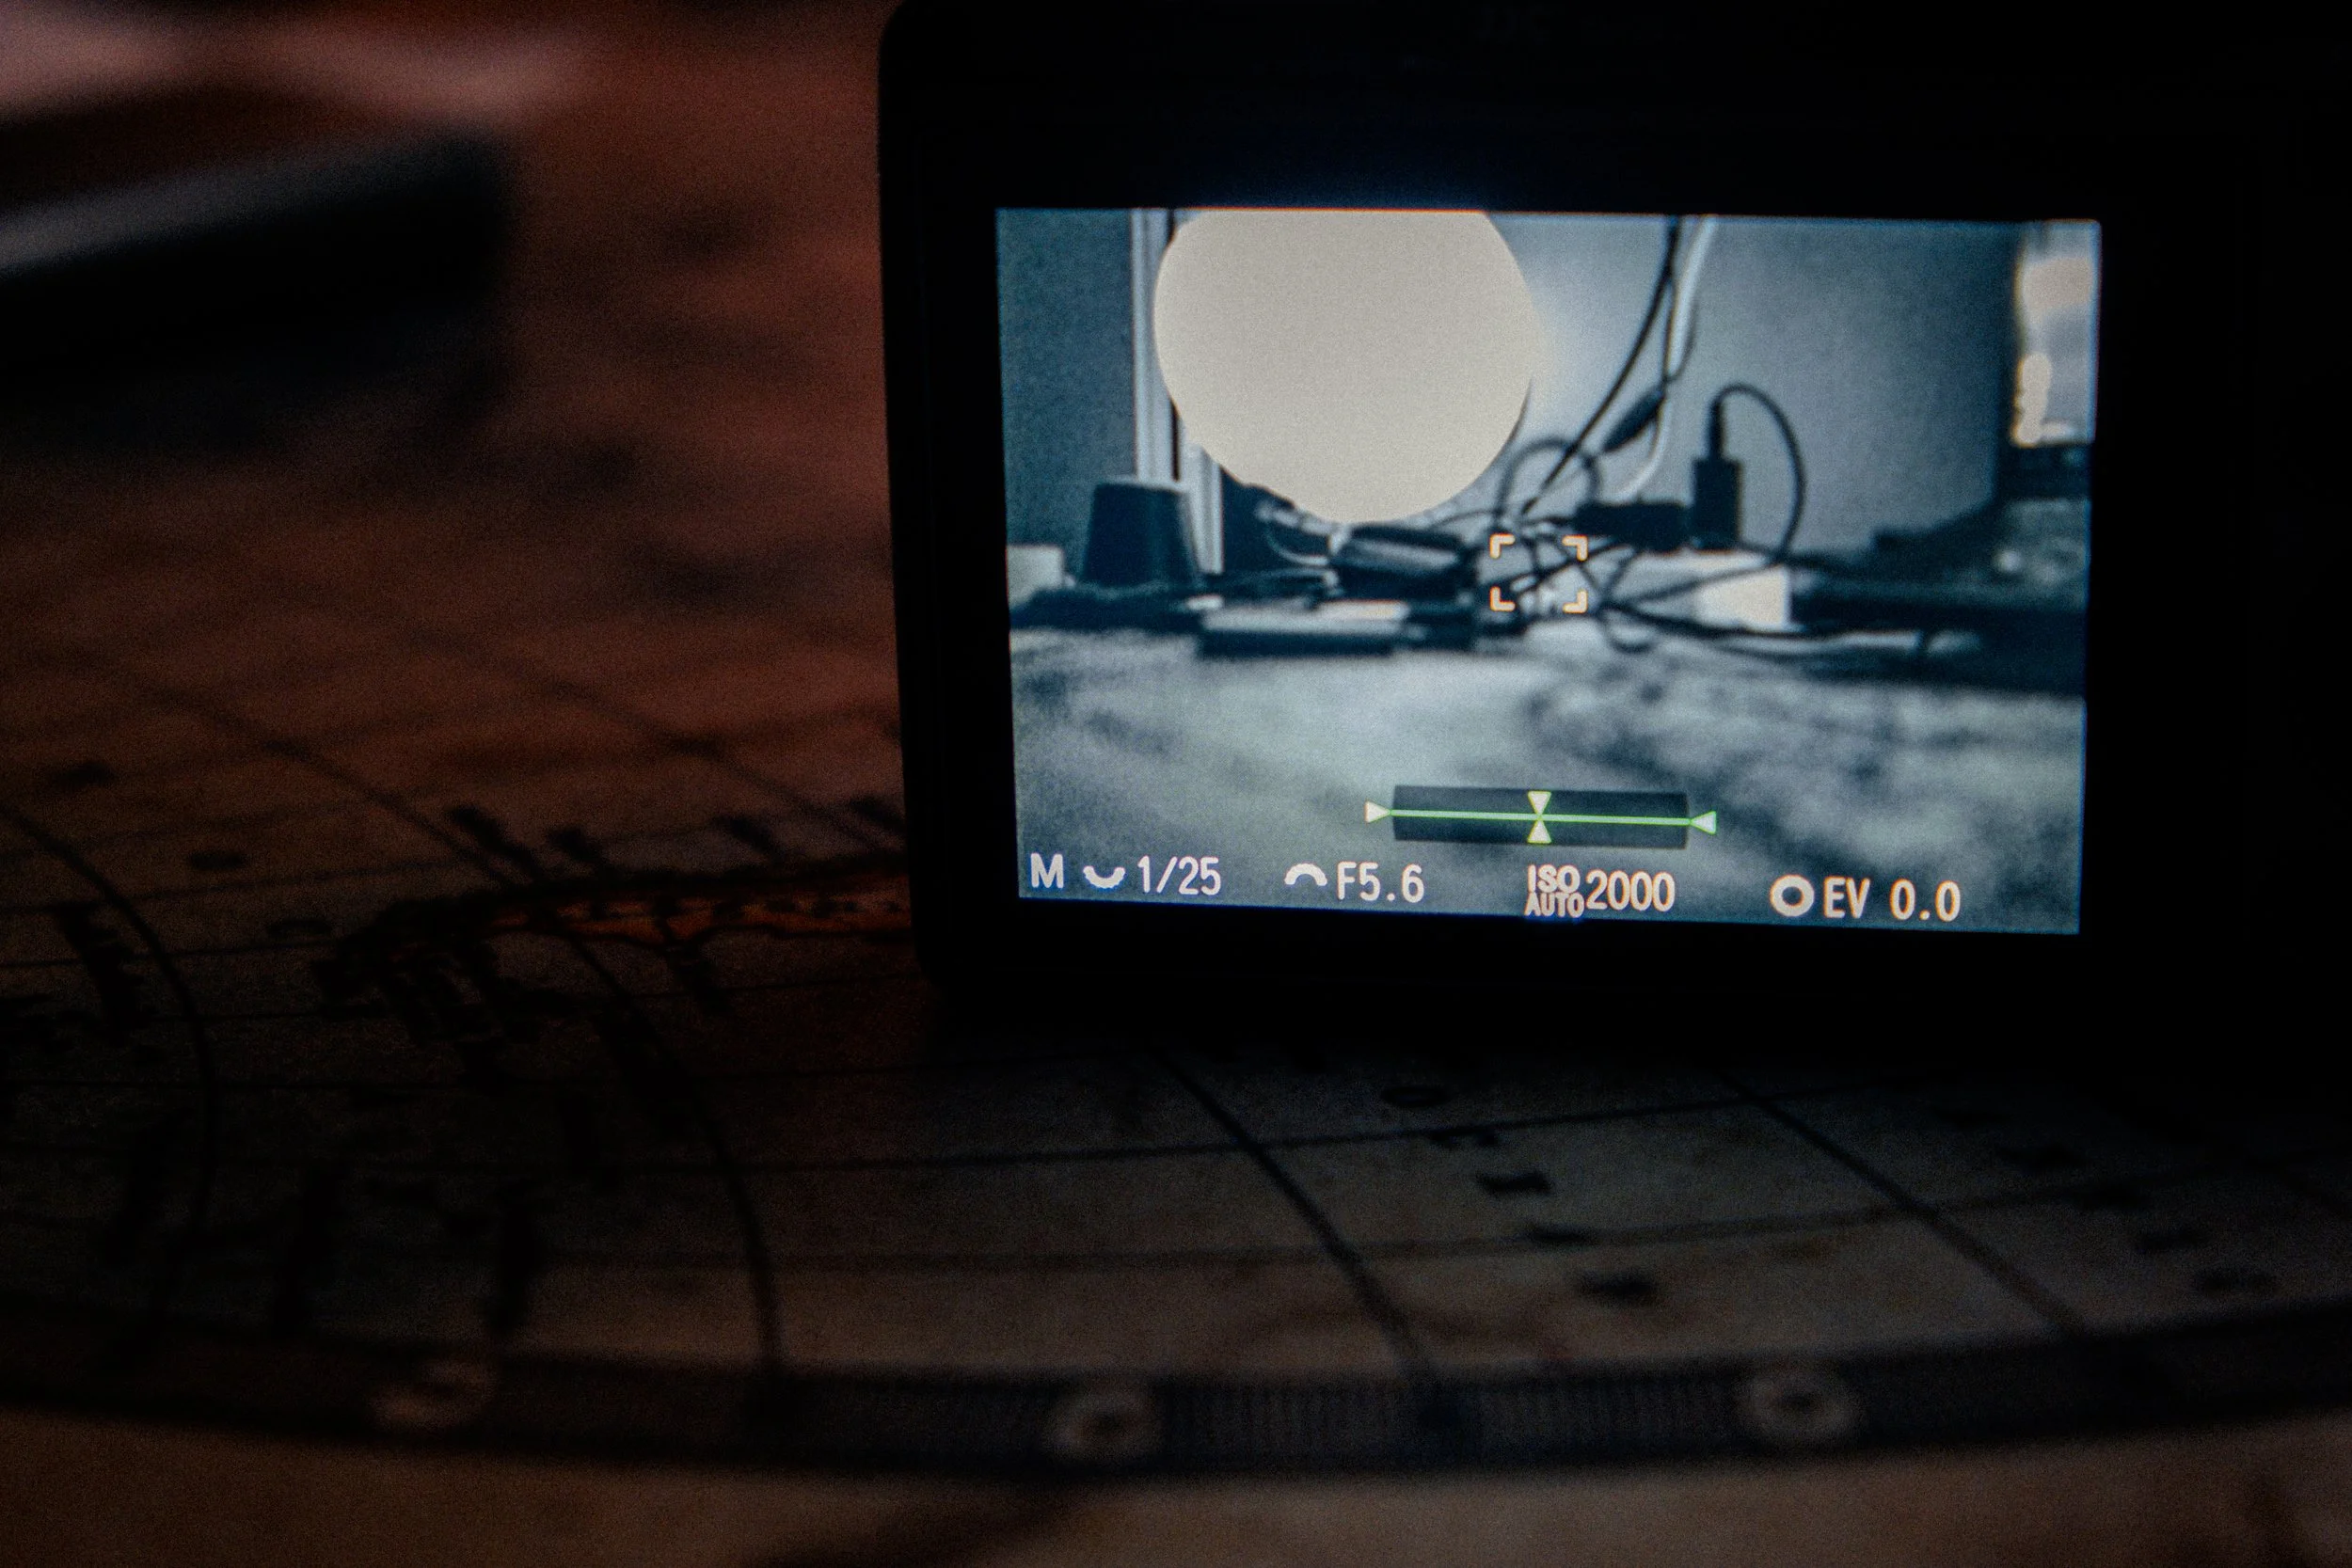
Manual Mode might seem intimidating at first.
But with the Ricoh GR III/x, it becomes surprisingly natural.
The reason is simple: the camera’s incredible Snap Focus system transforms what could normally be a slow and technical process into something very fast.
We will discuss Snap Focus in detail later, but in practical terms, my usual settings when shooting manually are:
Shutter speed: usually above 1/250s
Snap focus distance: 1 meter
Aperture: depending on available light, but usually never below f/6
The beauty of this approach is that once everything is configured properly, adjusting these parameters becomes extremely intuitive, even in the middle of a chaotic street scene.
Shutter Priority
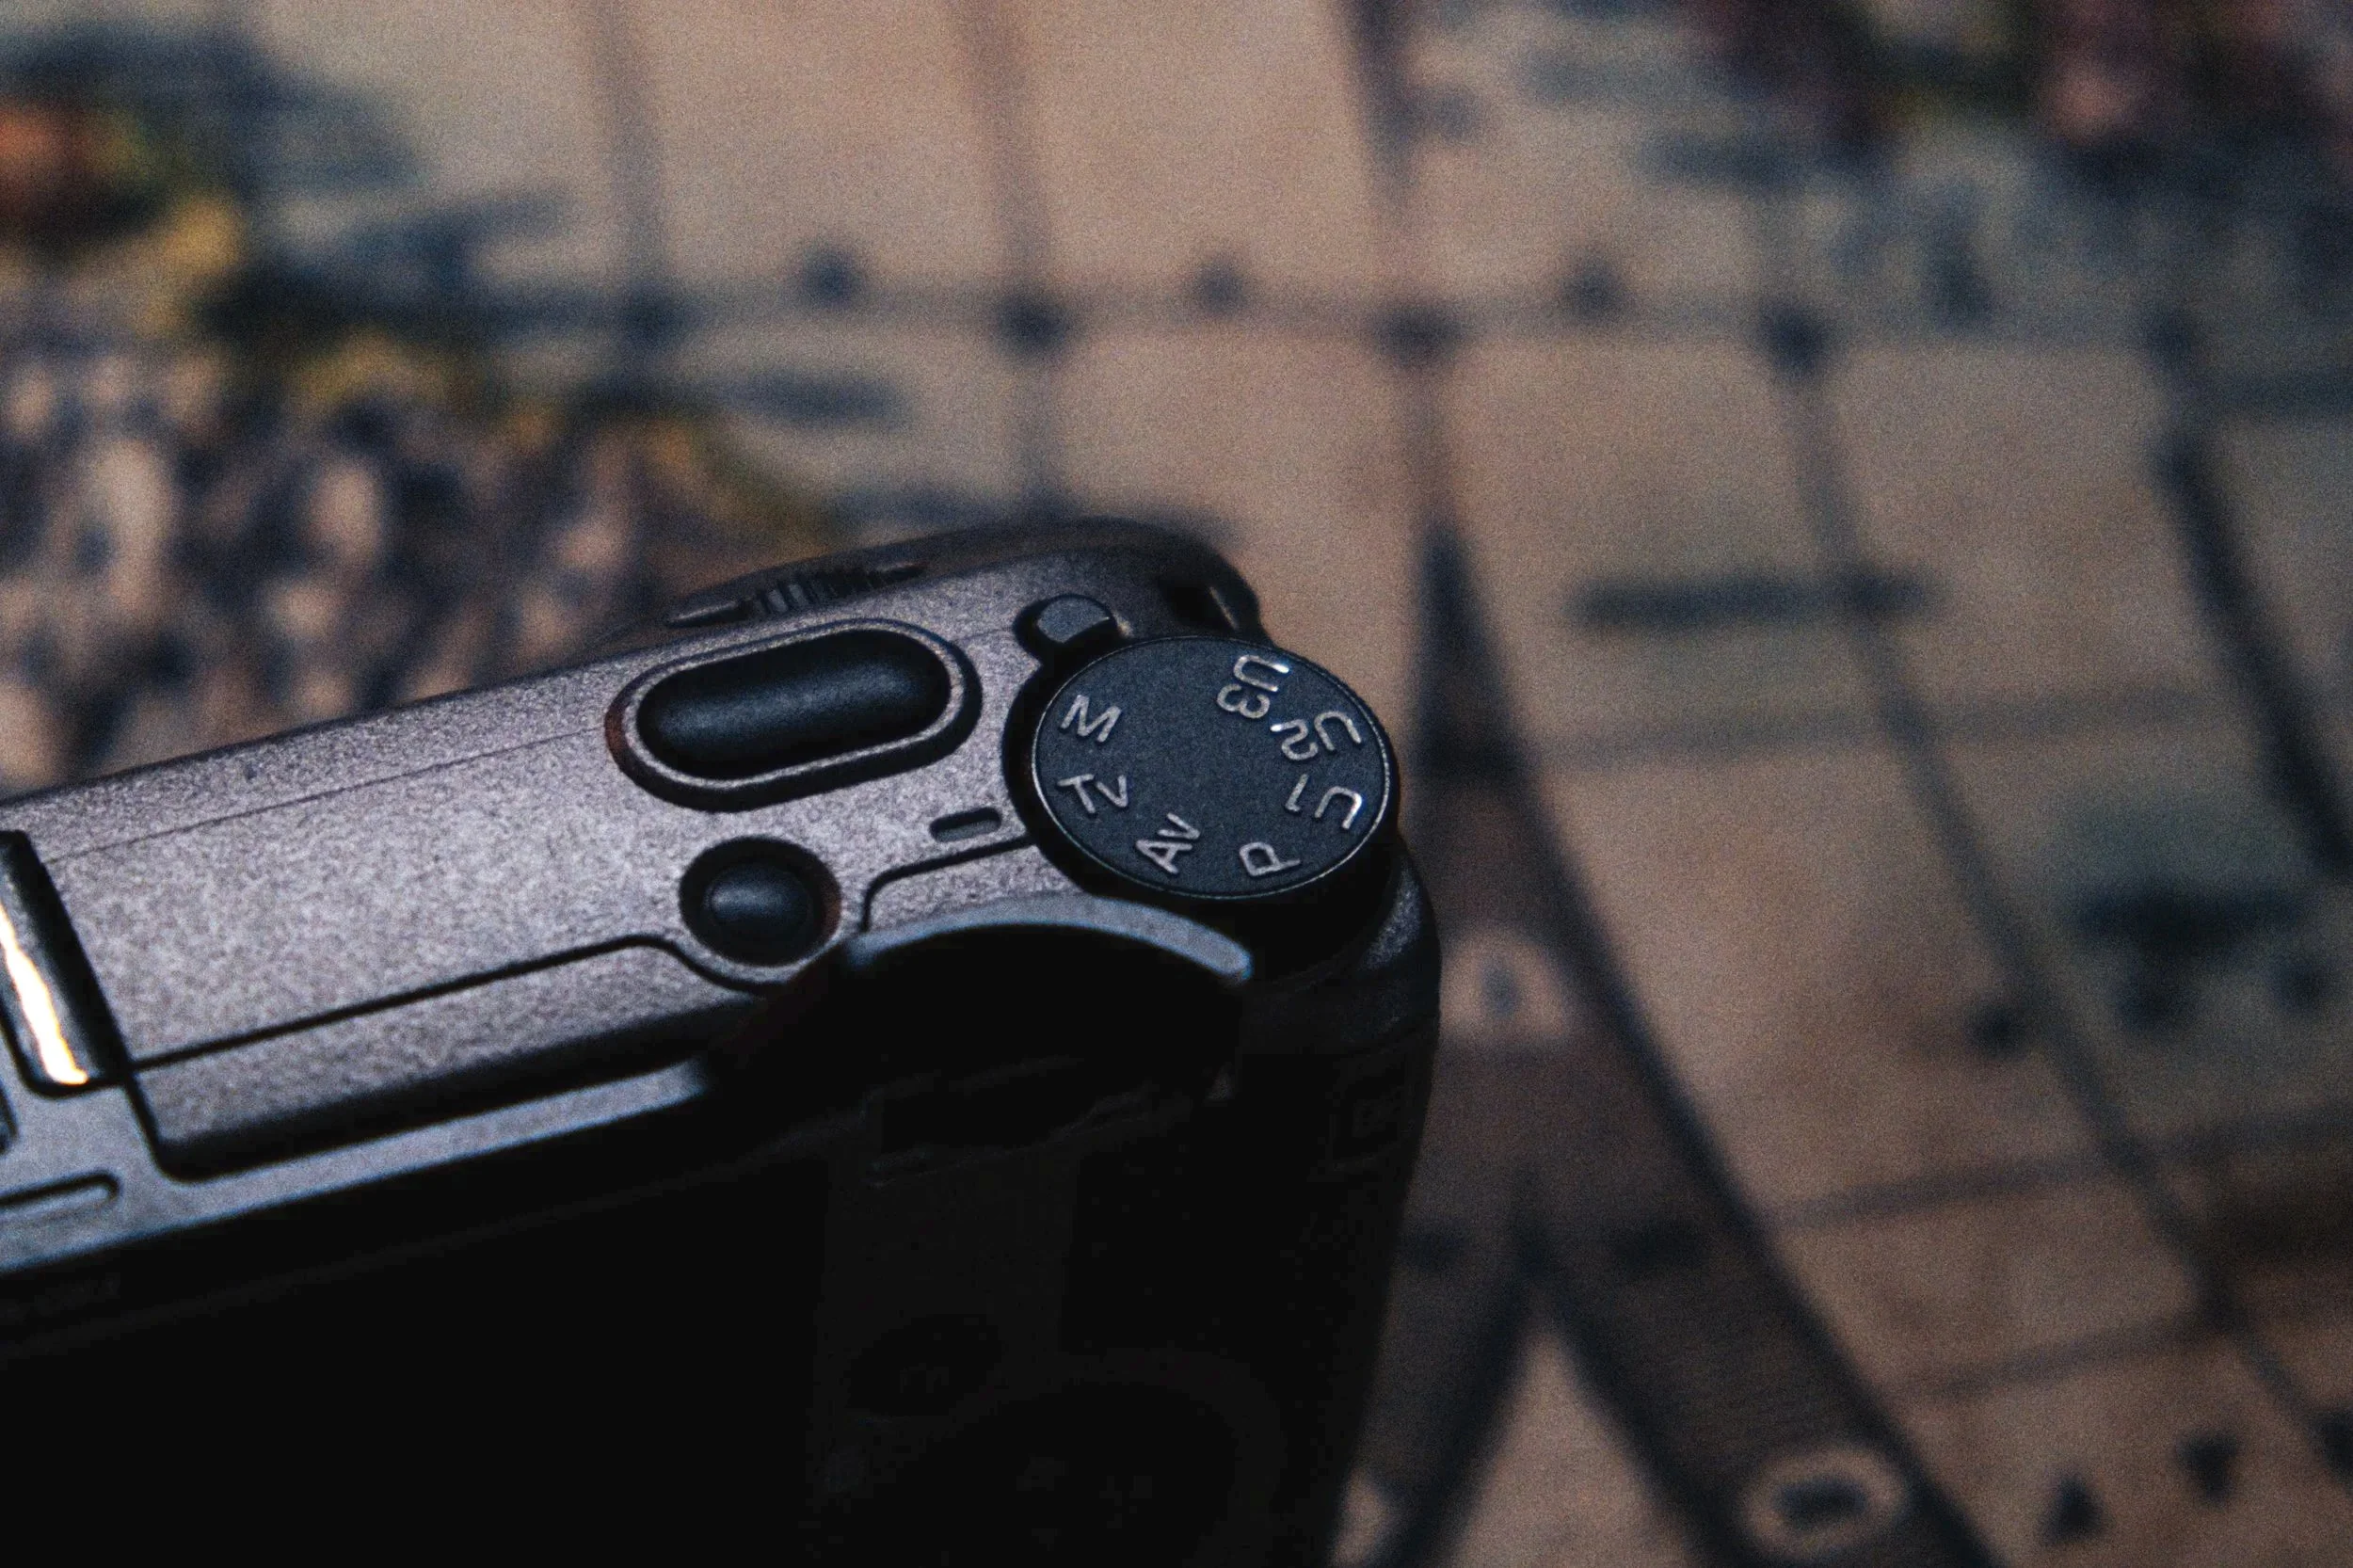
I use Shutter Priority less frequently, but there are certain situations where it becomes extremely useful.
The main example is when using flash.
Depending on the result I want to achieve, I may want direct control over shutter speed rather than aperture or ISO.
This can be especially useful in darker environments such as markets, narrow streets, or indoor locations, where slowing down the shutter speed can help capture more ambient light.
Program Mode (P)
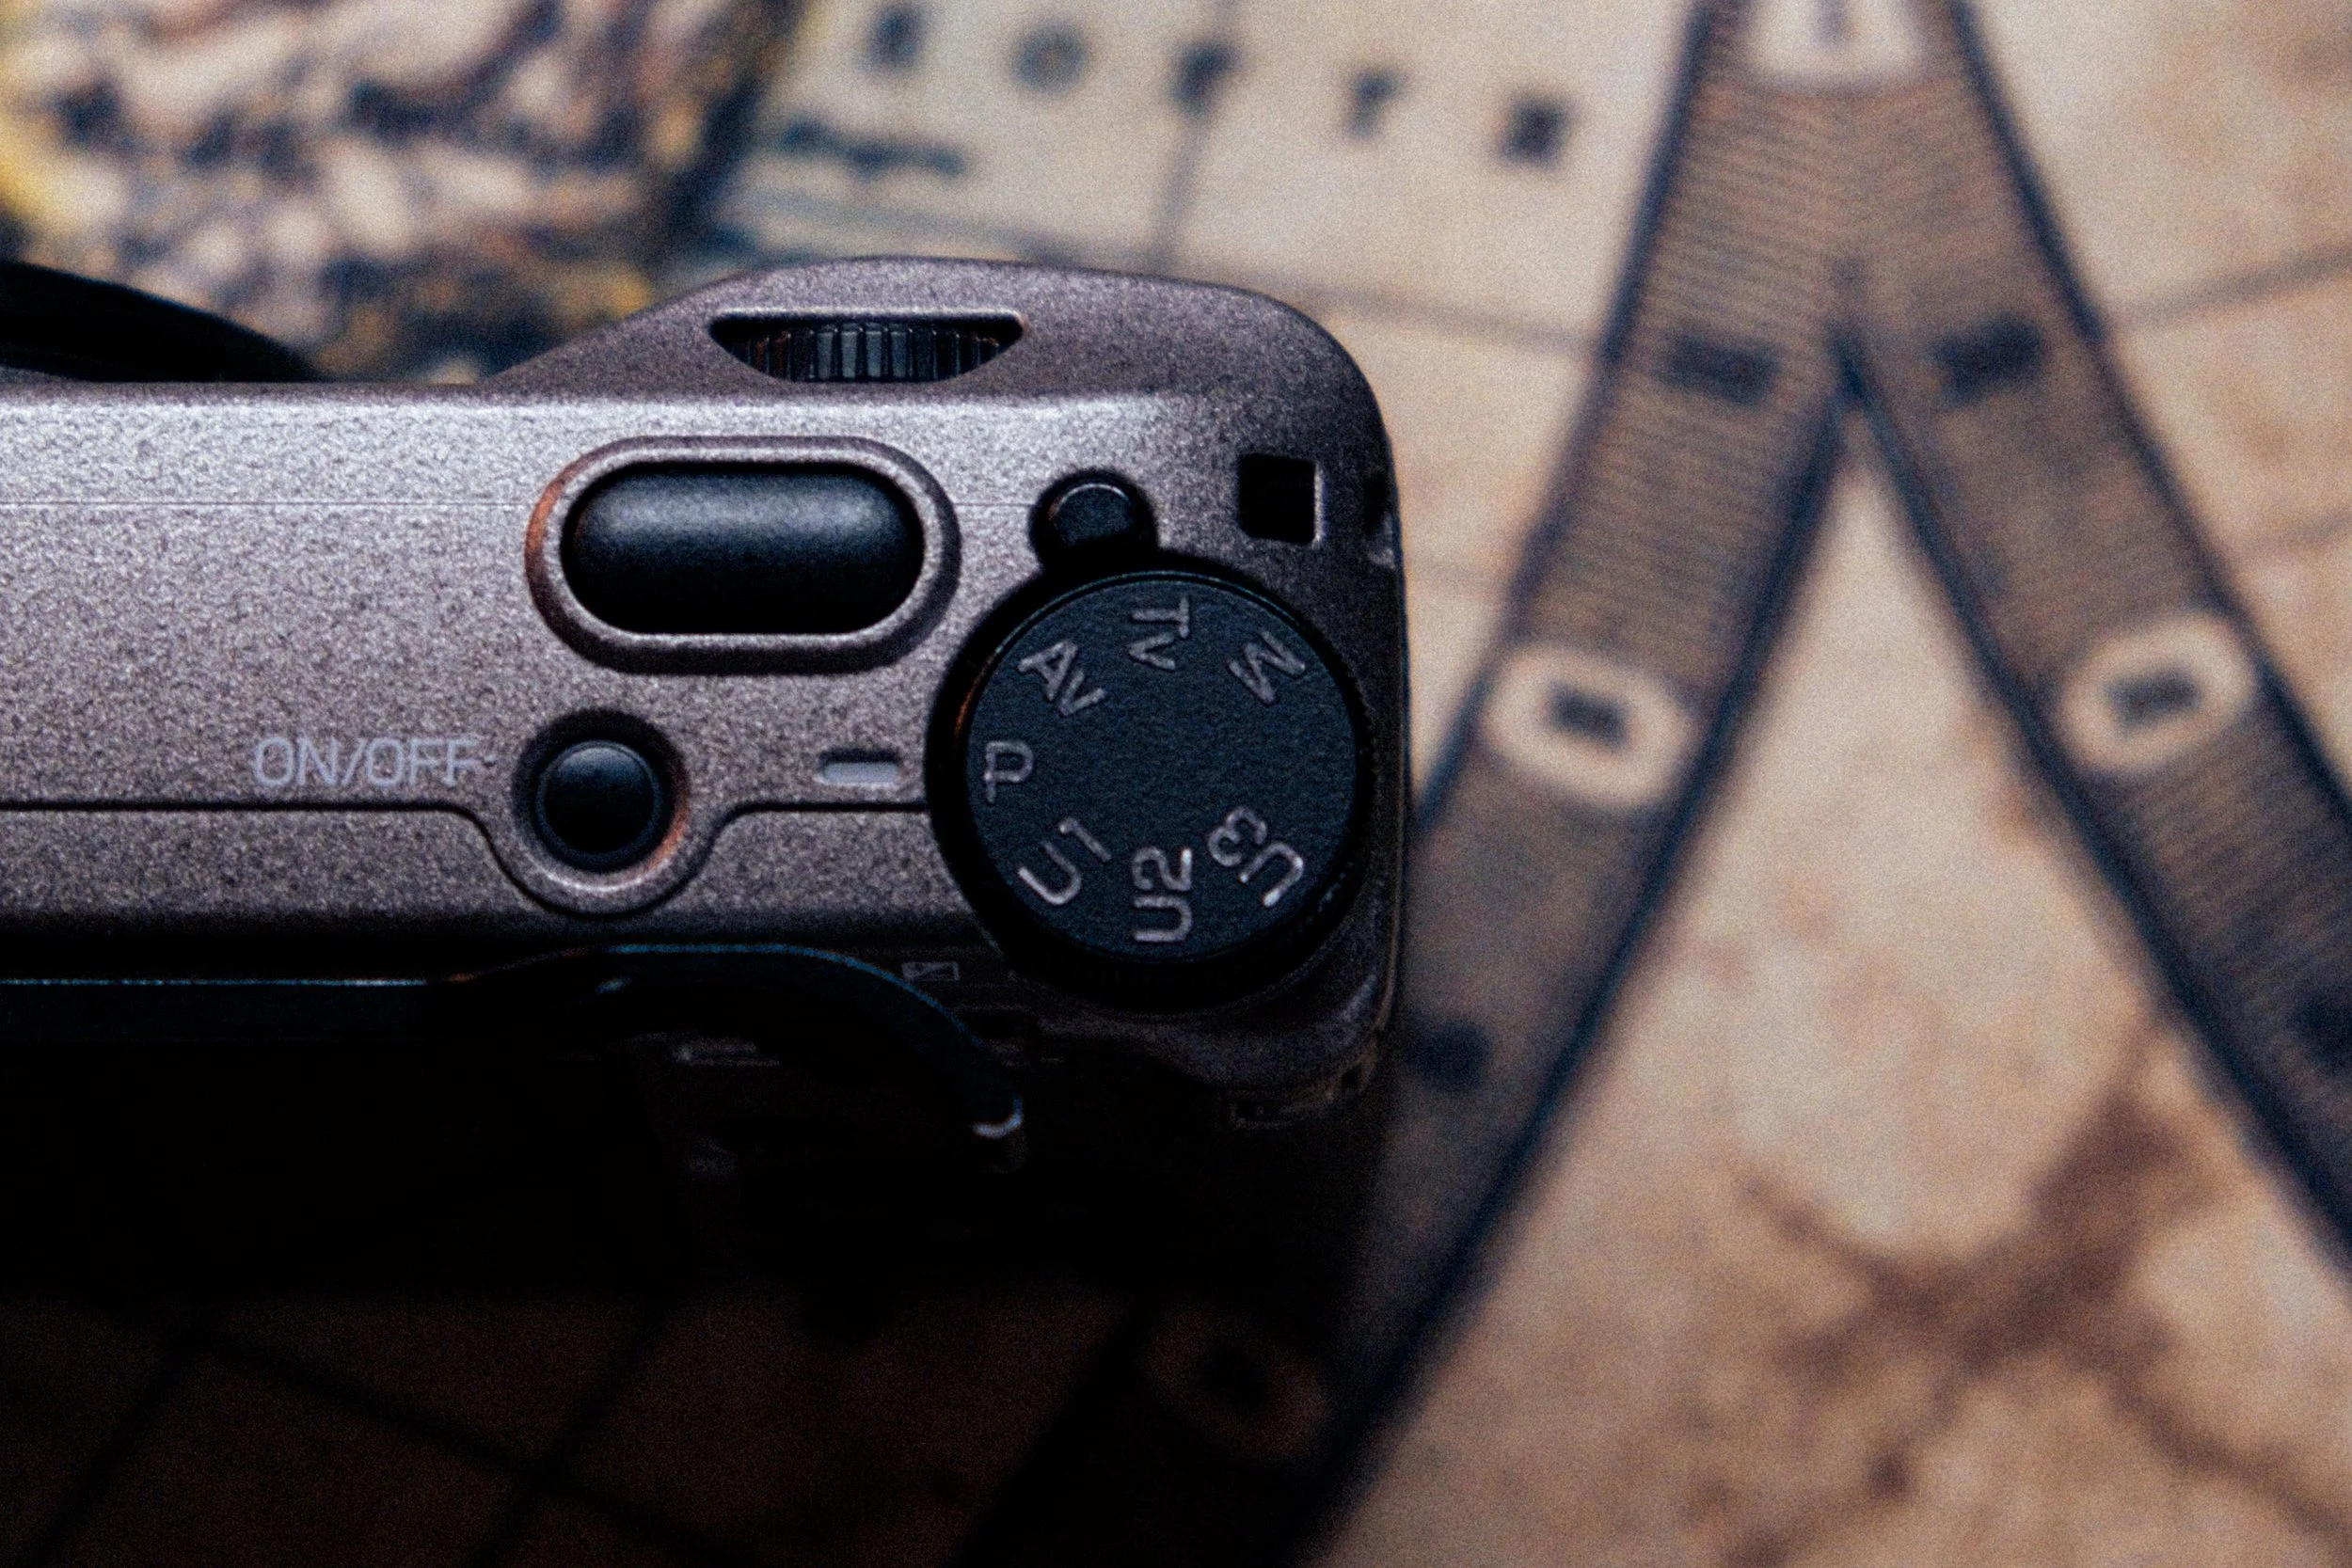
I have no problem admitting that there have been many occasions where I photographed exclusively in Program Mode.
And honestly, there is nothing wrong with that.
Sometimes we simply do not have the mental energy to constantly analyze every scene and decide which combination of settings will work best.
Sometimes we want a more relaxed photographic experience.
Other times, we simply need to get the shot.
There have been days when I missed important shots, became frustrated, and eventually switched completely to P Mode for the rest of the day.
The result? Surprisingly good.
Photography is not a competition of who uses the most manual settings.
PT.II
SETTINGS
With the shooting modes covered, we can finally move into the actual configuration.
The first section we encounter inside the menu is:
Focus Settings
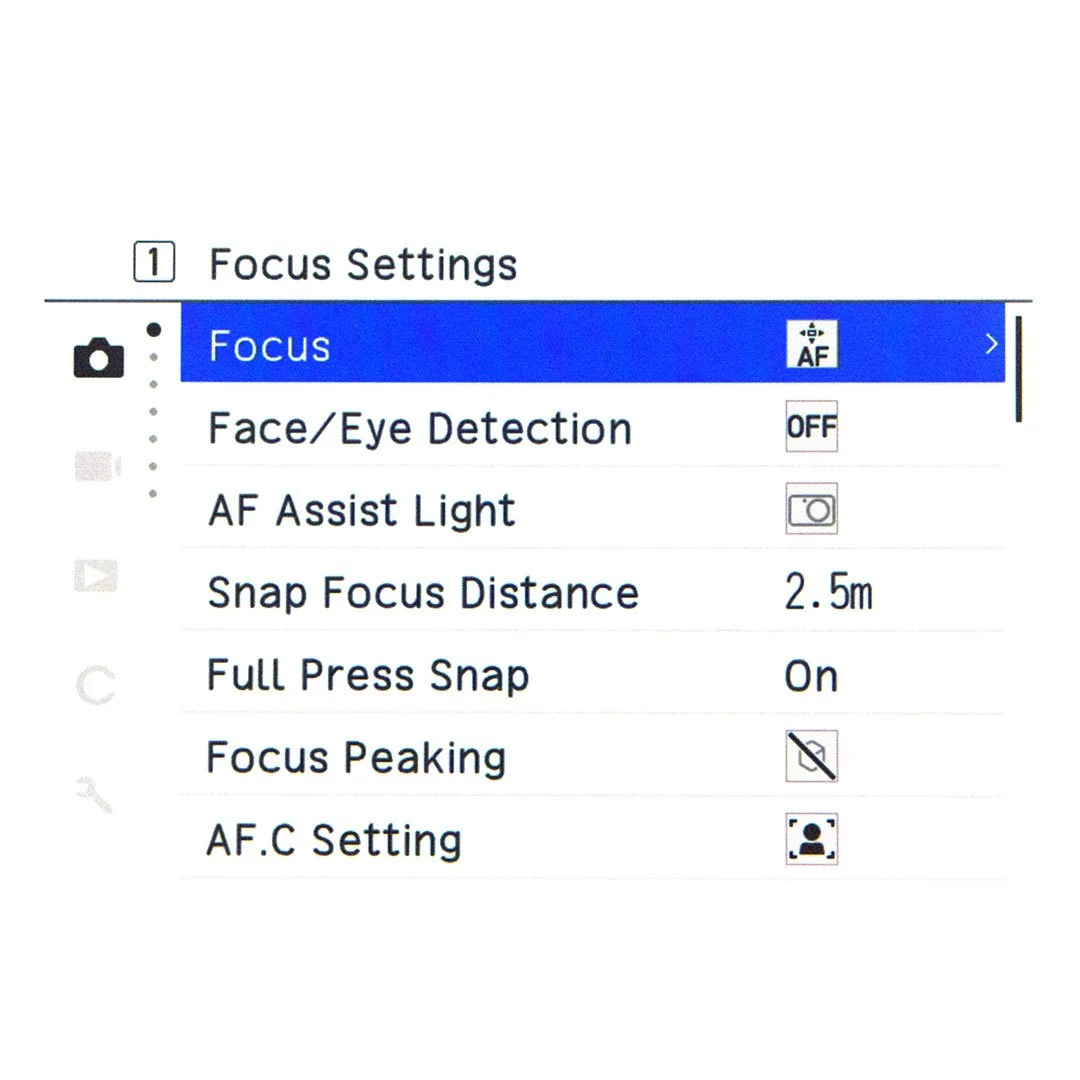
When it comes to focusing, I mainly use three different modes:
Select AF
Pinpoint AF
Snap Focus
I never use automatic autofocus modes.
I prefer pressing the shutter halfway, locking focus, and either recomposing the image or immediately taking the photograph.
This approach gives me much more control and keeps the process deliberate.
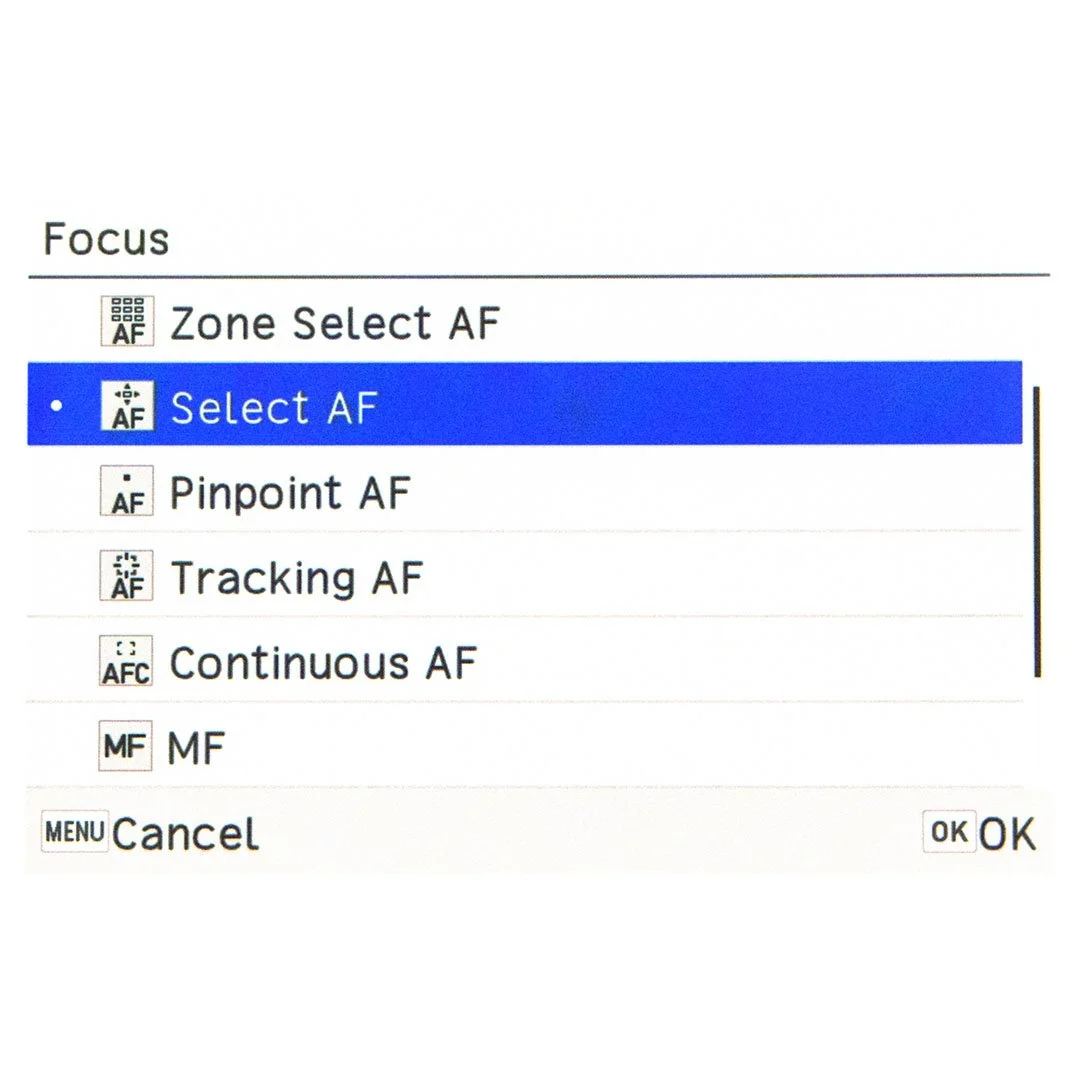
Select AF
Select AF is the focusing mode I use most of the time.
It provides a wider focusing area and, for my workflow, it works around 95% of the time. It is quick, reliable, and still gives me enough control without slowing down the shooting process.
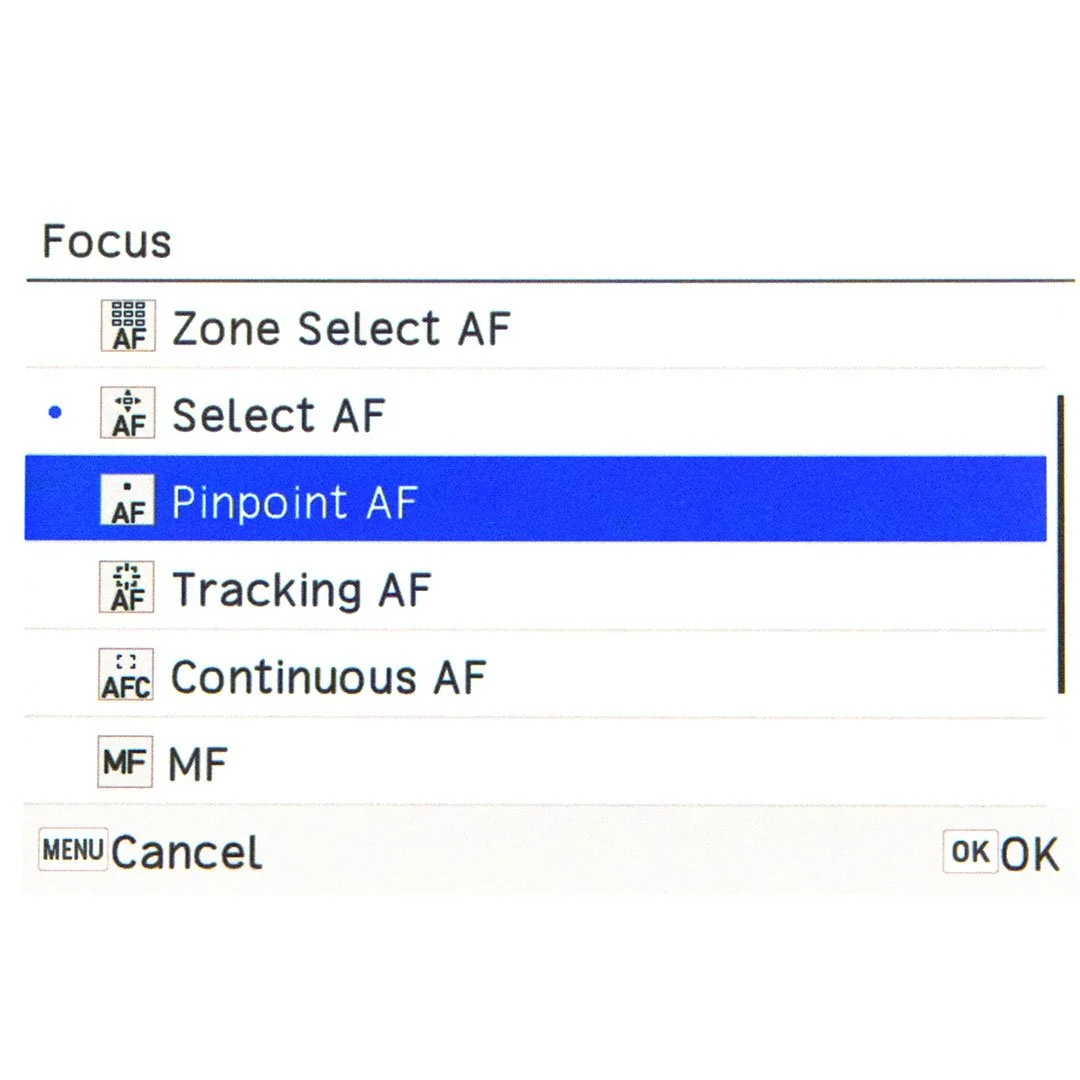
Pinpoint AF
As the name suggests, Pinpoint AF gives you a much smaller focusing area.
I mainly use it when I am dealing with reflections, mirrors, or situations where I already have a specific composition in mind and I need to focus on a very precise element within the frame.
It is not a mode I use constantly, but when the situation requires absolute precision, it becomes extremely useful.
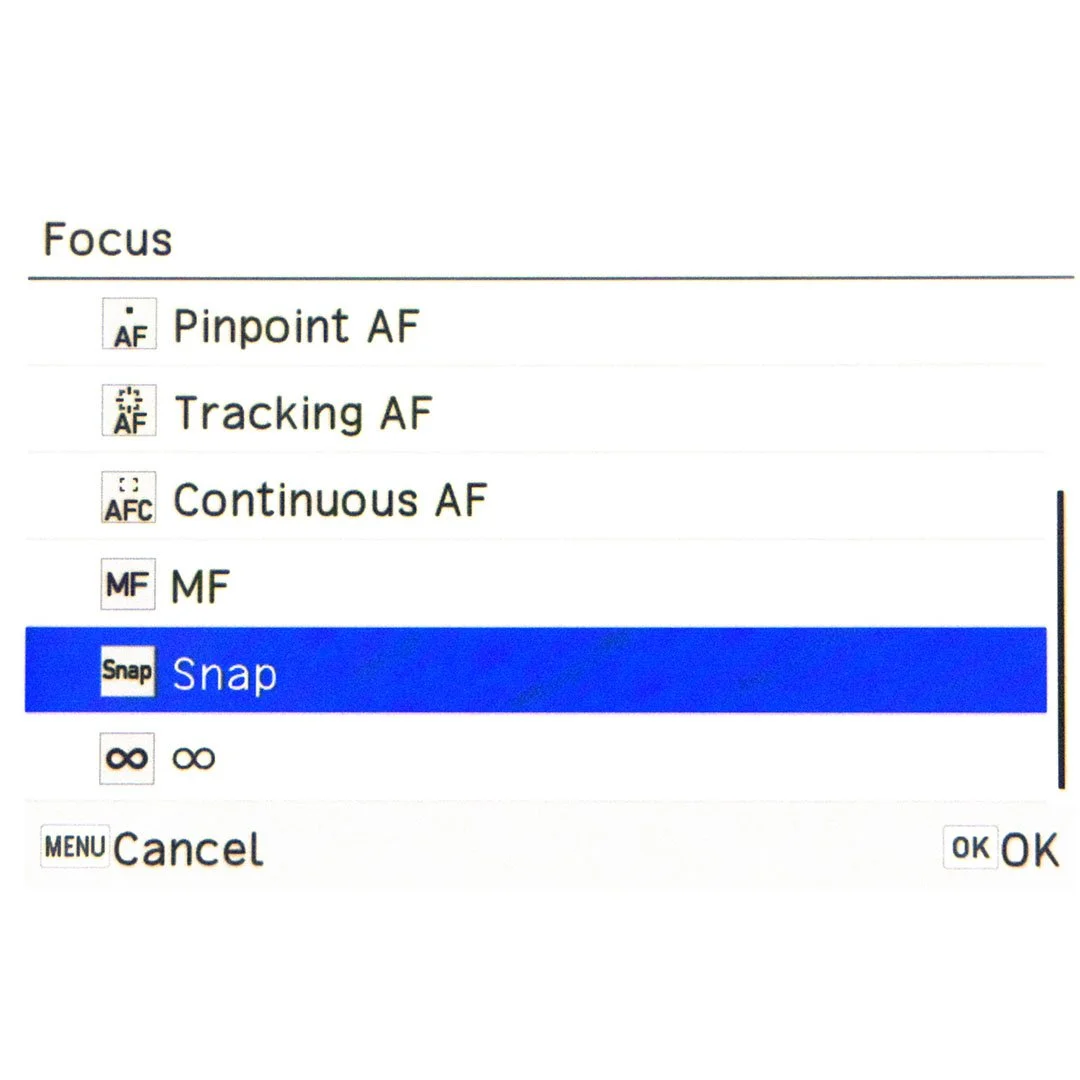
Snap Focus
I briefly introduced Snap Focus before, but this is probably the most important feature of the Ricoh GR III for my style of photography.
I will dedicate a larger section to it later.
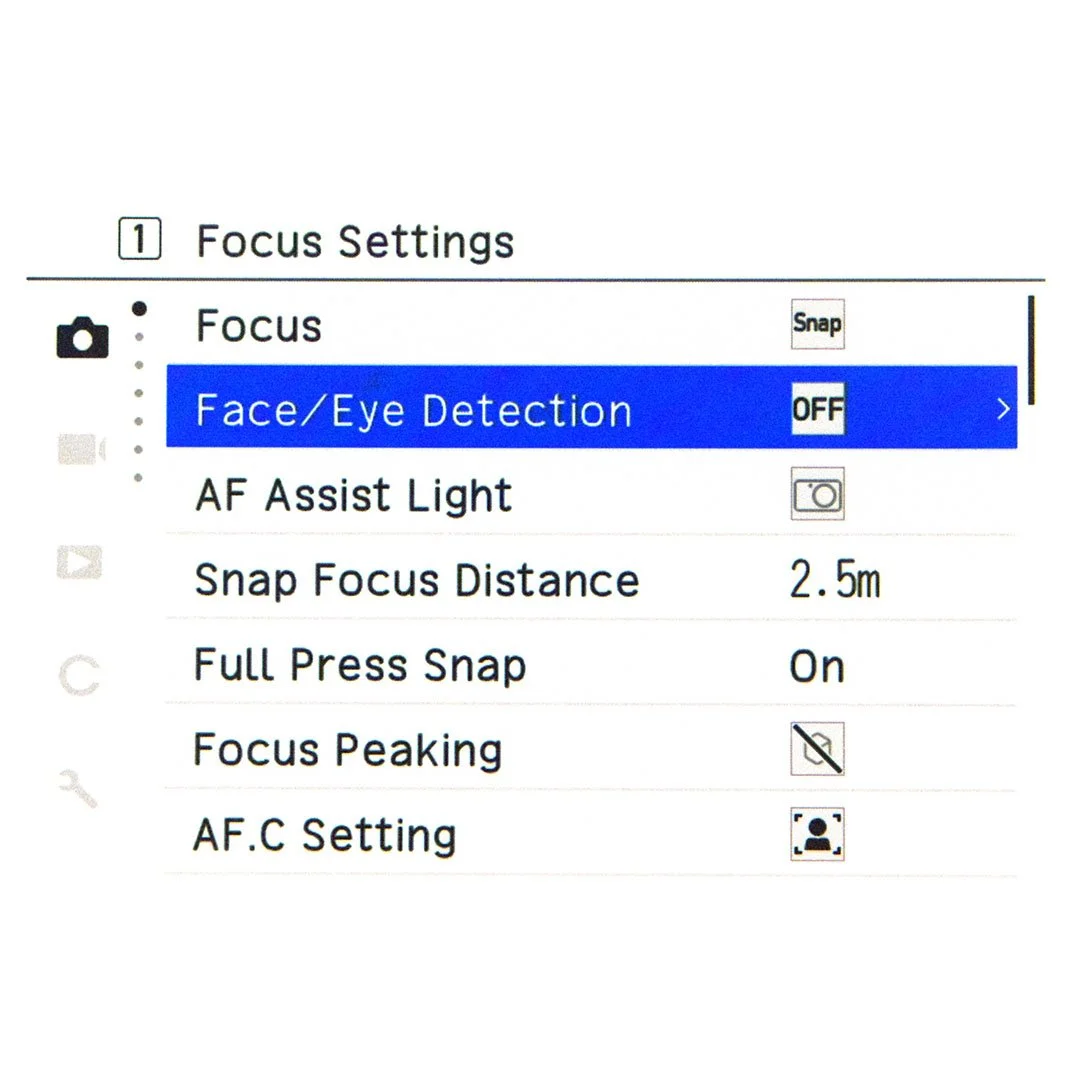
Face/Eye Detection
Face and Eye Detection is a feature that I keep turned OFF on every camera I own.
Even though most cameras come with this option enabled by default, I personally find it unnecessary for the way I photograph.
The reason is simple: not every image is about a face.
Sometimes the subject you want to emphasize is a hand, a gesture, a shadow, a reflection, or simply a specific element inside the frame. Allowing the camera to automatically prioritize faces can completely change the intention behind an image.
For street photography, I prefer deciding what matters inside the frame myself.
Keep it OFF. You’ll not miss it.
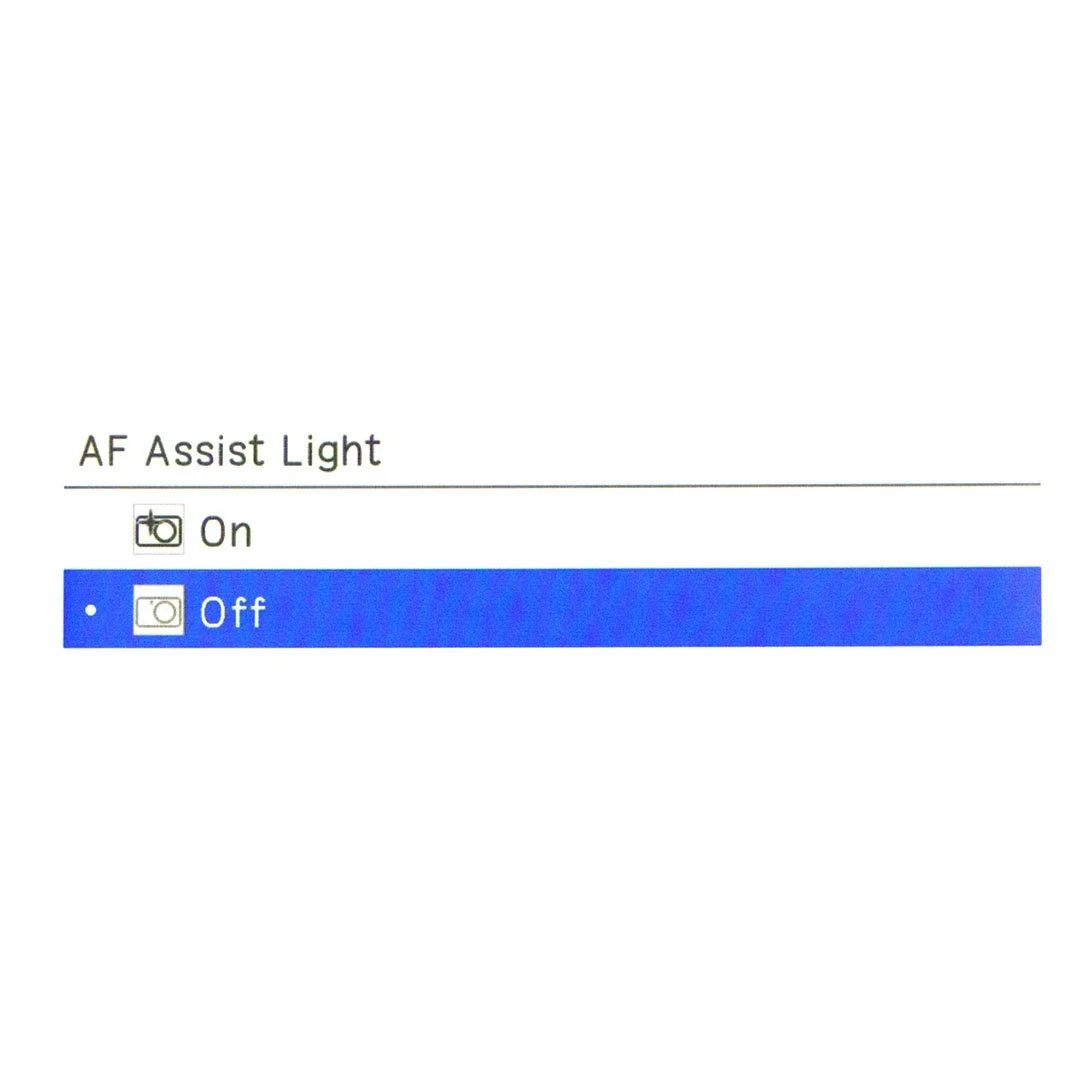
AF Assist Light
The function is pretty self-explanatory: turn it OFF.
Especially when shooting street photography, discretion is everything.
You do not want anything on the camera announcing your presence.
OFF. Absolutely.
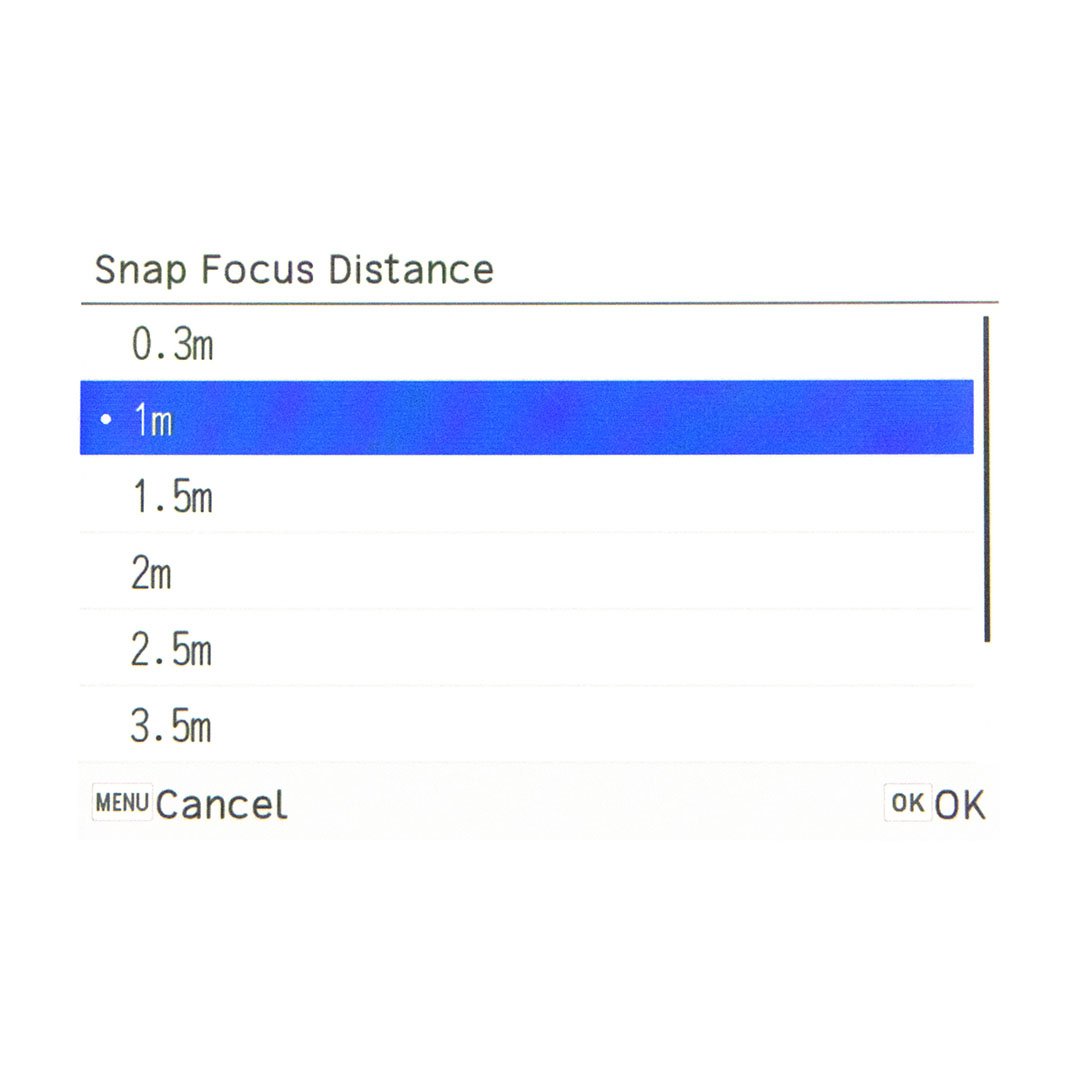
Snap Focus Distance
There is no universal rule here.
Depending on your style, you might want to set your focus distance from one meter to infinity for a more reactive and spontaneous approach, or start from two meters onwards to create more separation between subjects and achieve a stronger sense of layers within the image.
Personally, I usually set it to 1 meter and adjust my aperture depending on the lighting conditions.
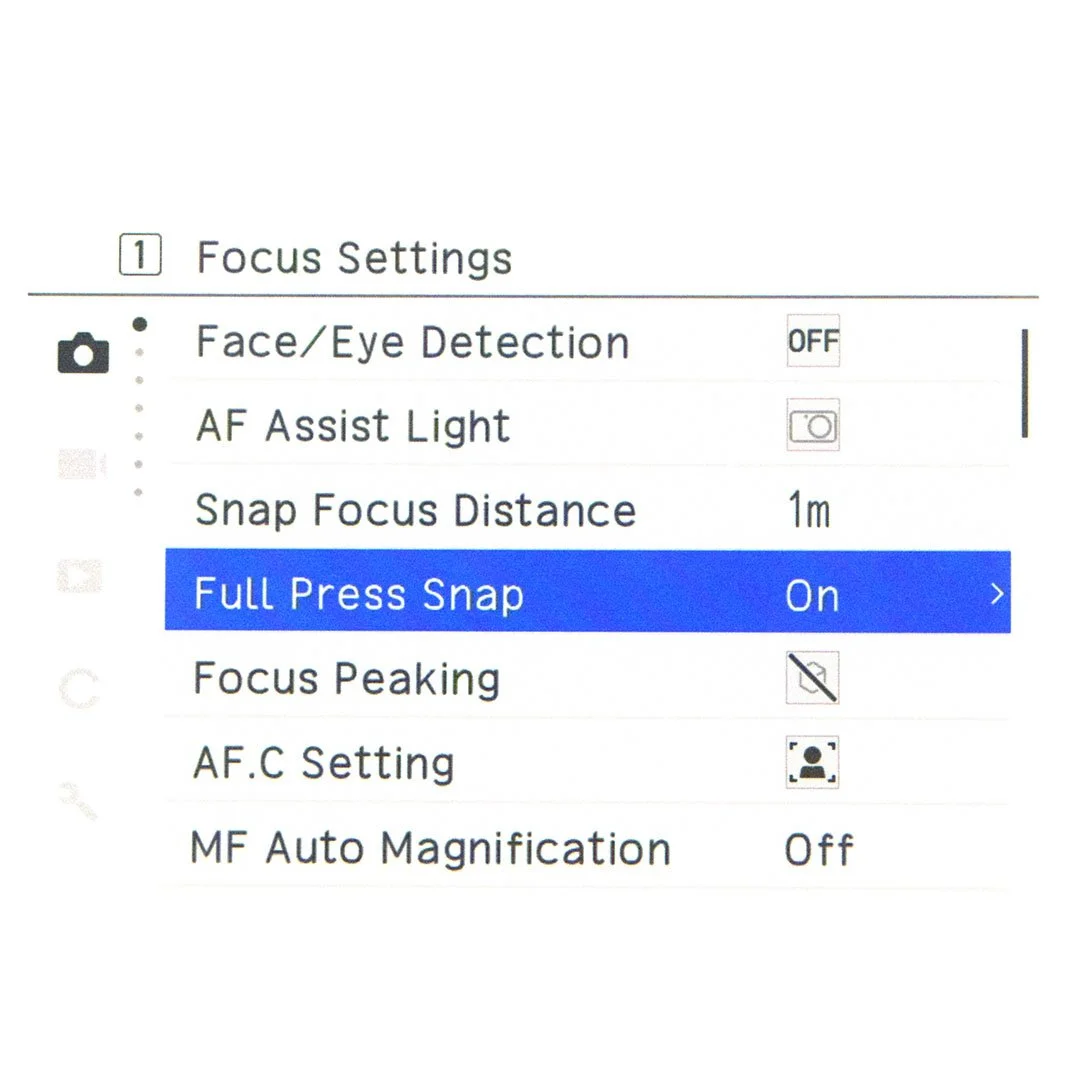
Full Press Snap
Again, the name explains the function quite clearly.
When enabled, the camera completely skips the autofocus process and immediately takes the picture at the selected Snap Focus distance.
If you are using Snap Focus, this feature is almost essential.
You already have:
your focusing distance set,
your aperture chosen,
your shutter speed ready.
At that point, the camera becomes almost an extension of your hand.
You simply frame and shoot.
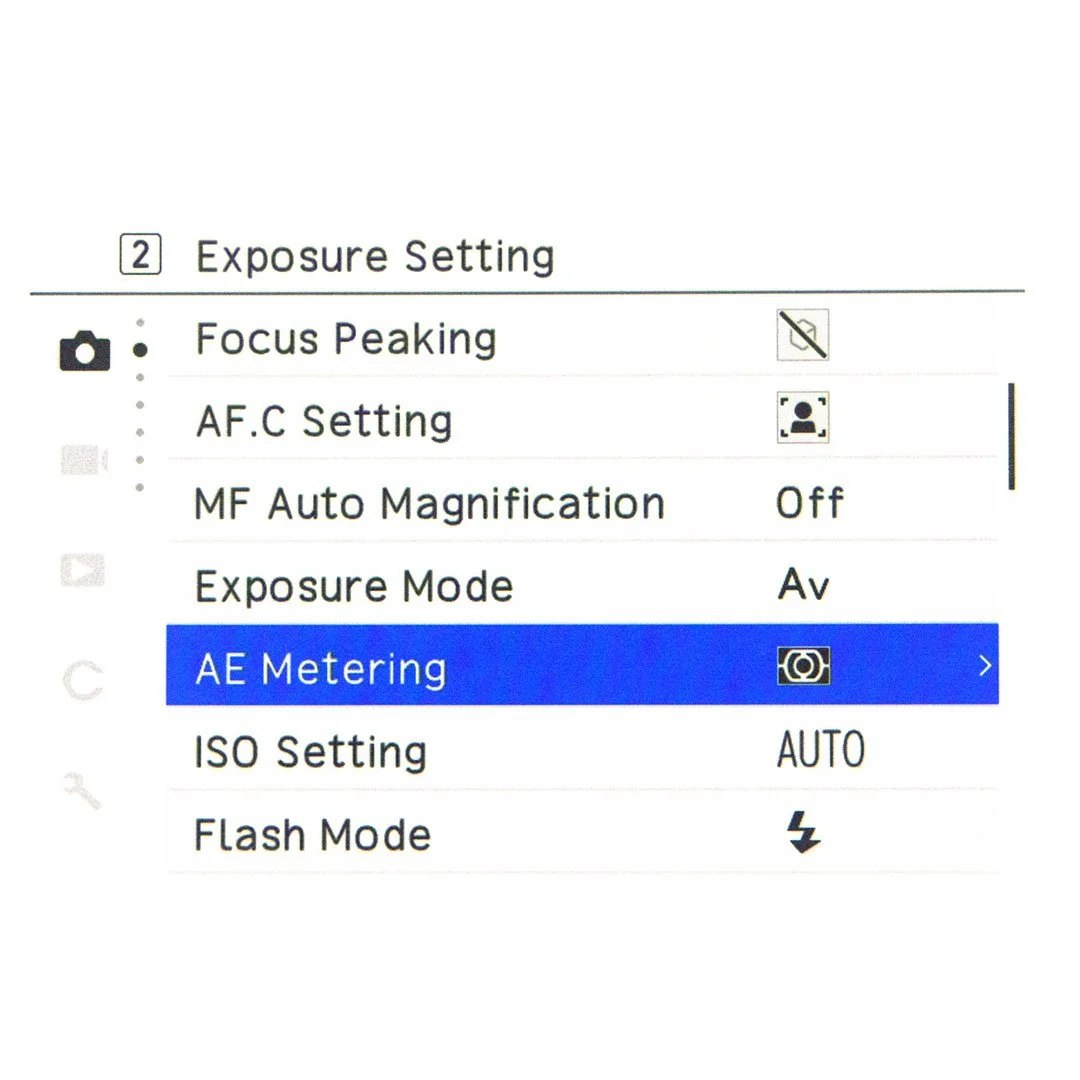
AE Metering
Among the available metering modes, I mainly use two:
Multi-Segment
Spot
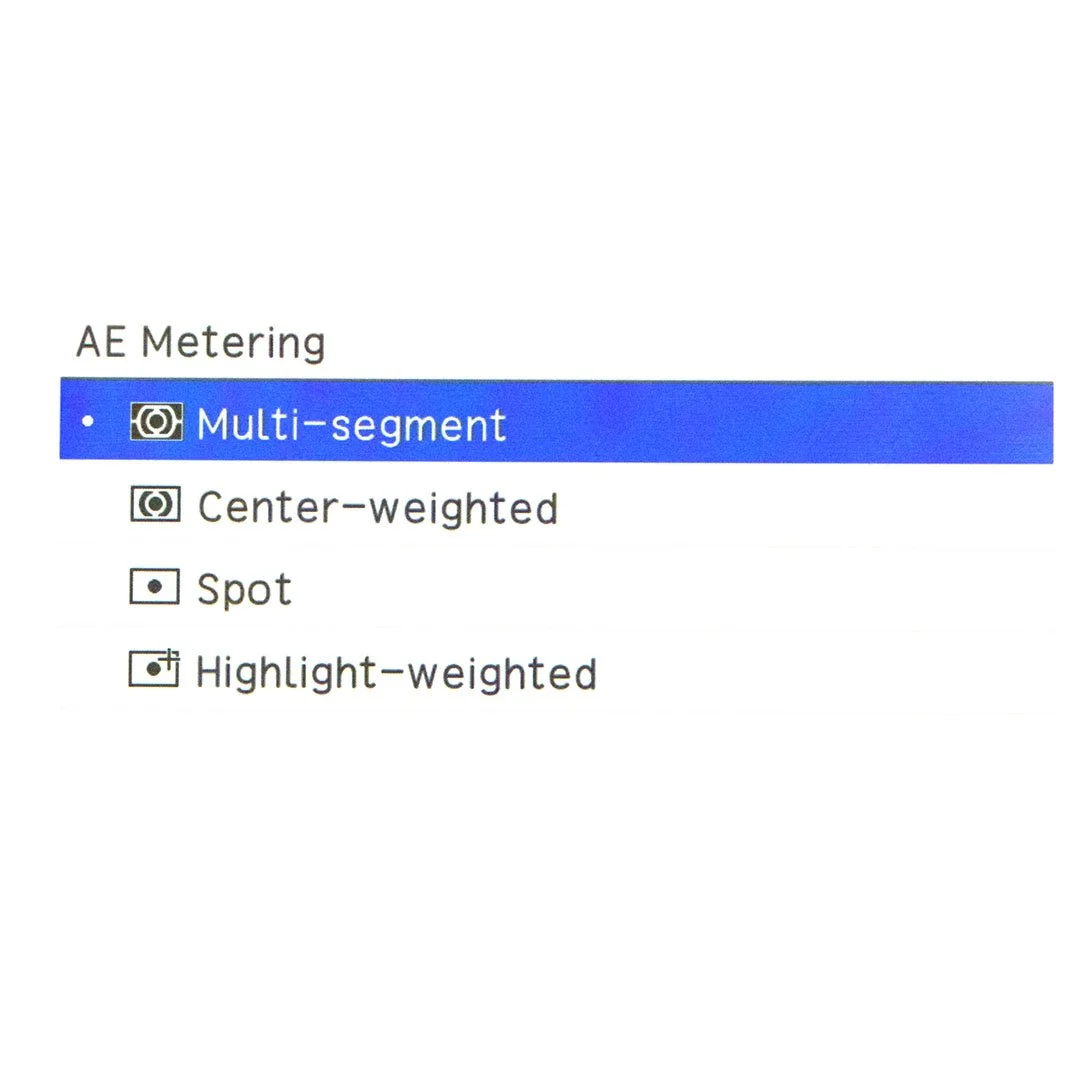
Multi-Segment
This is the mode I use around 95% of the time.
In my opinion, it is the least intrusive option and provides the most neutral files to work with during post-processing.
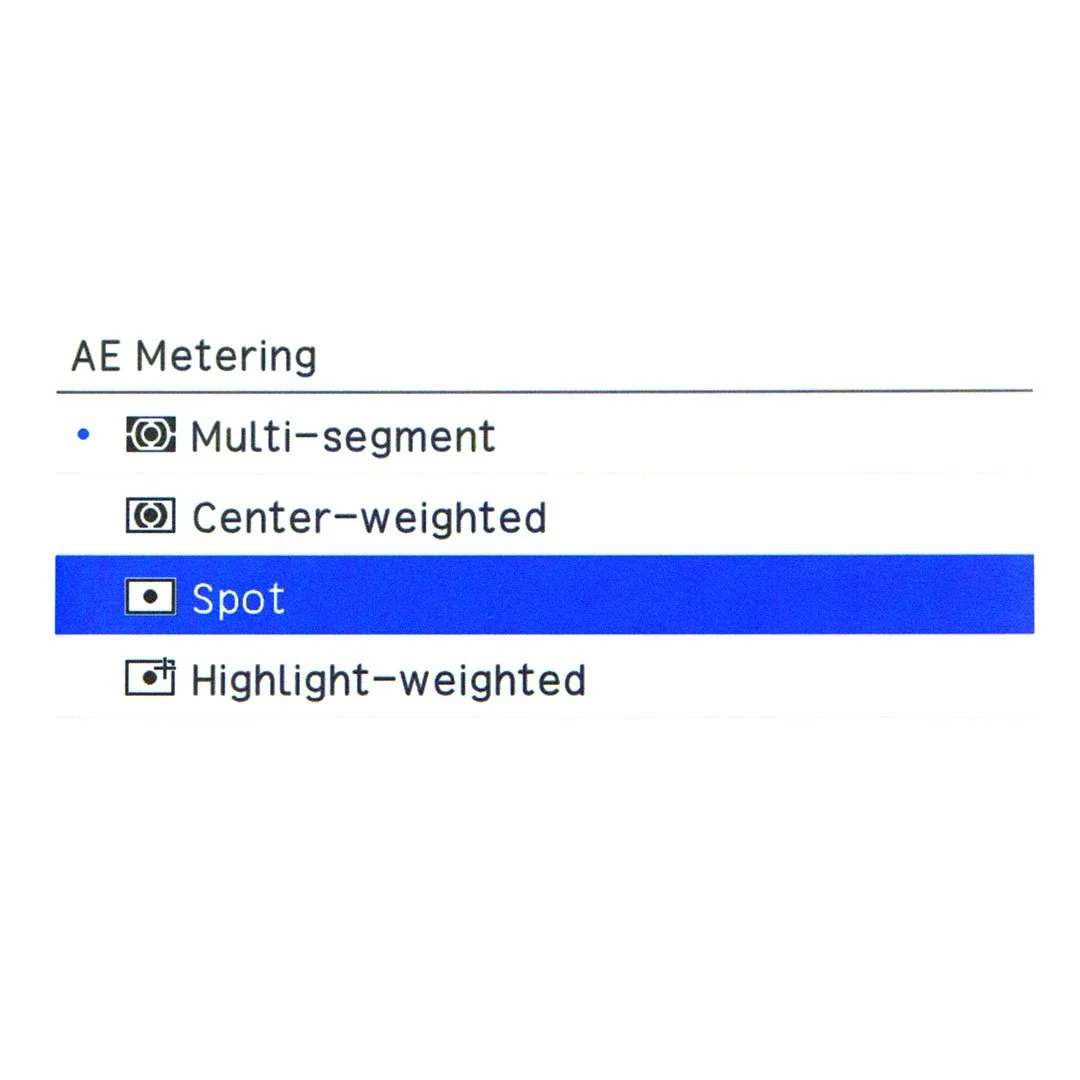
Spot
I use Spot Metering much less frequently.
Usually, I rely on it when dealing with extreme contrasts between light and shadow.
By measuring exposure on a bright area of the frame, everything else becomes darker, making it the perfect tool for creating silhouettes or more abstract images where contrast becomes part of the composition.
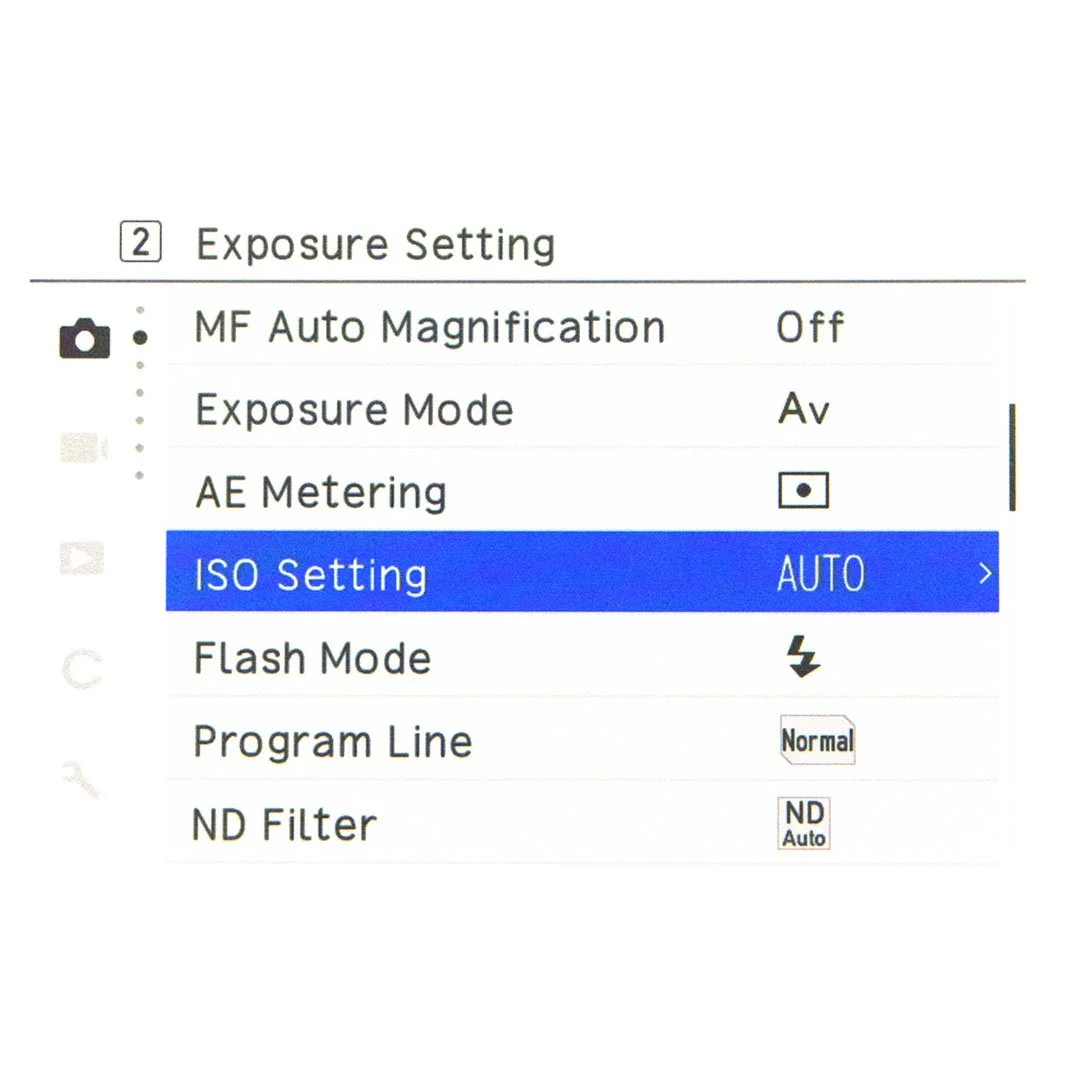
ISO Settings
Auto, auto, and auto.
Across all my cameras, ISO is one of the settings I rarely touch manually.
I do not have a problem with grain. In fact, I actually like the character that noise can add to an image.
However, after editing many Ricoh GR III RAW files, I noticed that image quality starts becoming noticeably limited once ISO gets too high.
For that reason, I prefer keeping things controlled.
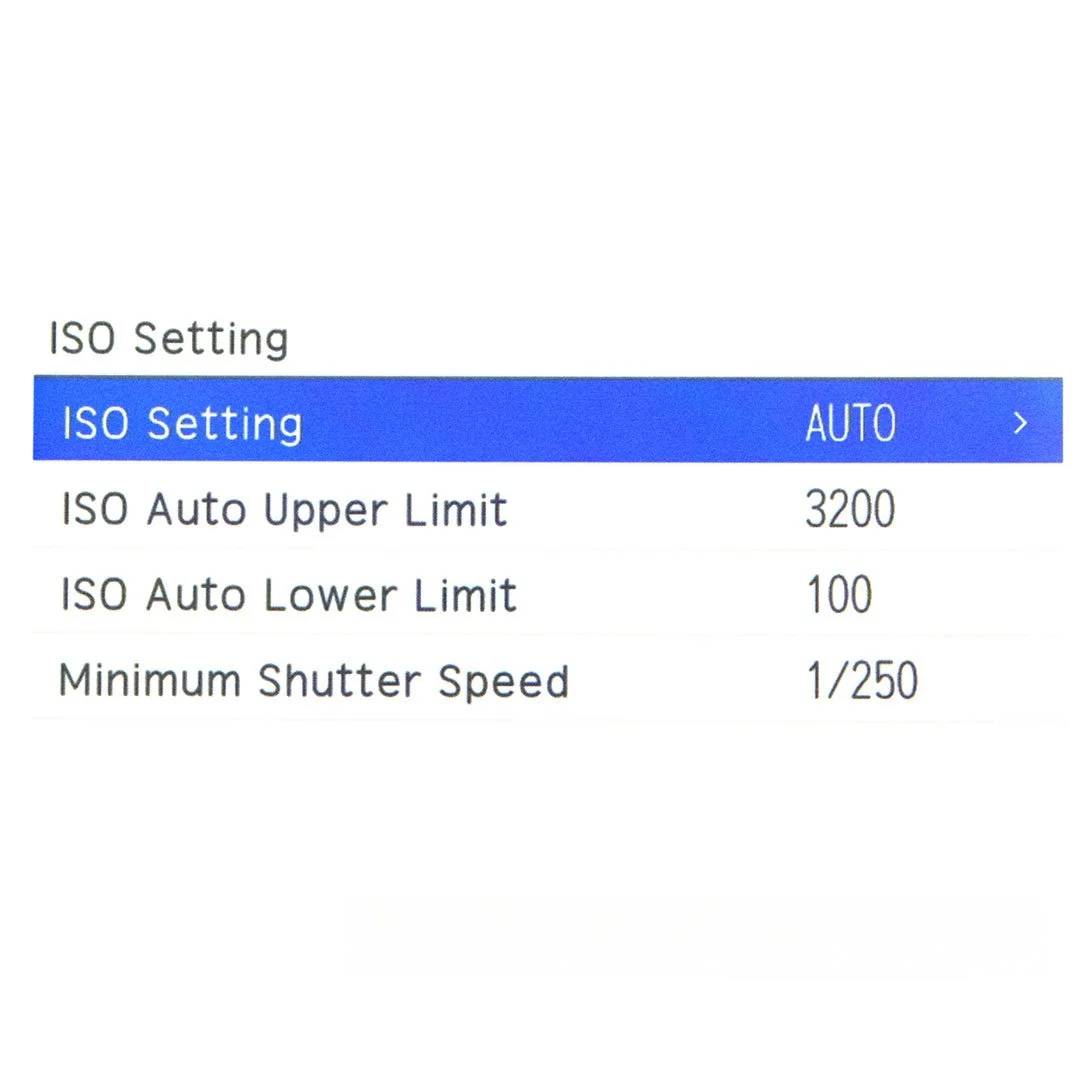
My settings:
ISO Auto Upper Limit: 3200
At ISO 3200, Ricoh GR III RAW files are still perfectly usable and maintain enough flexibility for editing.
ISO Auto Lower Limit: 100
Minimum Shutter Speed: 1/250
For me, 1/250 is the sweet spot between sharpness and natural movement.
A question you might have:
What happens if ISO goes above 3200 in low-light situations?
The camera will automatically lower the shutter speed to keep the ISO within your chosen range.
If you want to strictly maintain your preferred shutter speed, then you will have to compensate by either:
lowering the shutter speed,
opening the aperture.
For example, moving from f/6 to f/4.
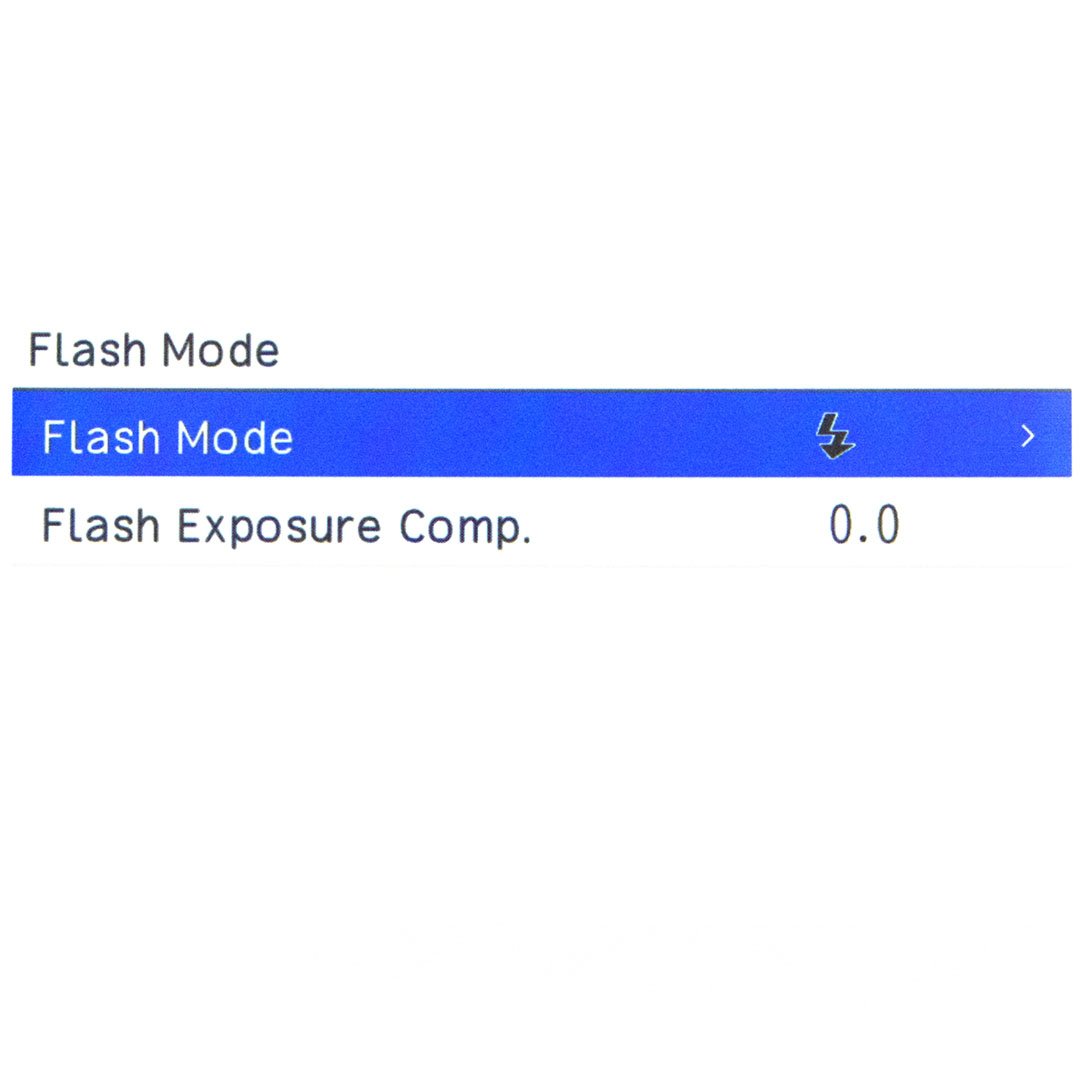
Flash Mode
The Ricoh GR III was actually the first camera where I started experimenting with flash.
I use a small Godox iM20 flash, but I do not consider myself experienced enough to recommend specific flash settings.
On the Ricoh, I usually keep things simple and mainly adjust the shutter speed depending on the effect I want to achieve.
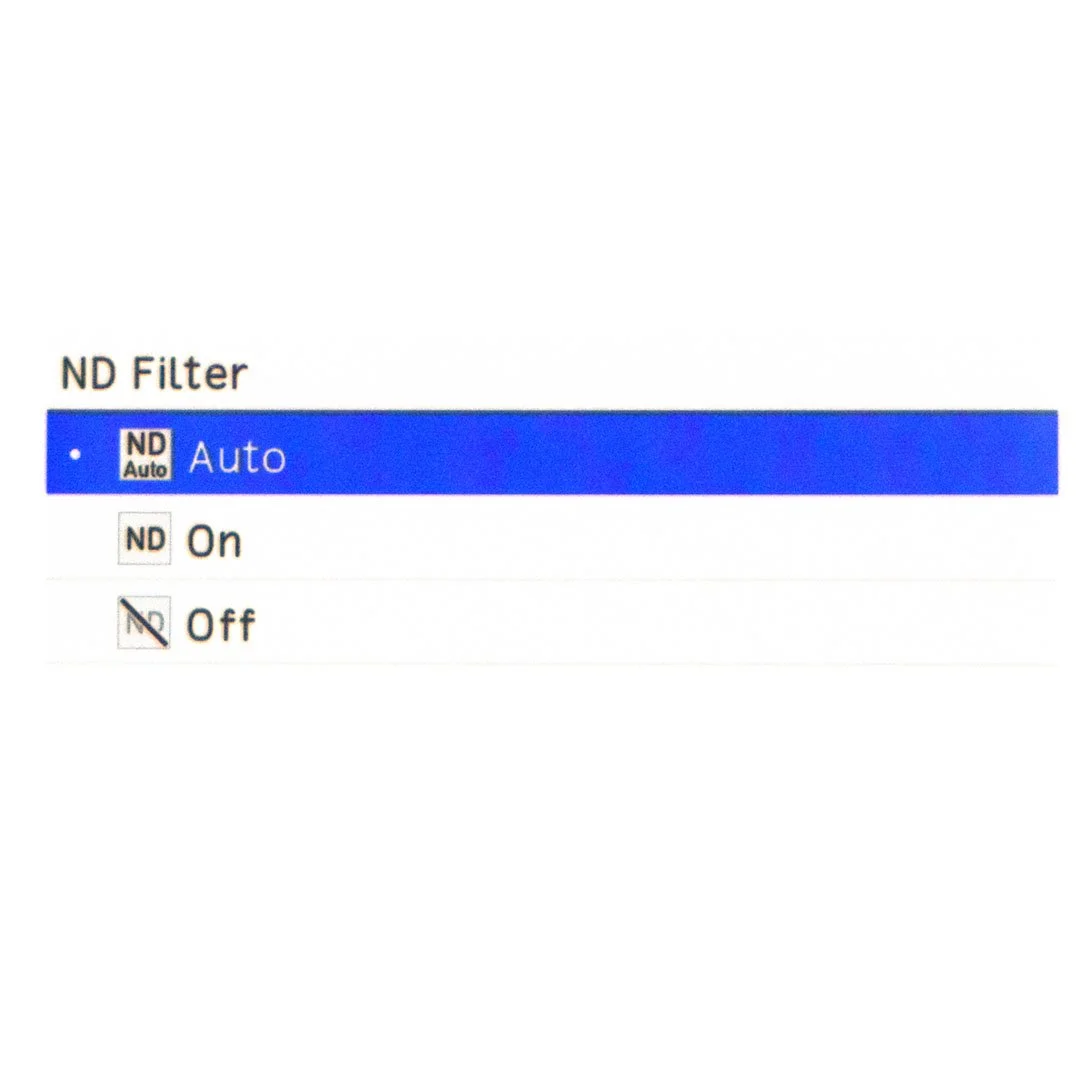
ND Filter
The built-in ND filter is one of the most underrated features of the Ricoh GR III.
Many times I have photographed using very slow shutter speeds, situations where without an ND filter the amount of light entering the sensor would have completely overexposed the image.
Keeping it on AUTO saves you from constantly thinking about it and allows the camera to handle those situations automatically.
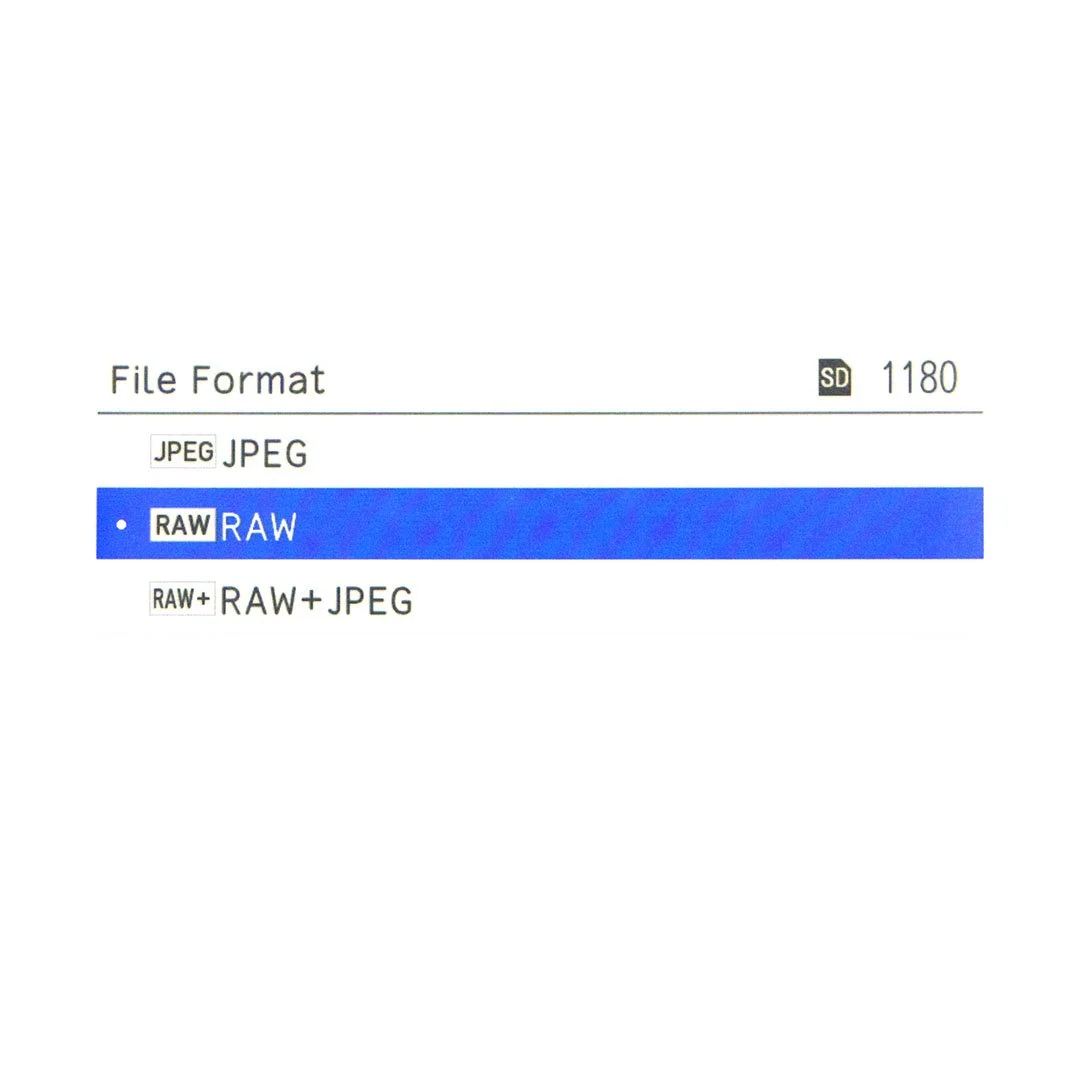
File Format
This comes down entirely to personal preference.
I shoot RAW only.
Never JPEG, and never RAW + JPEG.
While there are certainly situations where a client or a specific workflow might require JPEG files, for my personal photography I simply do not see the need.
My process is straightforward:
Shoot in RAW.
Import everything into Lightroom.
Edit.
Export.
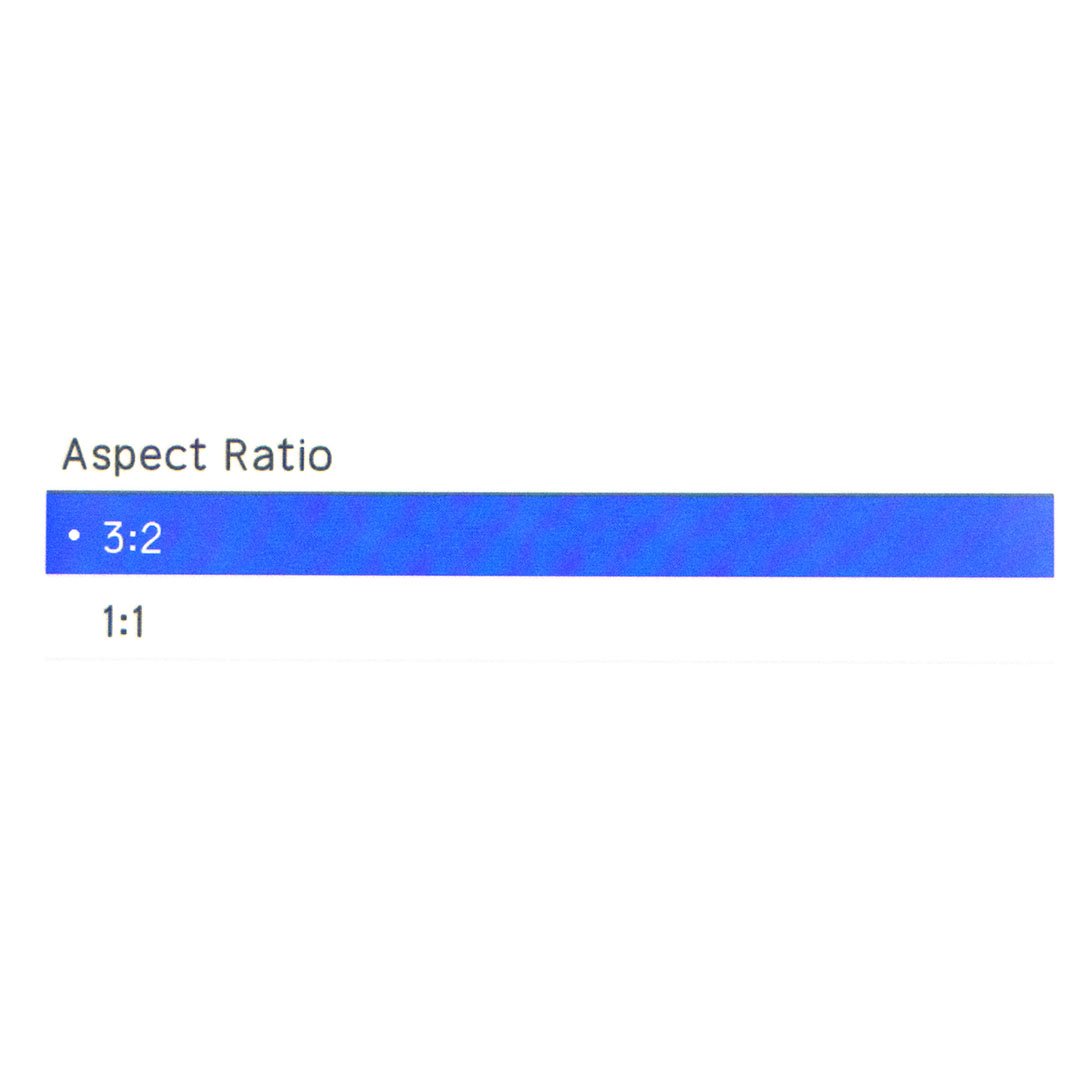
Aspect Ratio
3:2.
That's it.
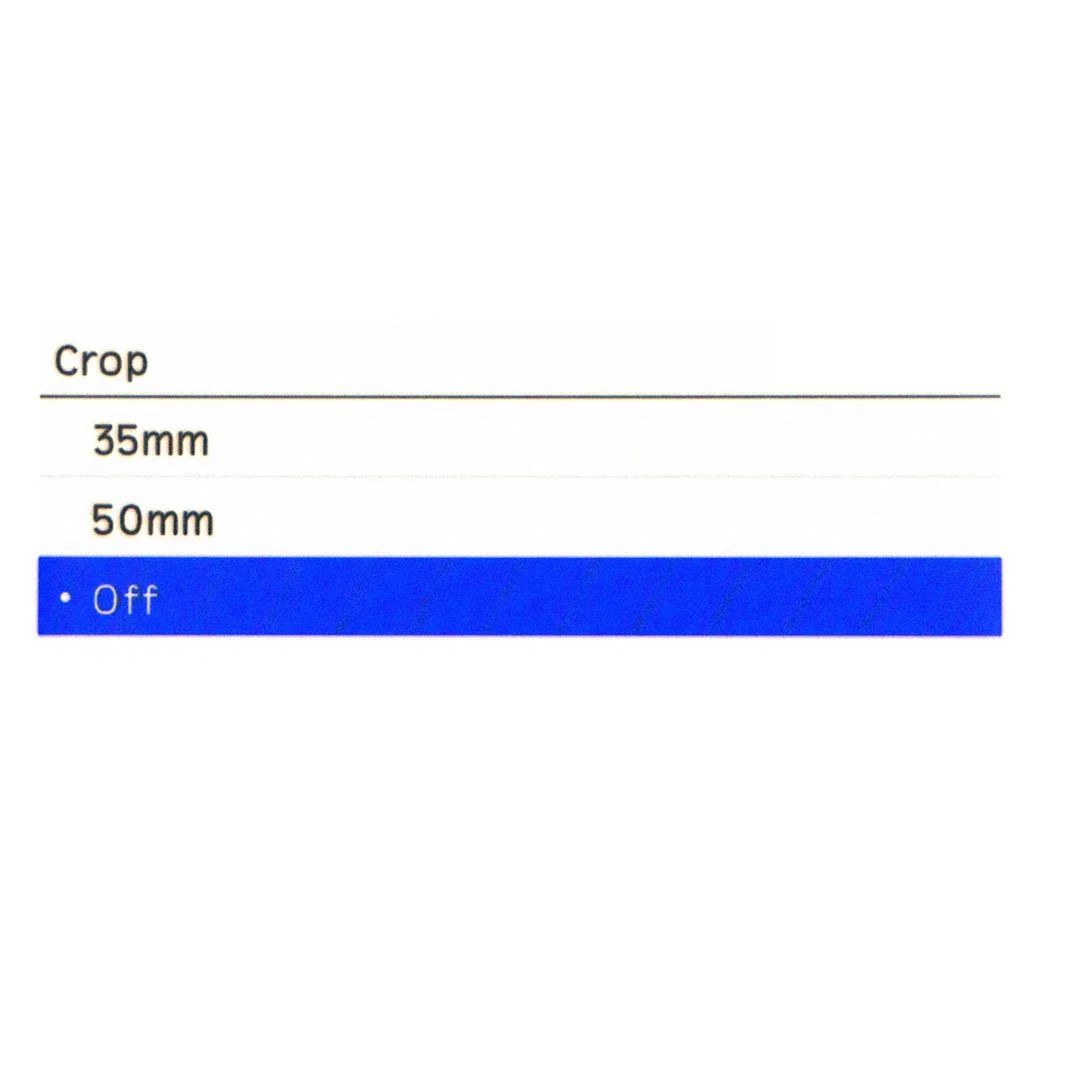
Crop
This is a surprisingly interesting feature.
Before talking about the setting itself, I think a little context is necessary.
A 28mm lens isn't for everyone.
Truth be told, it isn't even my favorite focal length. If you've followed my work for a while, you'll know that I naturally gravitate toward much tighter lenses.
However, photography often asks for compromises.
Sometimes you need to travel light. Sometimes discretion matters more than compression. Sometimes you simply want a camera that fits inside your pocket without sacrificing image quality.
One feature I genuinely appreciate is its built-in crop mode, which allows you to preview a 35mm or 50mm field of view directly on the LCD screen while shooting.
It's a clever feature, especially if you're transitioning from longer focal lengths or simply feel more comfortable composing at 35mm or 50mm.
That said, I personally leave it OFF.
Whenever I pick up the Ricoh GR III, I want to embrace exactly what makes it special: a fast 28mm camera.
Note: The GR IIIx version offers crop modes at 50mm and 71mm equivalent. However, the concept and usage remain the same.
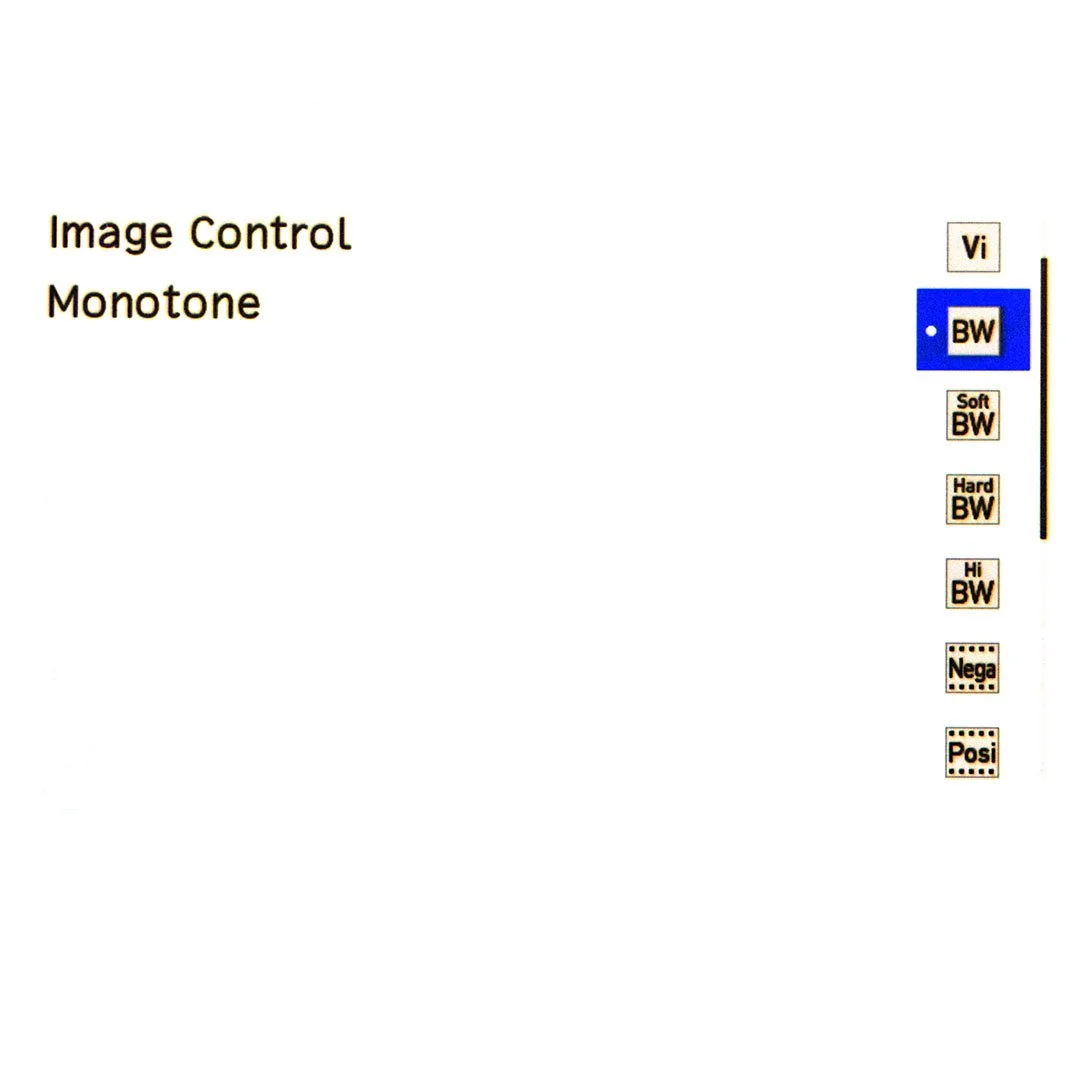
Image Control
When I'm out shooting, I always set my image preview to Black & White.
Black & White allows me to focus purely on composition, contrast, visual weight, and the geometry of a scene without being influenced by distracting colors.
One important thing to remember is that Image Control only affects what you see on the camera's LCD screen.
It does not change the RAW file stored on your SD card.
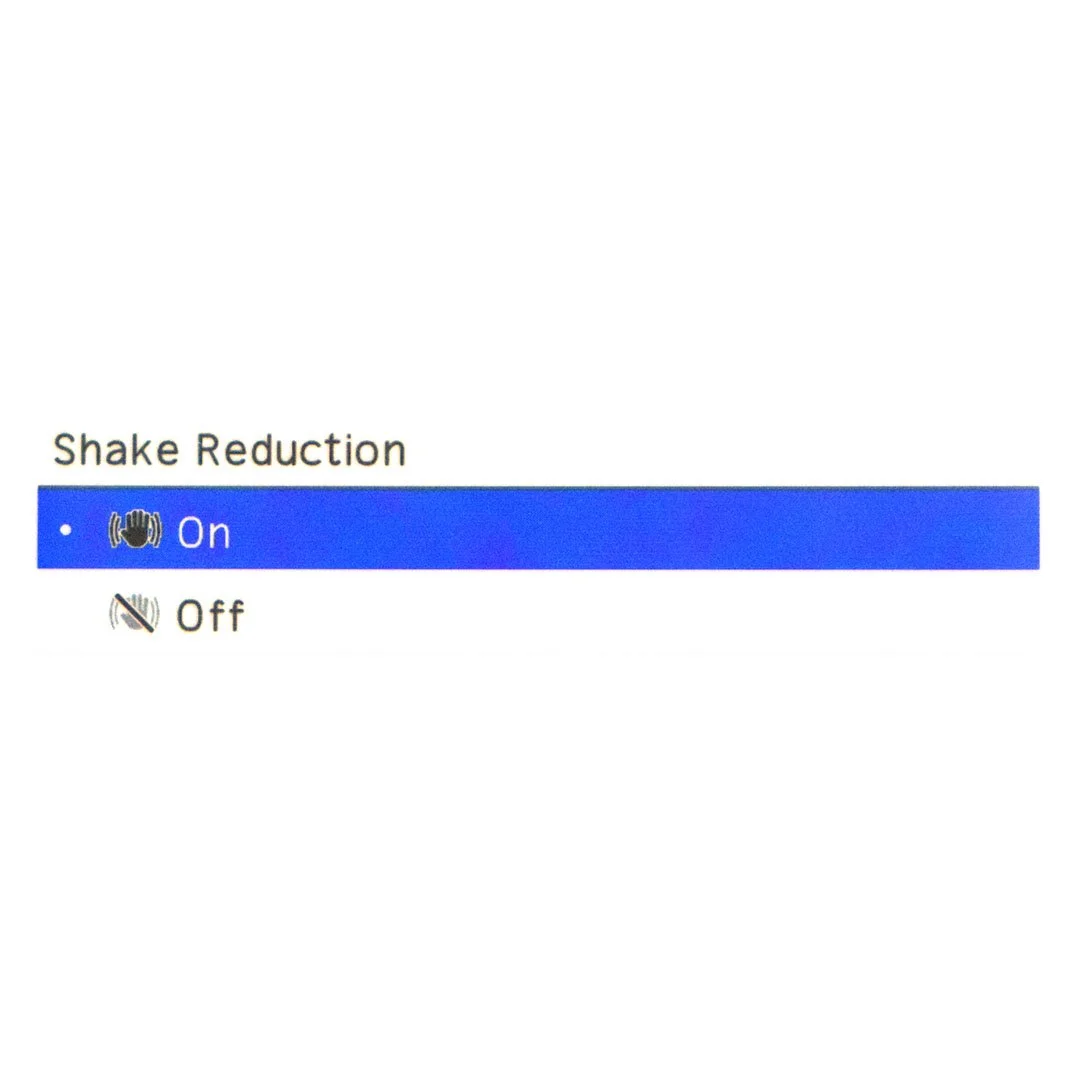
Shake Reduction
ON.
The Ricoh GR III is a camera that's often used one-handed. Whether you're shooting quickly, walking through a crowded street, or photographing from unusual angles, every bit of stabilization helps.
Most of the time it quietly does its job in the background, and I've never found a good reason to disable it.
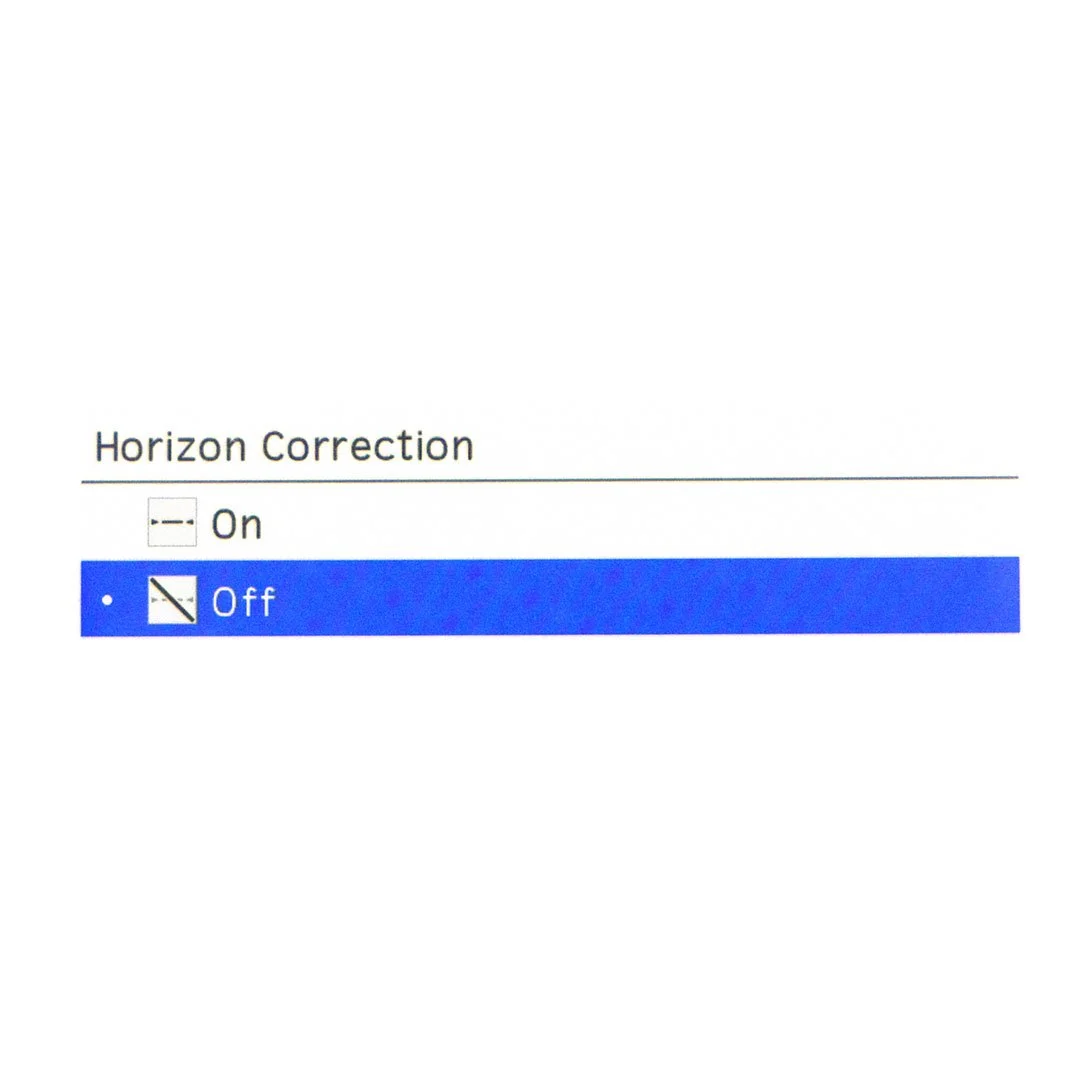
Horizon Correction
OFF. Absolutely OFF.
Many of my photographs are taken from the hip, without bringing the camera up to my eye. Others are captured while walking or reacting instinctively to a fleeting moment.
In those situations, a perfectly level horizon is often the last thing I'm thinking about.
Sometimes a tilted frame adds tension, movement.
PT.III
Customize Controls
This is where the guide really begins.
Up until now, we've talked about the settings I use while shooting. They're important, but on their own they don't completely change the experience of using this camera.
These are the custom controls that transformed my GR III into a camera that feels completely natural to use.
My goal is to have immediate access to the handful of settings that genuinely matter while I'm walking the streets.
The less time I spend navigating menus, the more time I spend paying attention to the world unfolding in front of me.
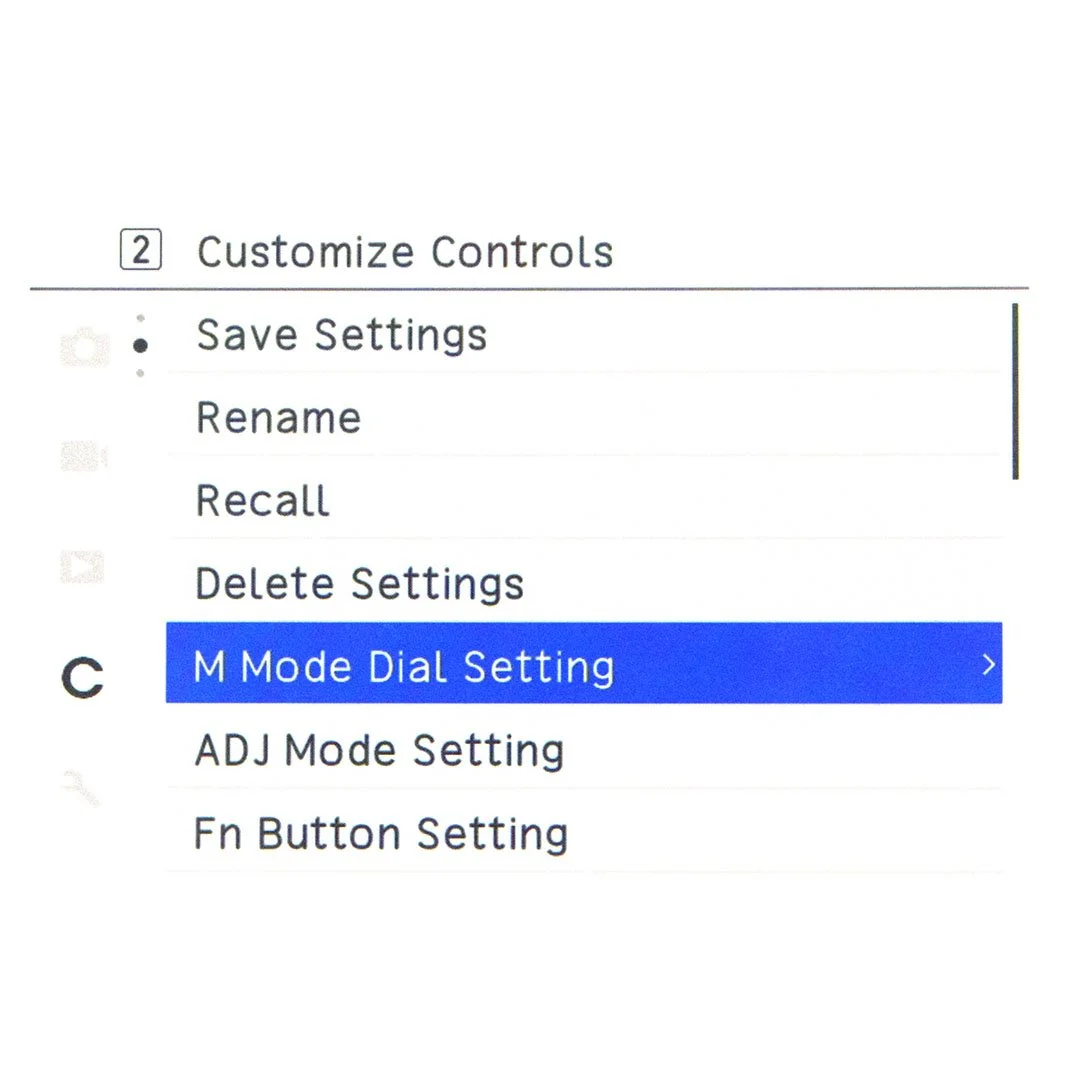
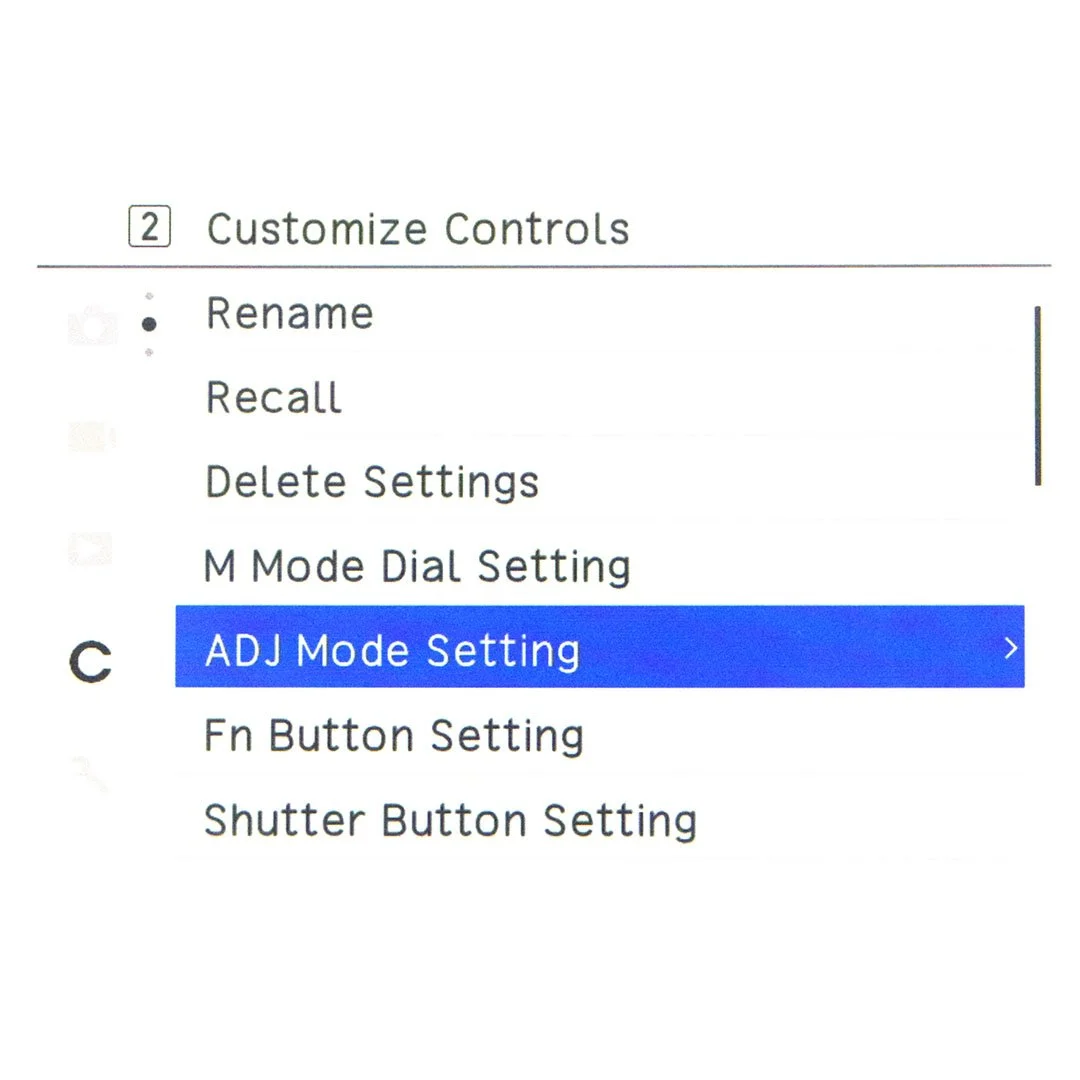
M Mode Dial Settings
This setting determines what the two command dials control while you're shooting in Manual Mode
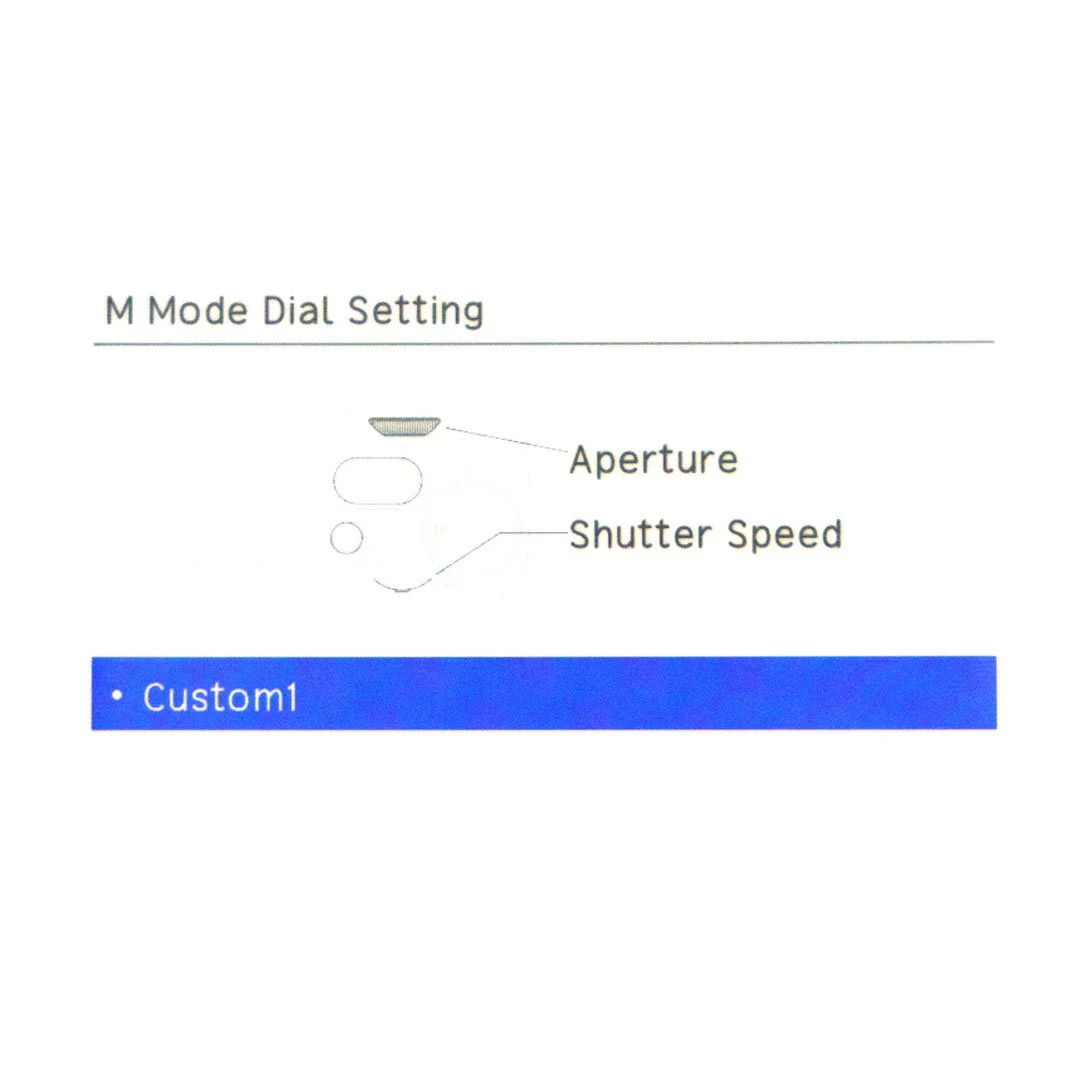
Personally, I've configured the front dial to control the aperture, and the rear dial to control the shutter speed.
The reason is simple.
As I mentioned earlier, aperture is the setting I find myself adjusting most often. Even though I generally shoot between f/8 and f/11, lighting conditions and creative intent sometimes require small adjustments, so having aperture under my index finger feels the most natural.
The rear dial, located next to the LCD screen, controls the shutter speed.
ADJ Mode Settings
The ADJ Mode is something you probably won't use constantly, but it's definitely worth configuring once and forgetting about.
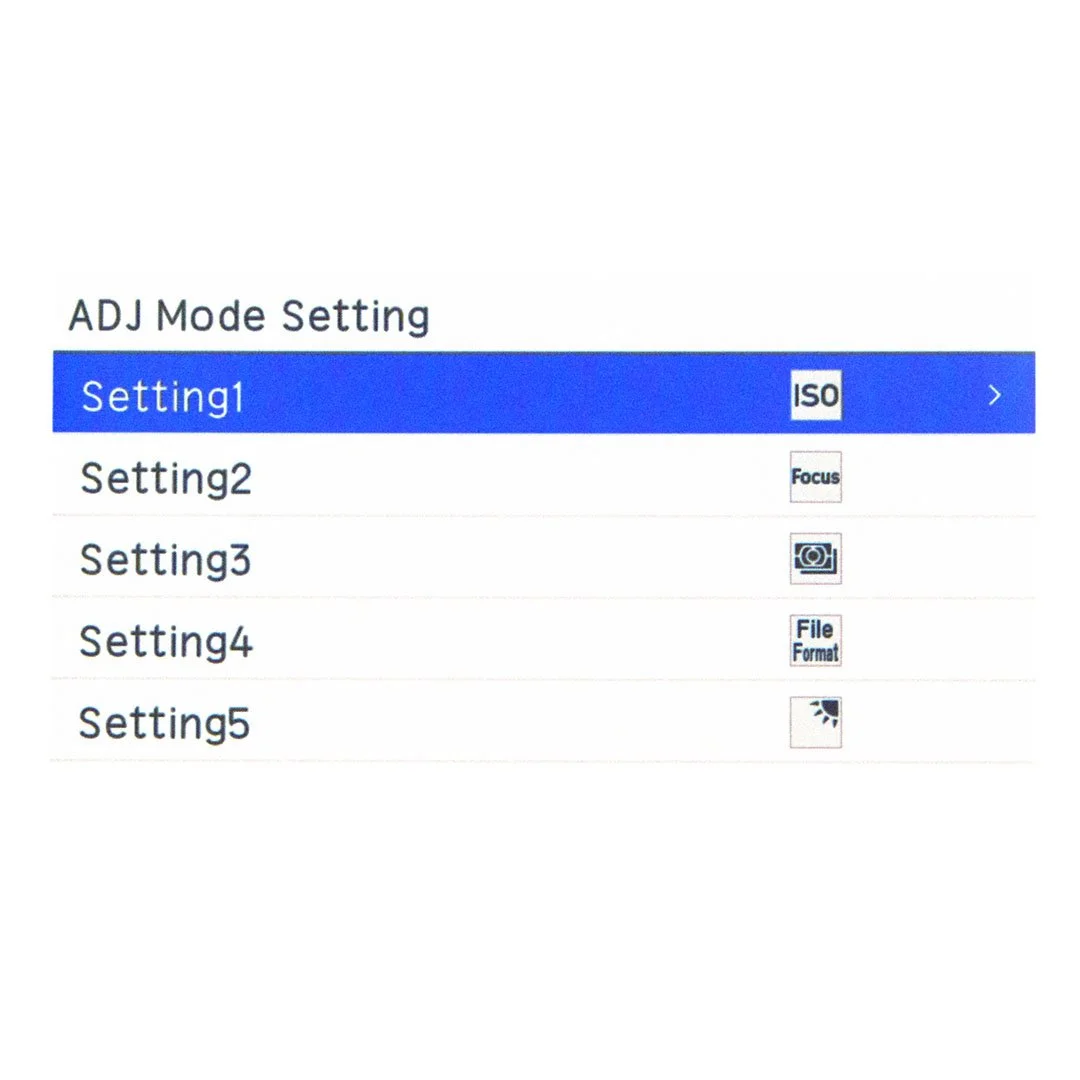
Think of it as your personal quick-access menu.
Instead of digging through the camera's menus every time you need to change an important setting, you can keep the functions you actually use within immediate reach.
This is how I've configured mine:
ISO
Focus Mode
AE Metering
File Format
LCD Brightness
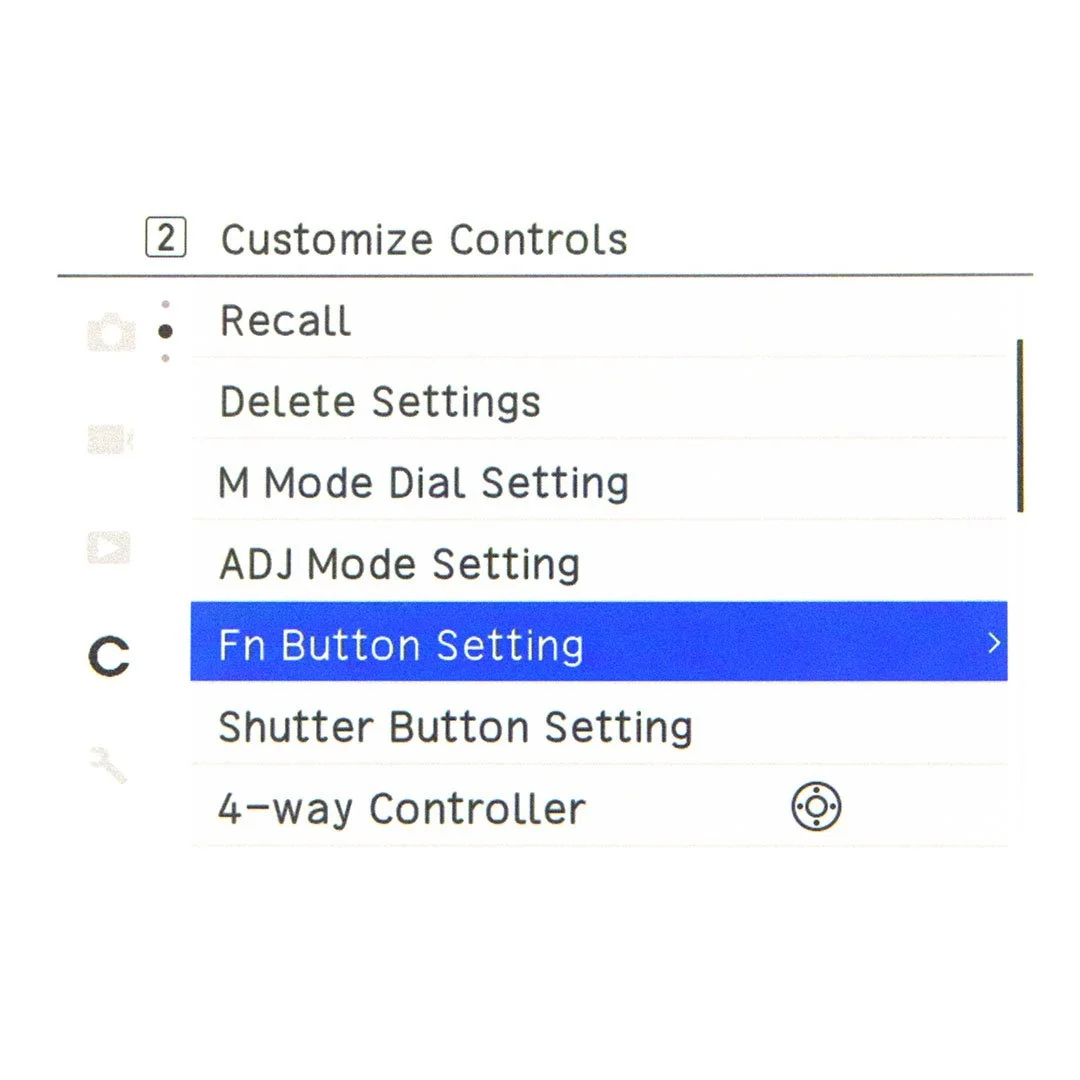
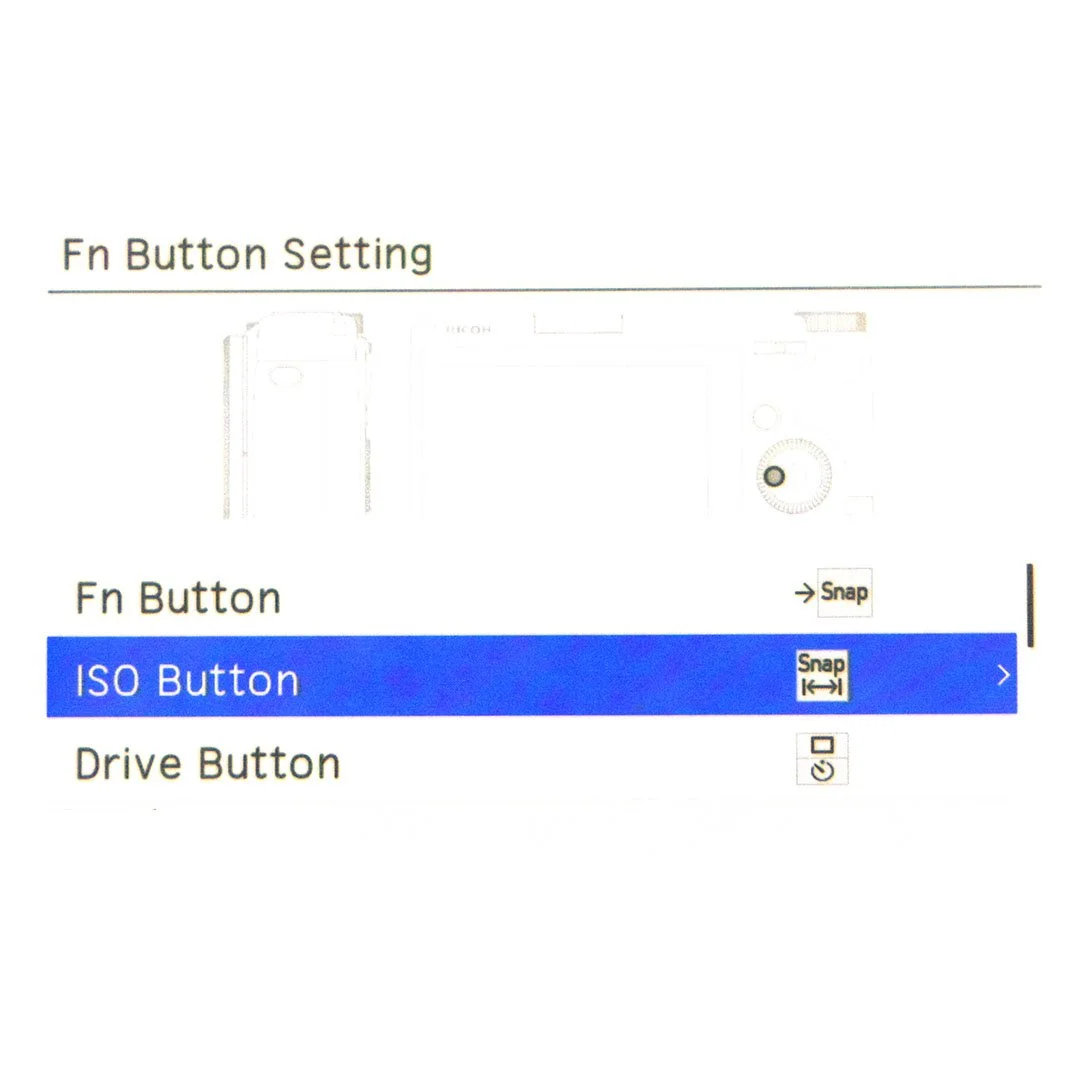
FN Button Settings
Unlike the ADJ menu, the FN button is something I use constantly.
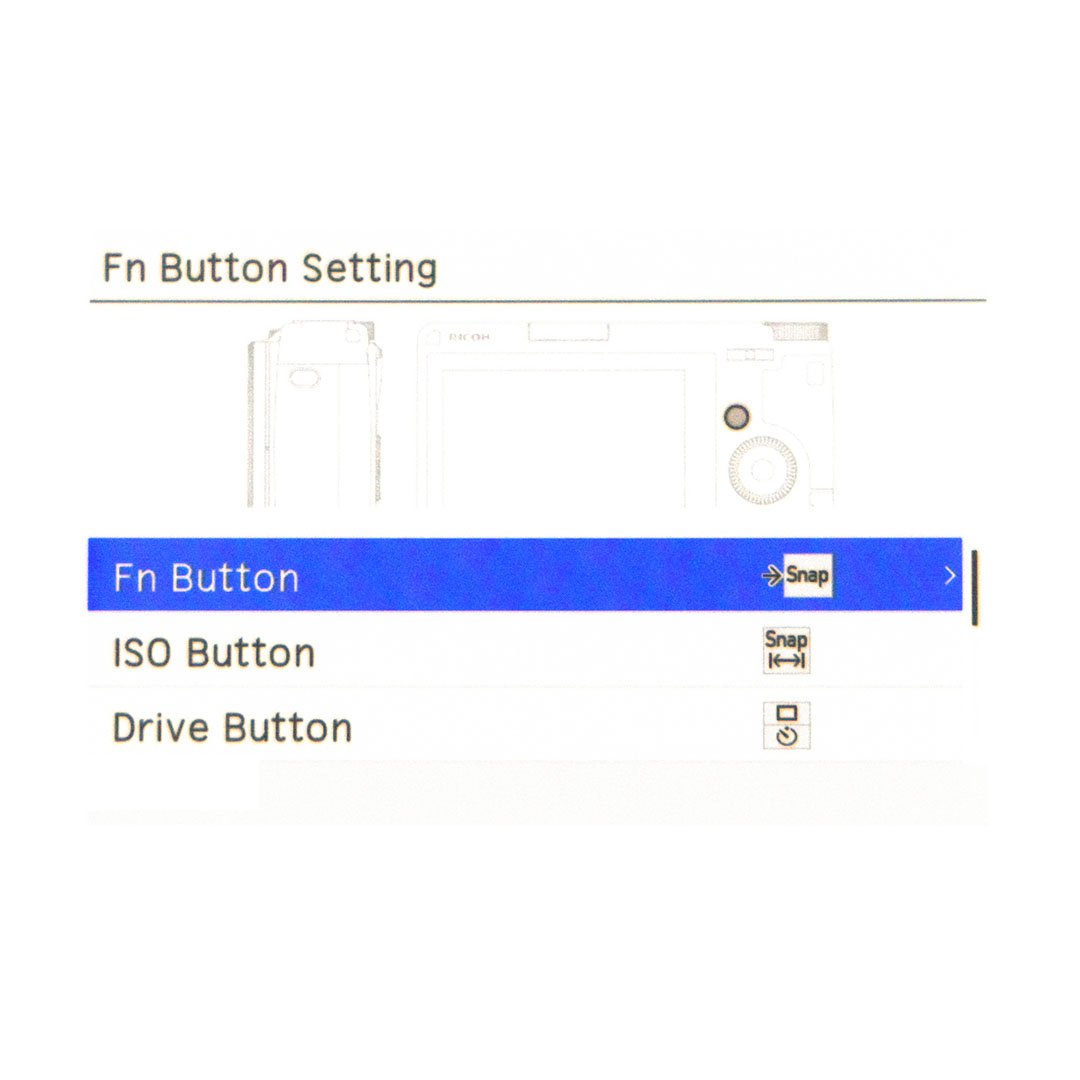
I've assigned it to Set Snap.
With a single press, the camera switches to Snap Focus. Press it again, and it instantly returns to whichever focusing mode I was using before.
It's an incredibly simple shortcut, but one that completely changes how quickly I can react to different situations.
ISO Button
I've reassigned the ISO button to control the Snap Focus Distance.
This is probably one of the most important customizations in my entire setup.
Shutter Button Settings
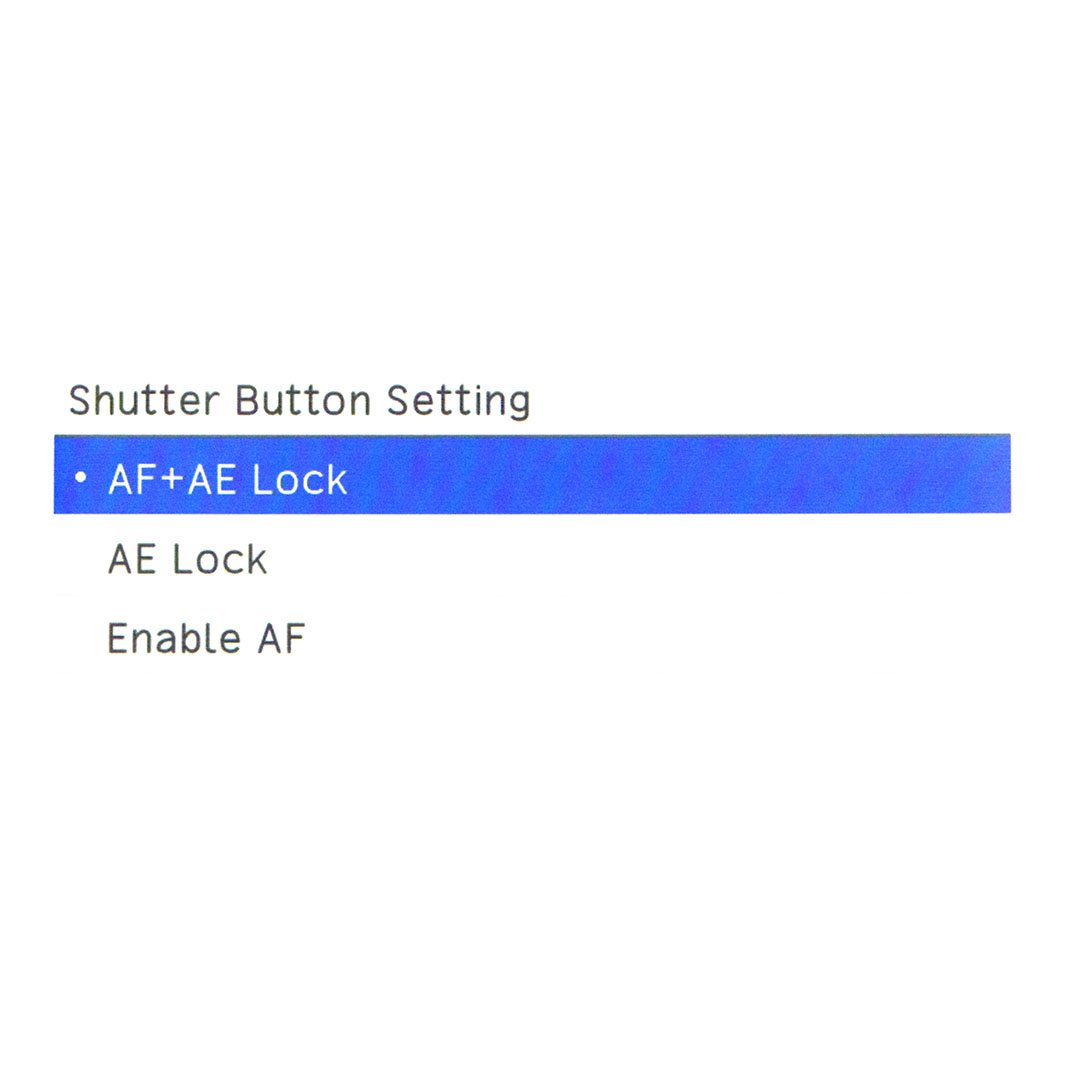
AF + AE Lock
I highly recommend this setting.
When you half-press the shutter button, the camera locks both focus and exposure.
This means you can focus on your subject, recompose the frame however you like, and take the shot knowing that both the focus distance and exposure remain exactly as they were when you half-pressed the shutter.
LCD Touch Operation
Meh.
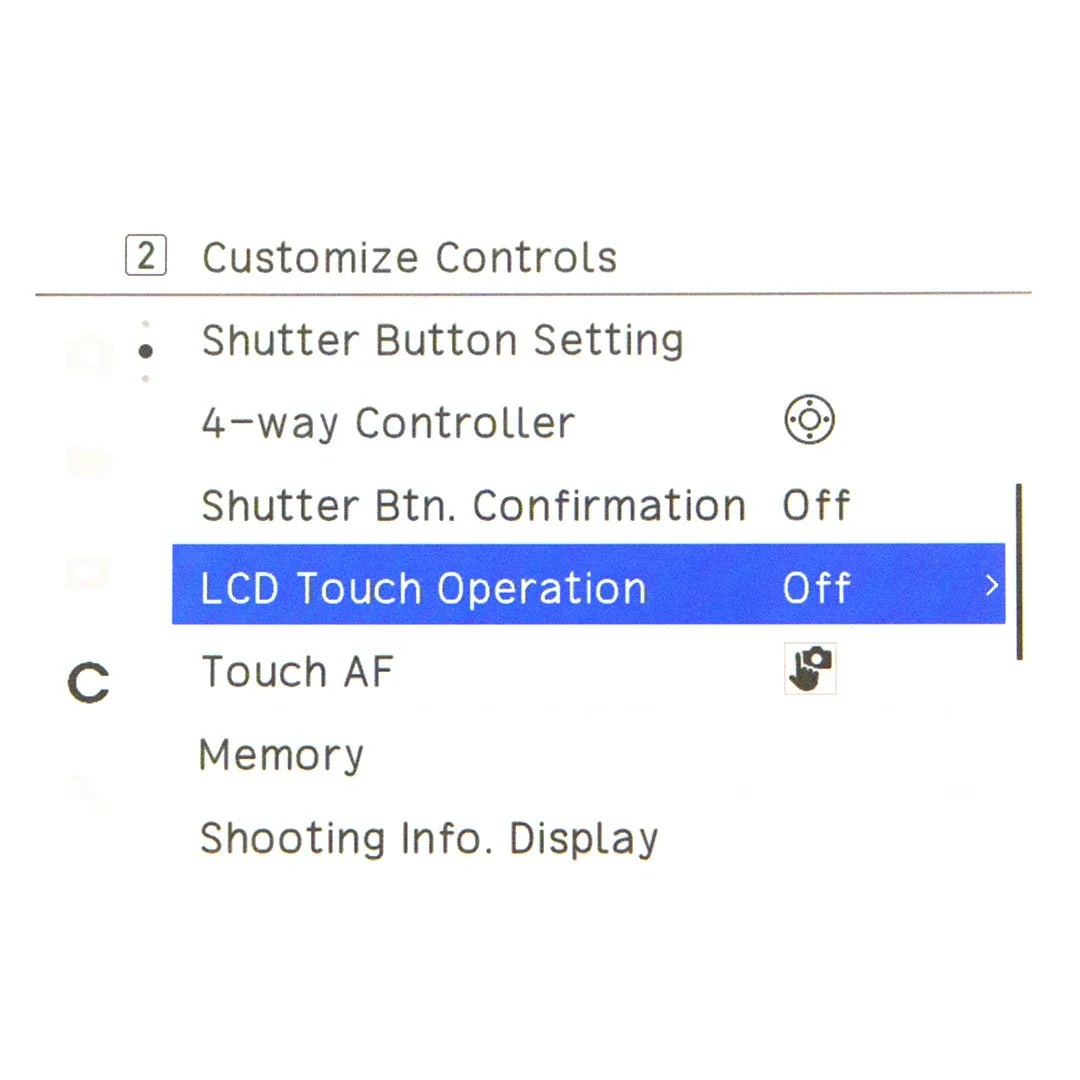
Some photographers love the touchscreen.
I don't. Especially on the Ricoh GR III.
Most of the time, my camera is hanging from a wrist strap while I walk through the streets. Because it's such a small camera, it's incredibly easy to accidentally touch the LCD while picking it up or carrying it.
For me, the touchscreen introduces more problems than it solves.
I simply leave it OFF.
Shooting Info Display
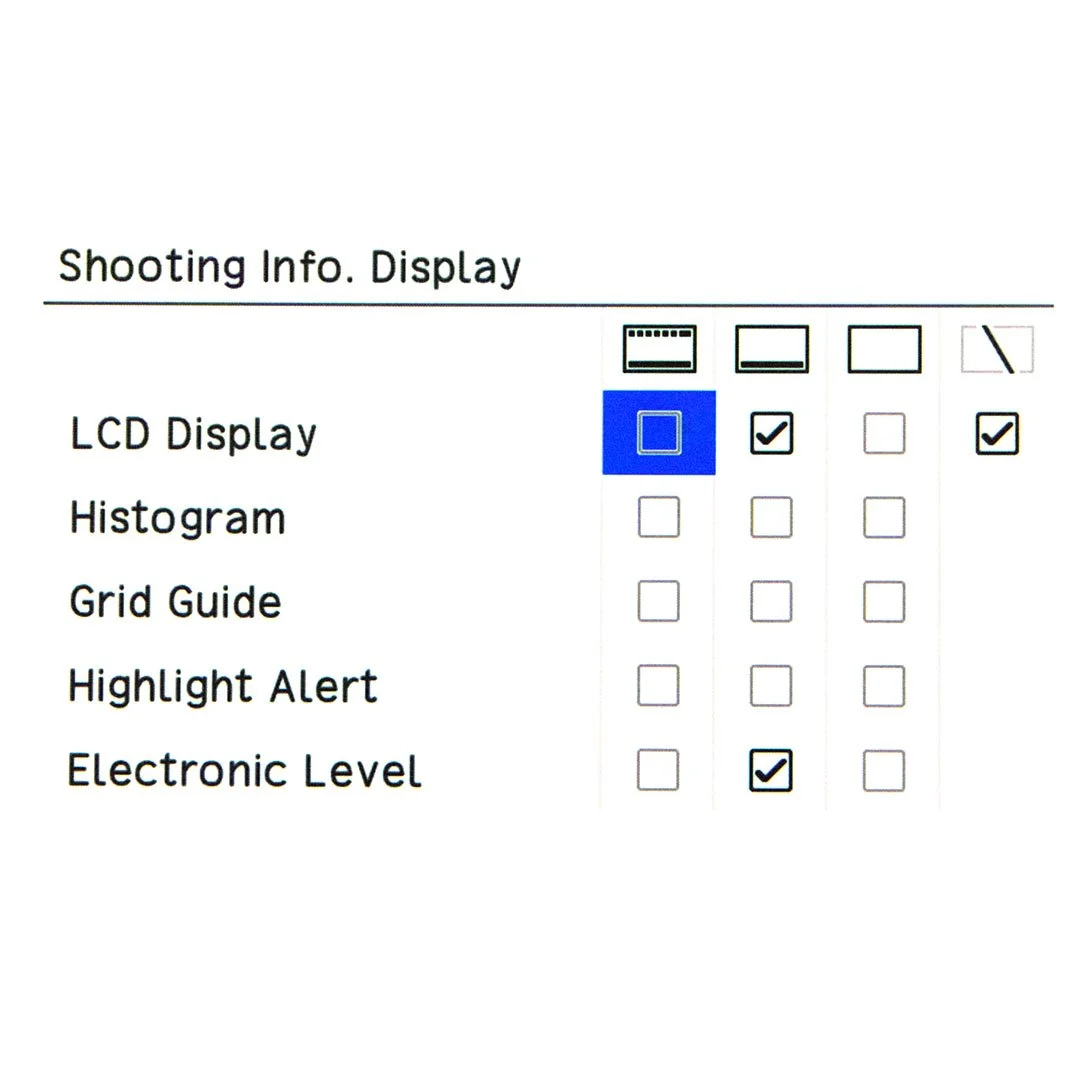
This is one of the most important sections in the entire guide.
Seriously.
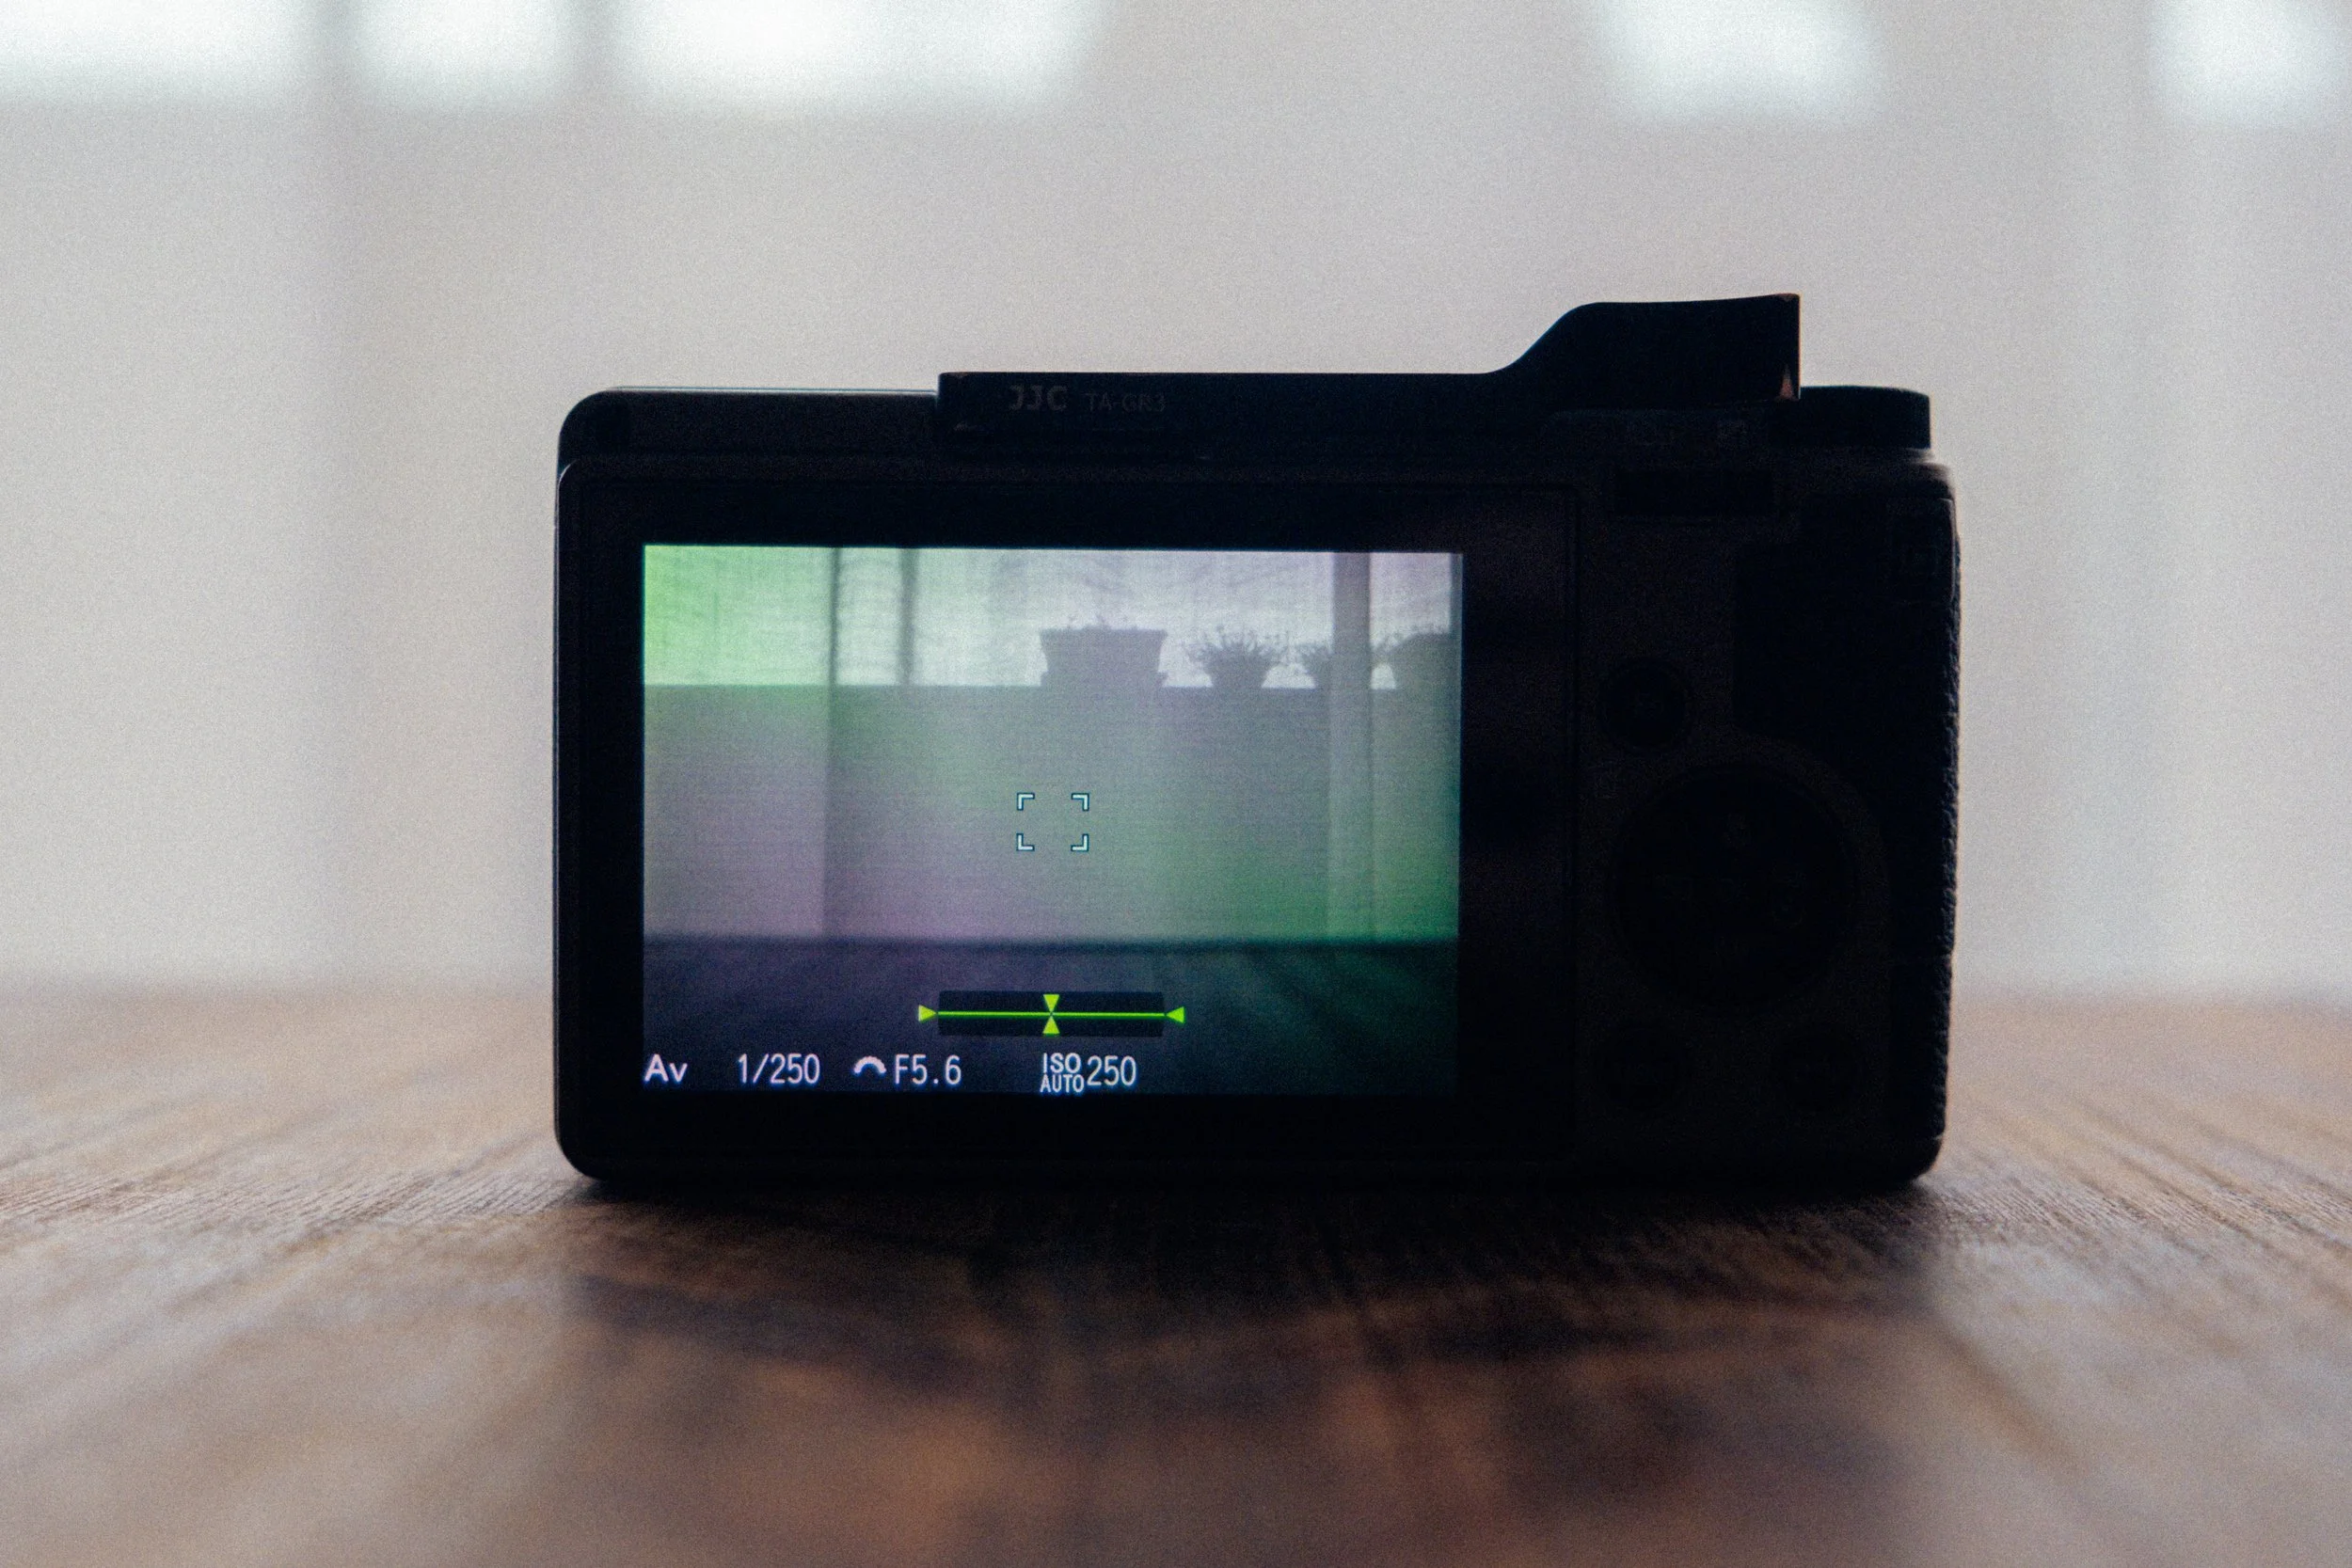
My goal is to have only three pieces of information visible while shooting:
Aperture
Shutter Speed
ISO
Nothing else.
No histograms.
No unnecessary icons.
No visual clutter.
The cleaner your screen becomes, the easier it is to concentrate on what's actually happening in front of you.
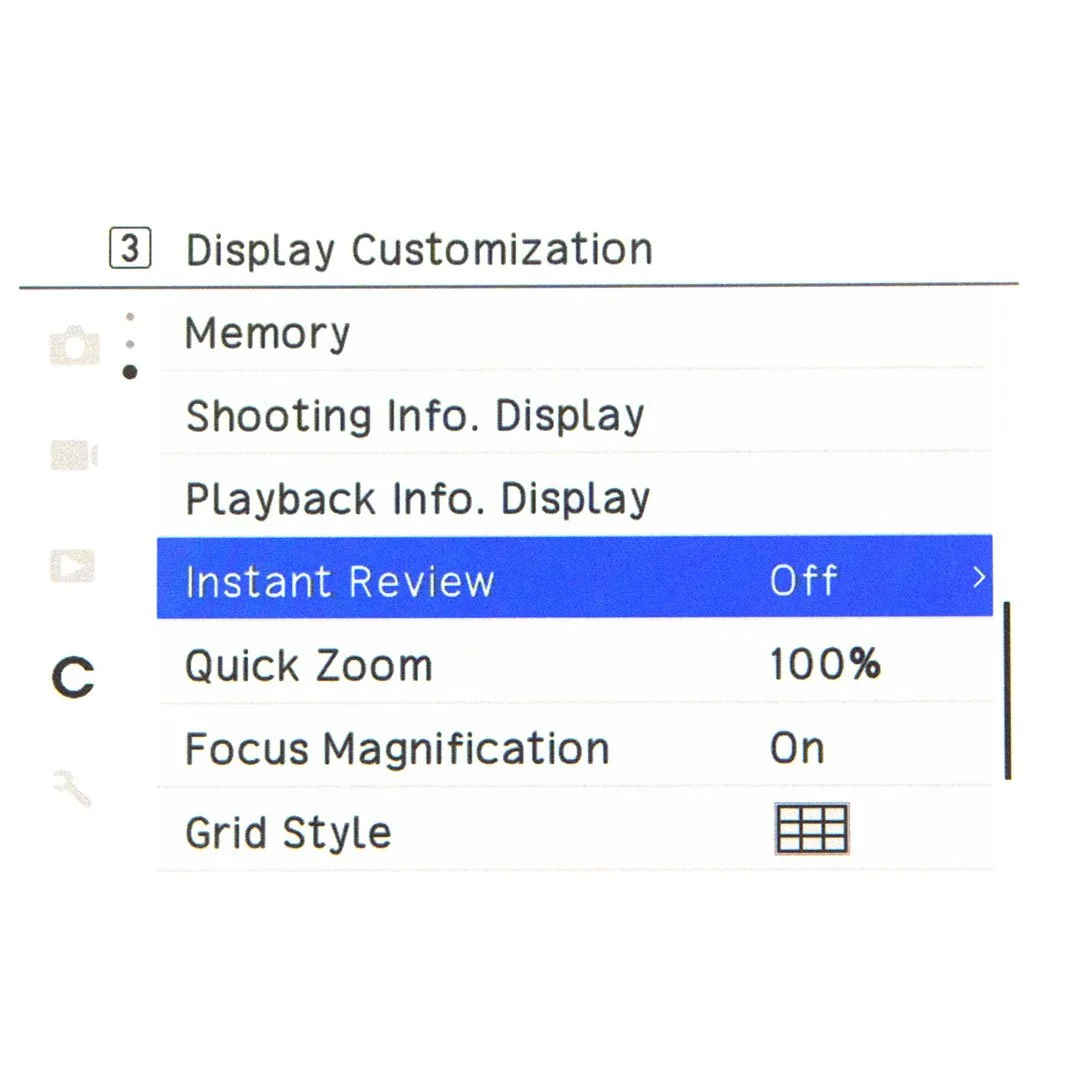
Instant Review
OFF.
Always.
PT.IV
Setup
Last, but certainly not least, let's take a quick look at the Setup menu.
To be honest, there's only one setting here that I believe is truly worth changing:
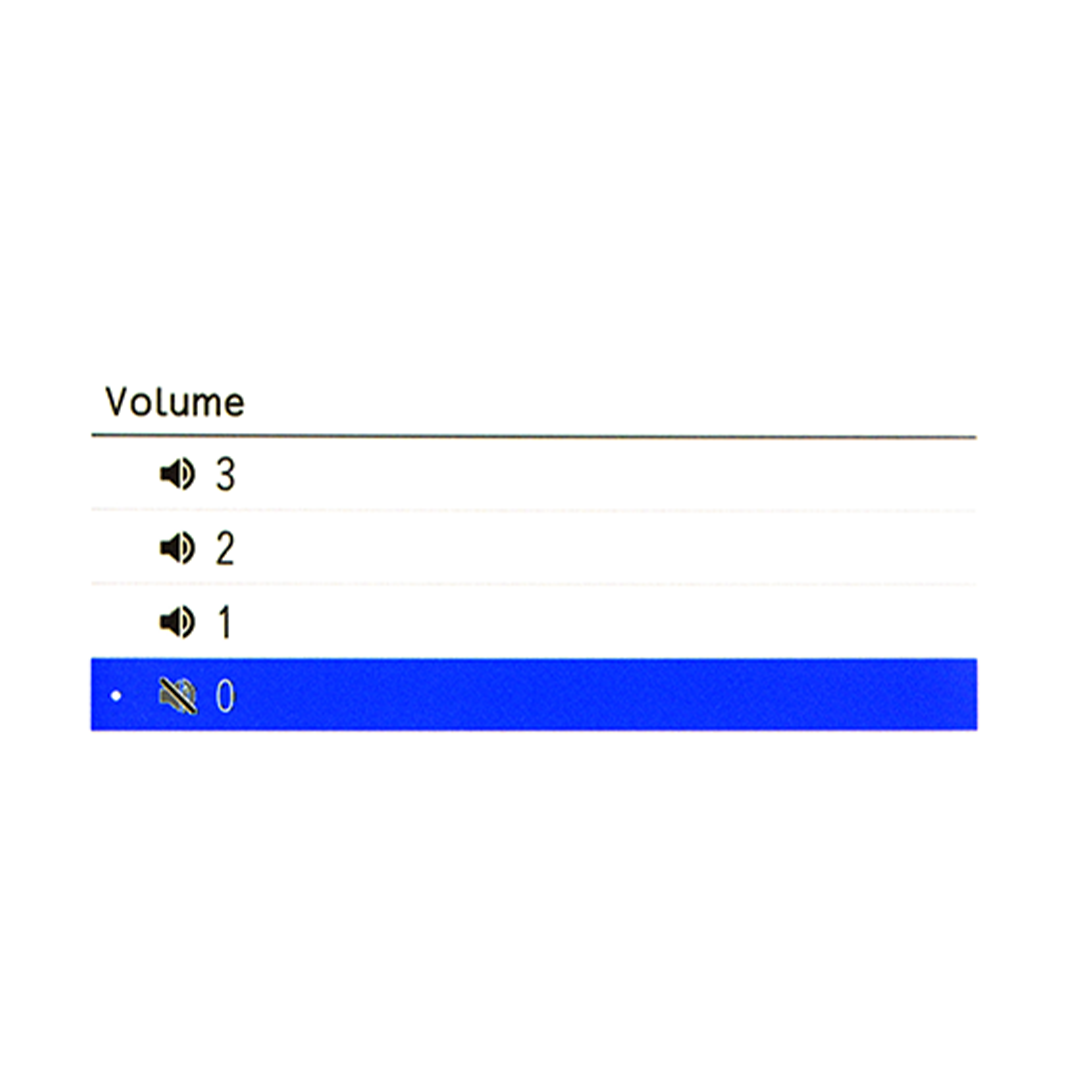
Volume
By default, the Ricoh GR III plays a confirmation sound when it focuses, and it also simulates a shutter sound every time you take a photograph.
I recommend turning all camera sounds OFF.
SOMETHING IS MISSING
You may have noticed that I've intentionally skipped the Video section entirely.
In my opinion, the Ricoh GR III was built first and foremost as a stills camera. While it is perfectly capable of recording video, that's never been its greatest strength.
Nothing is stopping you from experimenting, and if video is part of your workflow, by all means explore what the camera has to offer.
Personally, however, I've always preferred dedicating video work to other cameras.
Final Thoughts
If you've made it all the way to the end, thank you for taking the time to read this guide.
I genuinely hope it has helped simplify your experience with the Ricoh GR III/x or, at the very least, given you a few ideas for building a setup that feels more natural and intuitive.
The less time you spend thinking about your camera, the more time you can spend paying attention to the world around you.
If this guide helps you achieve that, then it has done exactly what I hoped it would.
Thank you!
This blog will always remain ad-free.
If you enjoy my blog and would like to support my work, consider leaving a tip or visiting my shop, where you'll find my personal Lightroom presets, zines & camera guides.
Every bit of support goes directly back into creating new photography content, including YouTube videos, blog posts, camera guides, and, of course, more presets and zines, with the occasional freebie for everyone along the way.
Thank you for reading. <3