Fujifilm X-E4 Essential Street Photography Settings Guide
Like all of my photography guides and articles, this content is, and always will be, freely available.
However, if this Essential Guide helped you better understand your camera, introduced you to features you hadn't considered, or simply made your experience a little easier, you can support my work in two simple ways.
You can purchase the PDF version of this guide for the symbolic price of $1, or, if you'd prefer, you can simply buy me a coffee through Buy Me a Coffee.
Your support helps cover the time invested in researching, writing, photographing, editing, and designing guides like this, allowing me to continue creating free resources for the photography community.
Thank you for reading, and thank you to everyone who chooses to support what I do.
Note: This guide is also compatible with other Fujifilm cameras, although keep in mind that the menu layout may differ slightly. I own a Fujifilm X-T4 and use the same settings on it.
Note II: This guide covers photography settings only, not video. The camera is not stabilized, so I have never really considered it a video camera. At least, I have never personally used it for anything other than photography.
Introduction
I created this guide to share my personal approach to street photography with the Fujifilm X-E4, breaking down the essence of how I use this camera and showing the settings that I consider truly essential, as well as the ones I believe can be ignored in order to achieve a faster, simpler, and more intuitive shooting experience.
This was my first Fujifilm camera, and probably the only one I will never get rid of. I have dedicated a video and a blog post to explaining why, as well as another video and blog post where I go through the accessories that made this camera so versatile that it became the only Fujifilm camera that has truly convinced me so far.
Before we begin, there is something important to clarify.
This is not meant to be a complete Fujifilm X-E4 manual.
The settings I will show you are not necessarily the ones that will perfectly match your style, habits, or creative process.
They are simply the choices that, after spending a significant amount of time with this camera, have become essential to my own workflow.
Think of this as a personal recipe rather than a universal instruction manual.
Take what works for you, ignore what does not.
PT.0
Drive / Delete
Before talking about the actual settings, I want to show you the shooting mode I use.
To access it, press the Drive/Delete button. By default, the camera will be set to Still Image, meaning Single Shooting Mode: every time you press the shutter, one photo is taken.
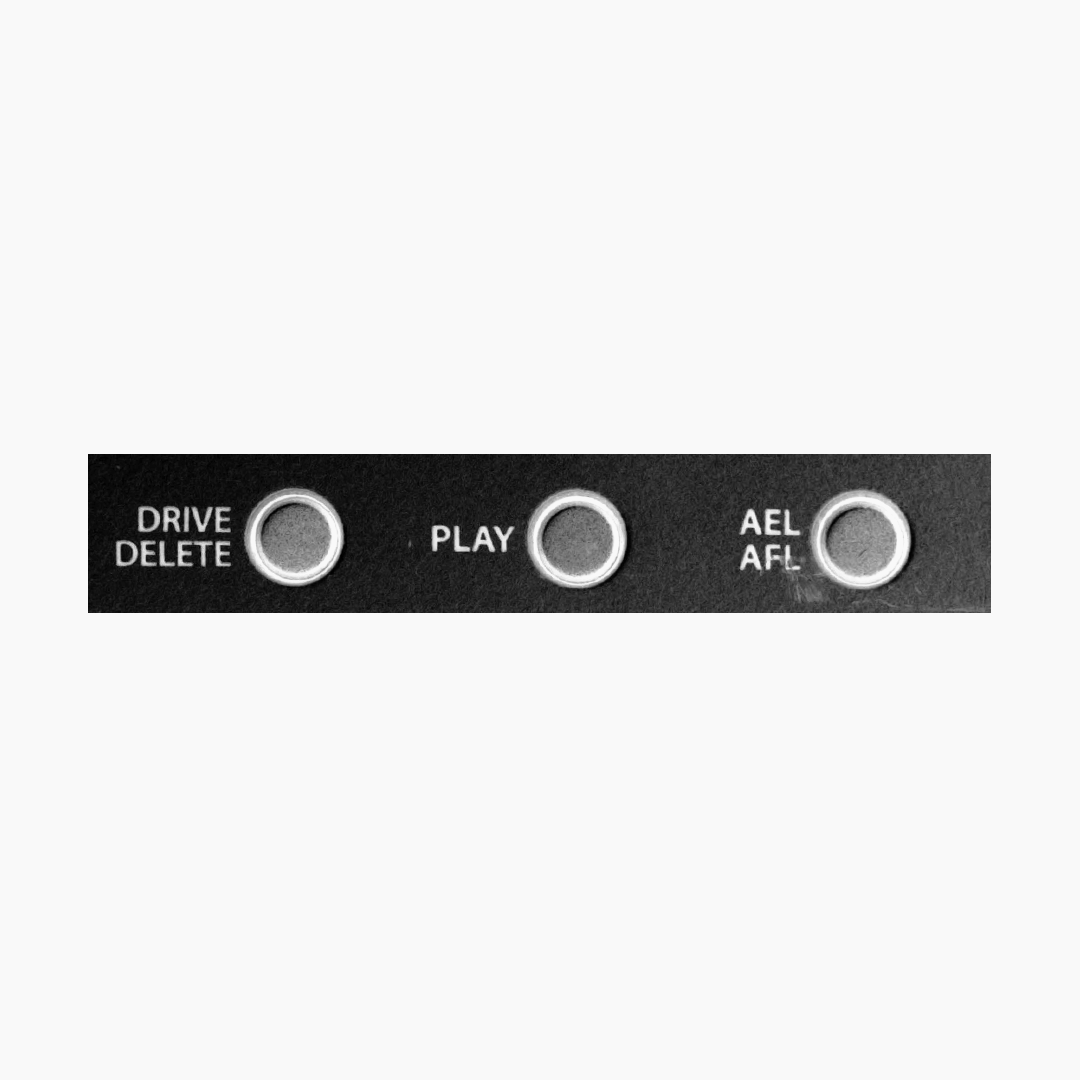
To access it, press the Drive/Delete button. By default, the camera will be set to Still Image, meaning Single Shooting Mode: every time you press the shutter, one photo is taken.
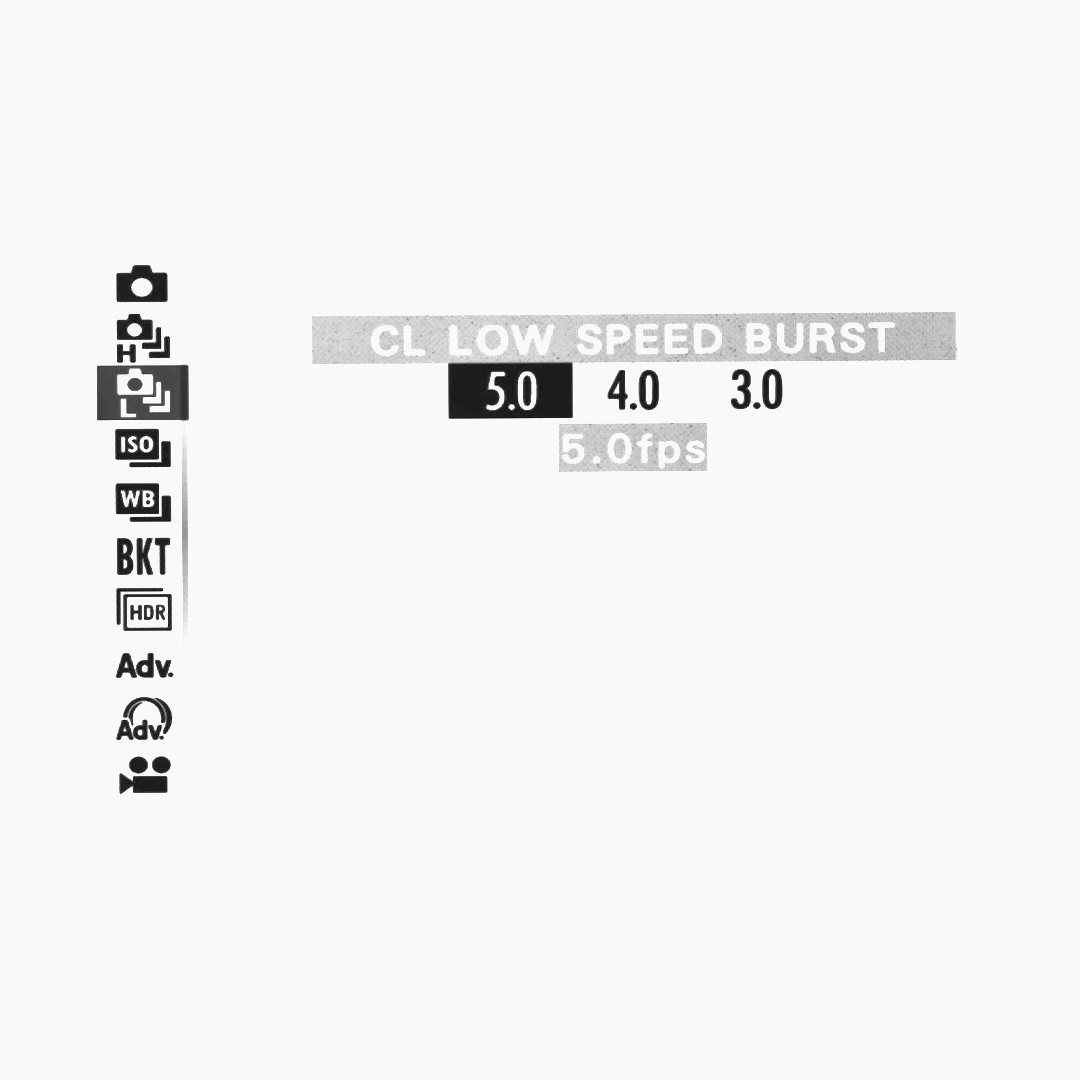
Personally, I shoot in CL LOW SPEED BURST, meaning Continuous Low, which is pretty self-explanatory. You can choose between 5 fps and 3 fps.
Personally, I prefer 5 fps. While it is true that I end up discarding more photos, I have also noticed that I am less likely to miss the decisive moment once I have it framed. It makes the job a little bit easier!
PT.I
Image Quality Setting
We can now start navigating through the menus by pressing the corresponding button.
The first window that opens on the left is I.Q.: Image Quality Setting.
As mentioned, I will not go through every single item in the menu. Instead, I will focus on the settings that I have personally changed and consider essential for a smooth photography experience.
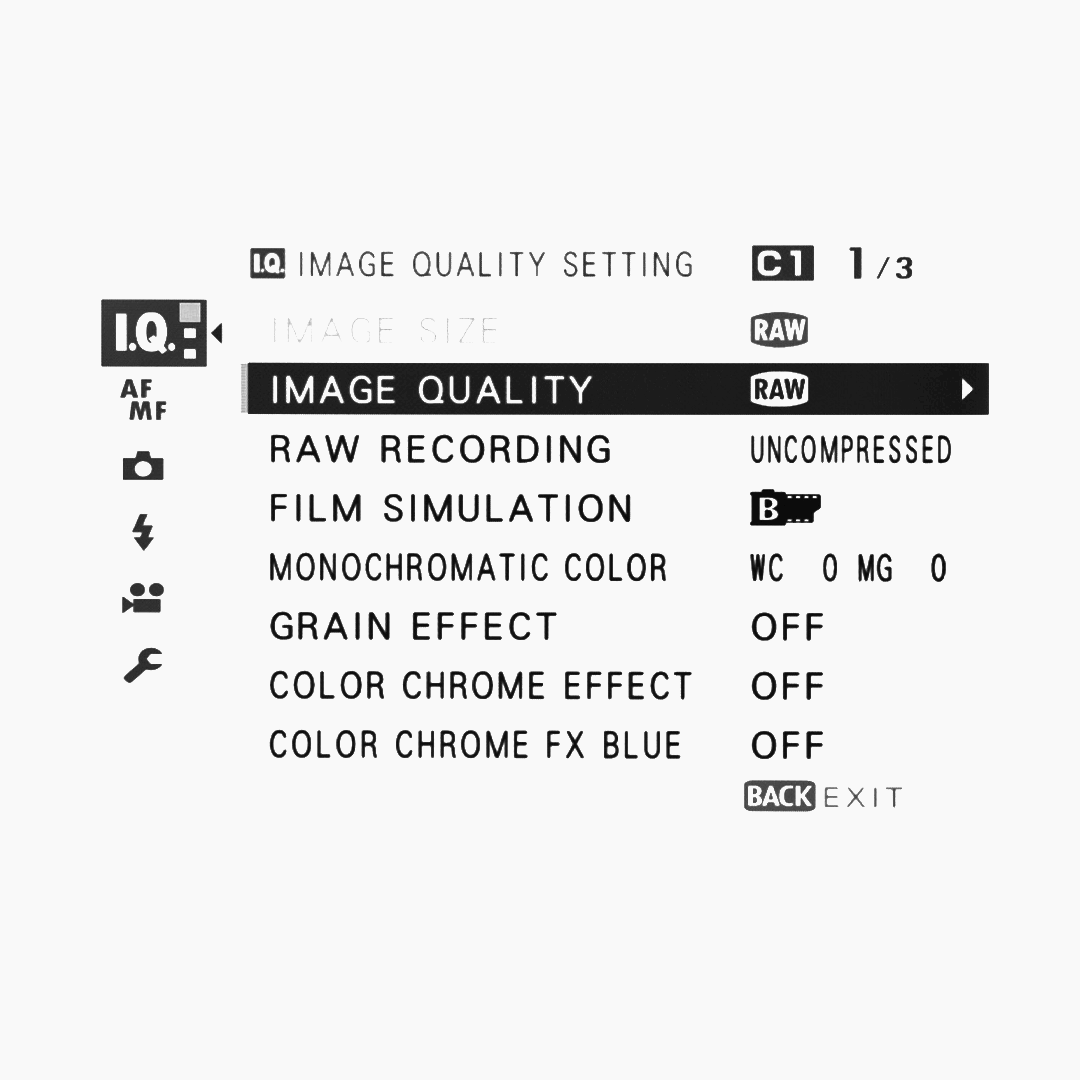
Image Quality
I shoot exclusively in RAW.
I don't use JPEG recipes, and I edit exclusively with my own presets, so I don't see much reason to unnecessarily fill up my SD card during my sessions.
Film Simulation
This might seem like a setting you can simply ignore, but I actually consider it extremely important. Almost a key setting for my approach to photography.
As you probably know, Fujifilm cameras are famous for their Film Simulations. Personally, they don't interest me much, except for one thing: they allow you to have a black-and-white preview on your LCD and viewfinder.
I've said this many times: having the scene in front of me displayed in black and white through the LCD or viewfinder allows me to balance it better.
Of course, sometimes the subject of a photograph can be the combination of colors within a scene. But I can see those colors with my own eyes. Once I recognize that they are what I want to photograph, I simply take the picture.
When the subject of a photograph isn't the colors, but rather the people within the scene or the composition itself, I find it easier to balance everything spatially when looking at the scene in black and white.
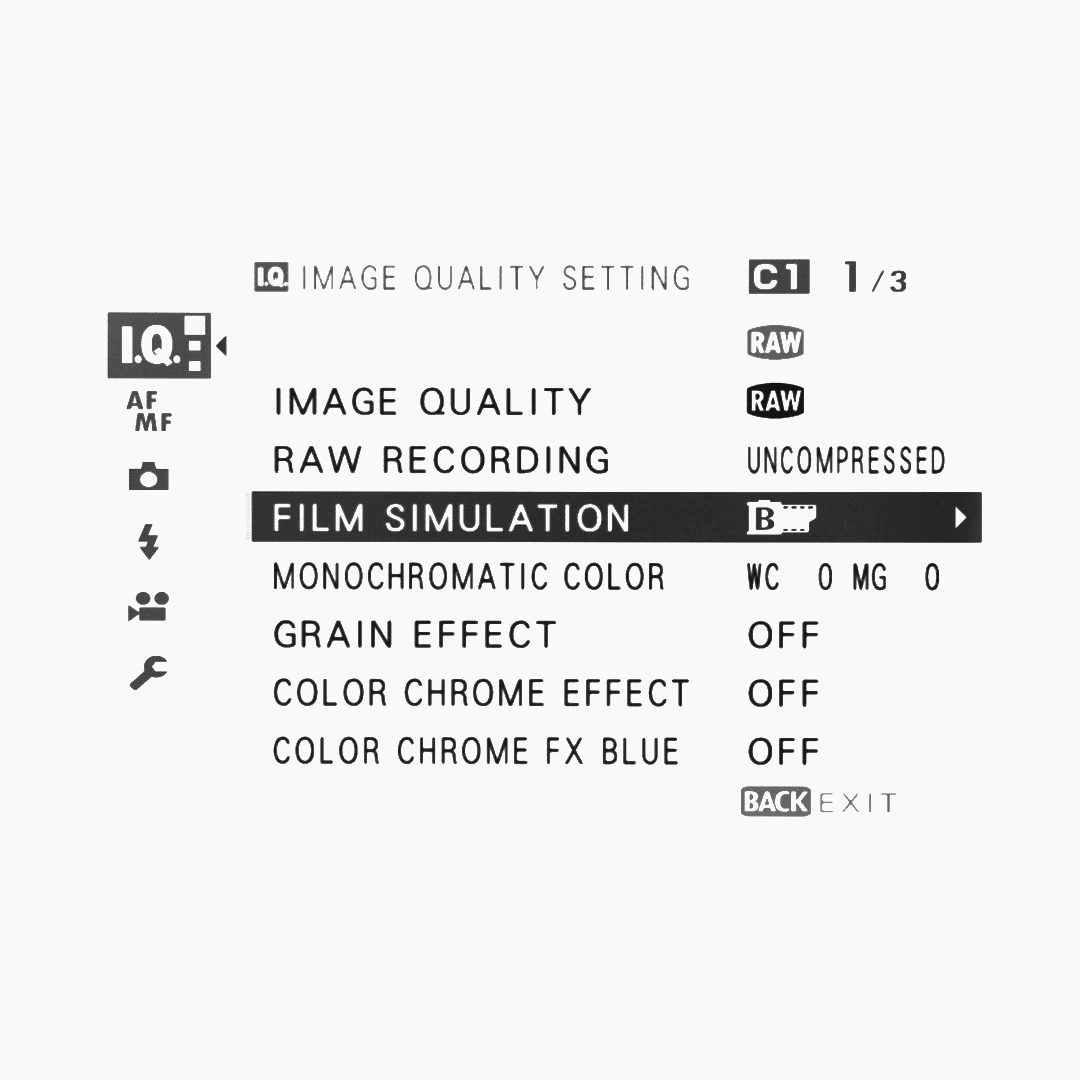
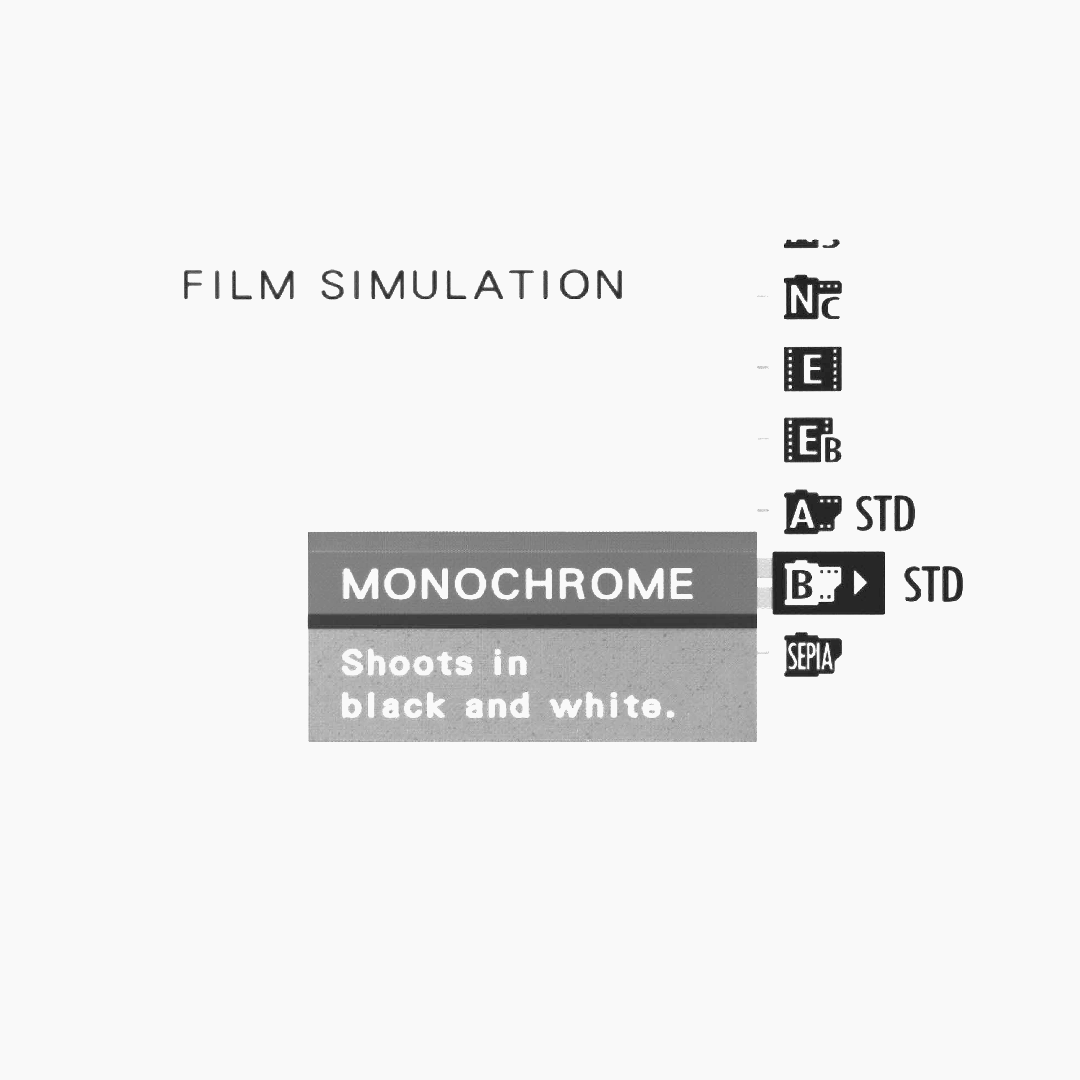
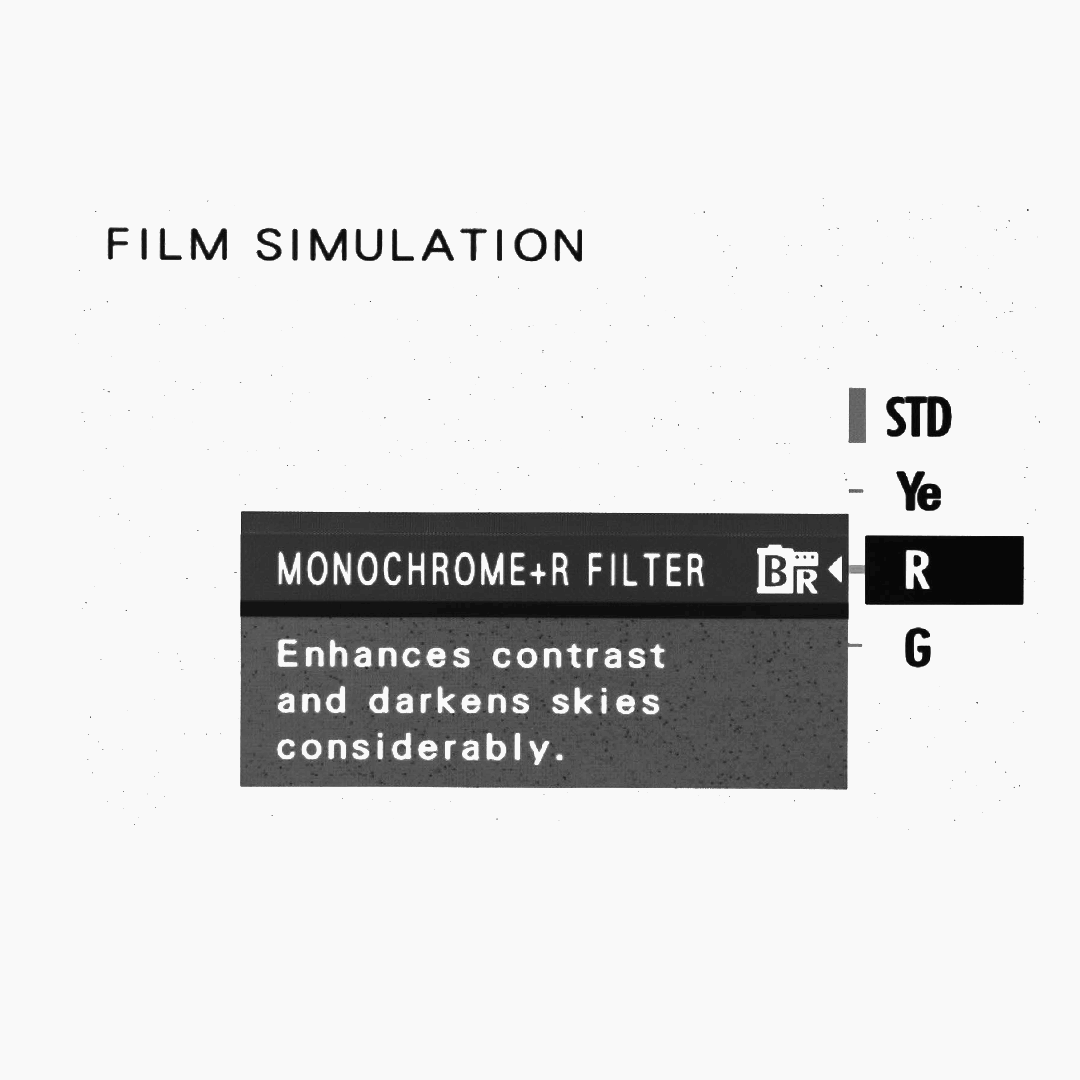
There are several monochrome simulations, some of which increase contrast, for example.
Personally, I use the most neutral one possible (STD), so I don't distort too much the relationship between what my eyes see and what I see on the screen.
PT.II
AF/MF Setting
The second menu is AF/MF Setting.
There are a few important distinctions to make here. While I use modern zoom and prime lenses on this Fuji, I also love using vintage lenses. In that case, there are some specific settings that need to be changed.
Let's go through them.
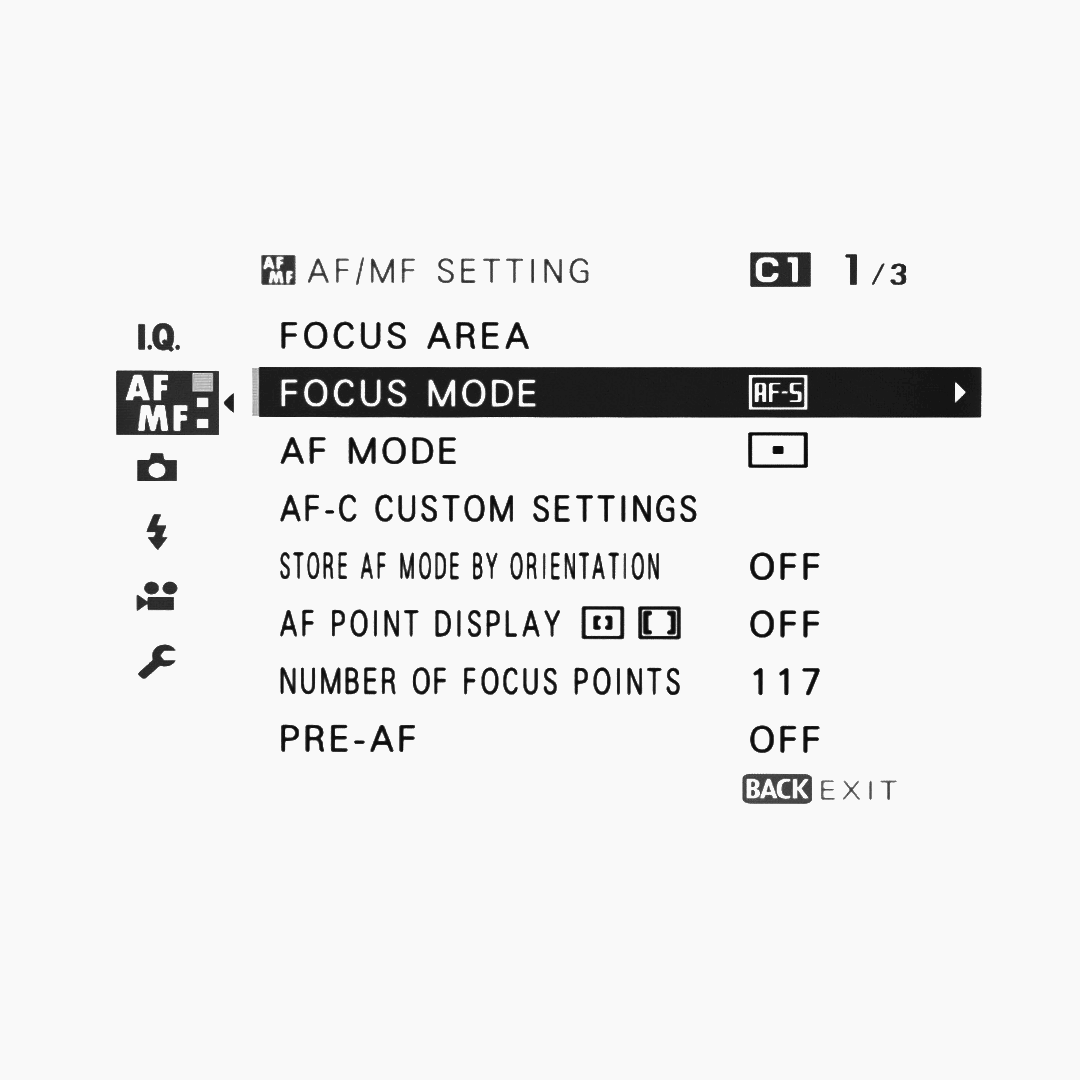
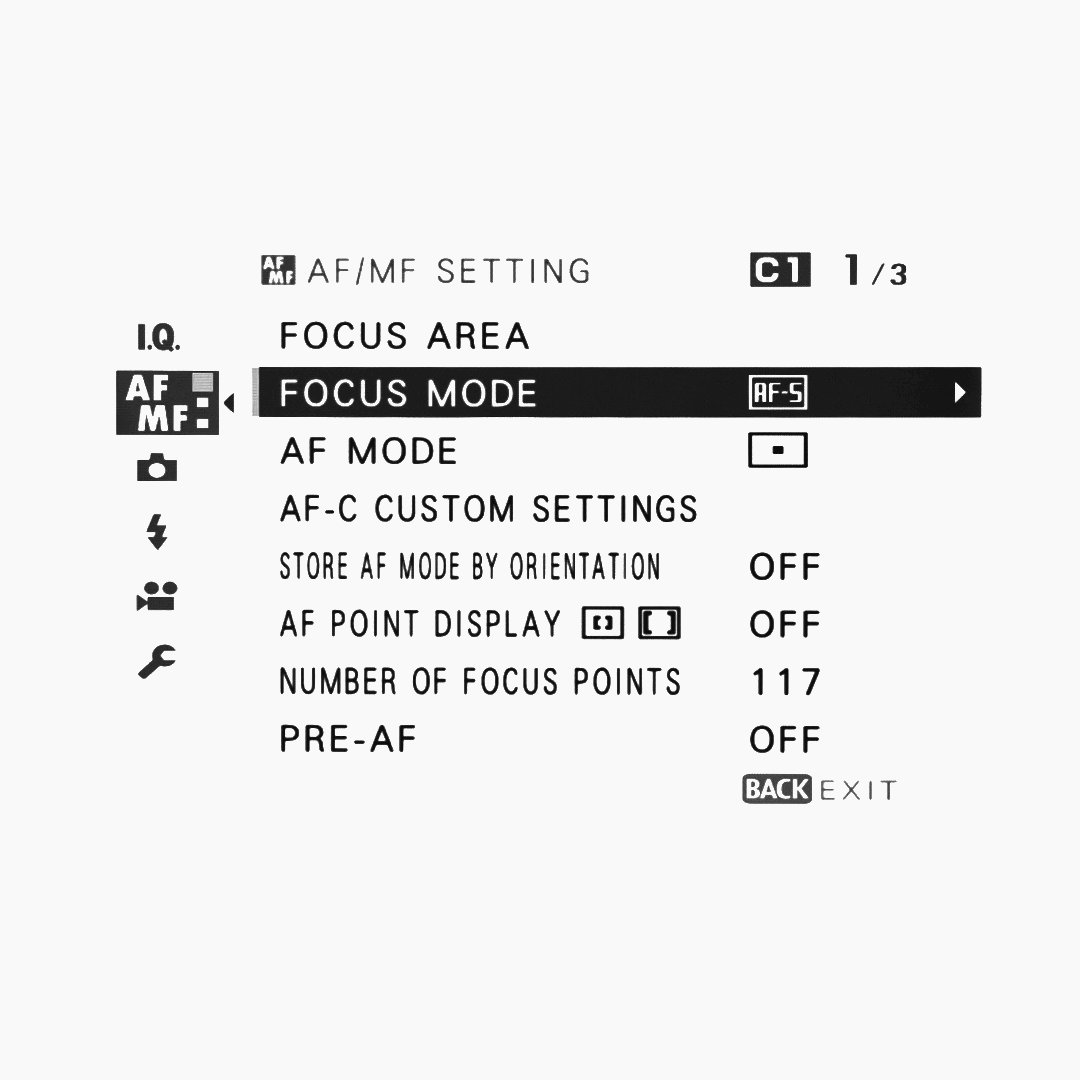
FOCUS MODE 1 / AUTO
Let's start with autofocus.
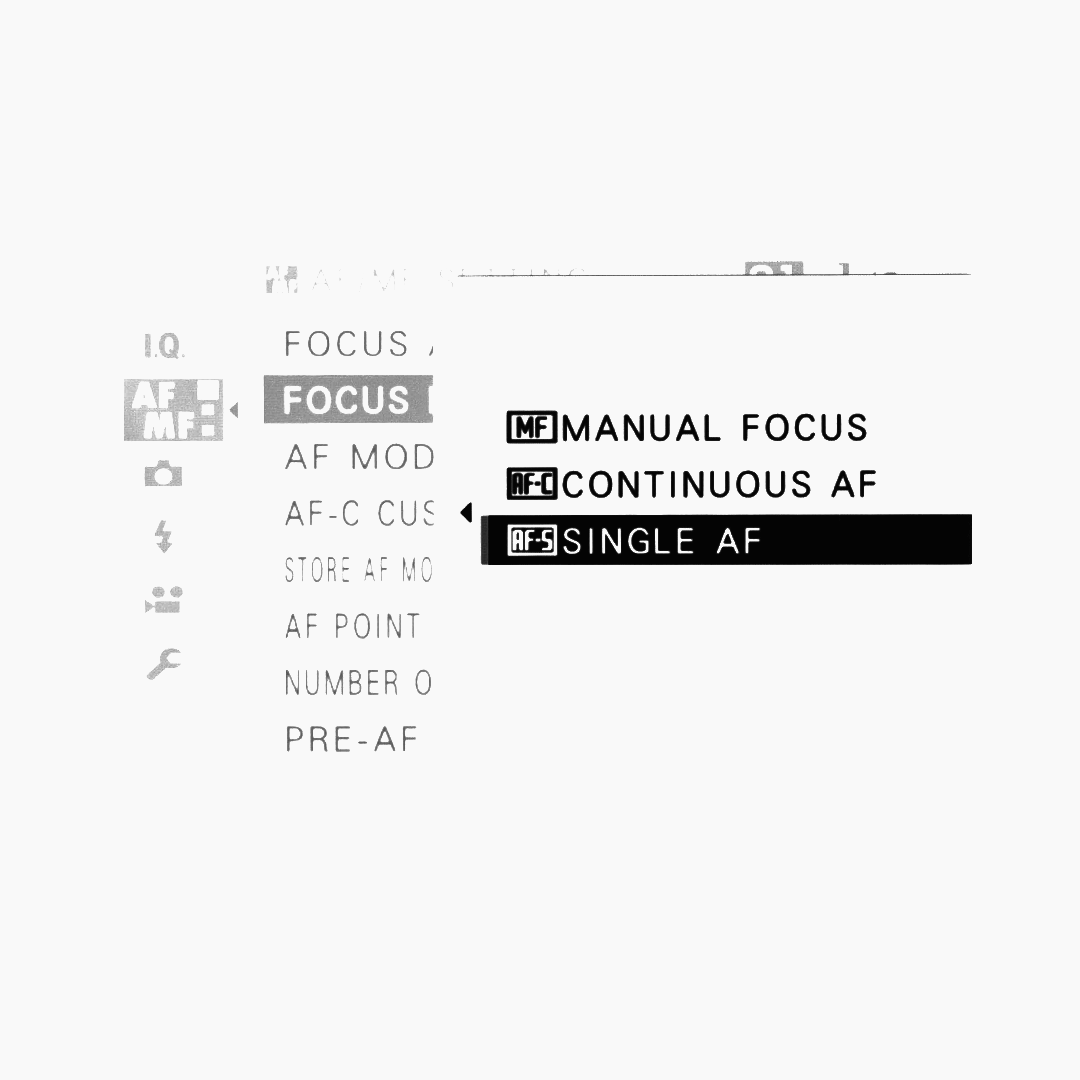
Personally, I use SINGLE AF. I use Continuous AF on other camera bodies when I need to record myself or when shooting all kinds of cinematic footage.
For photography, I like having full control over the point I want to focus on and, if necessary, being able to change it.
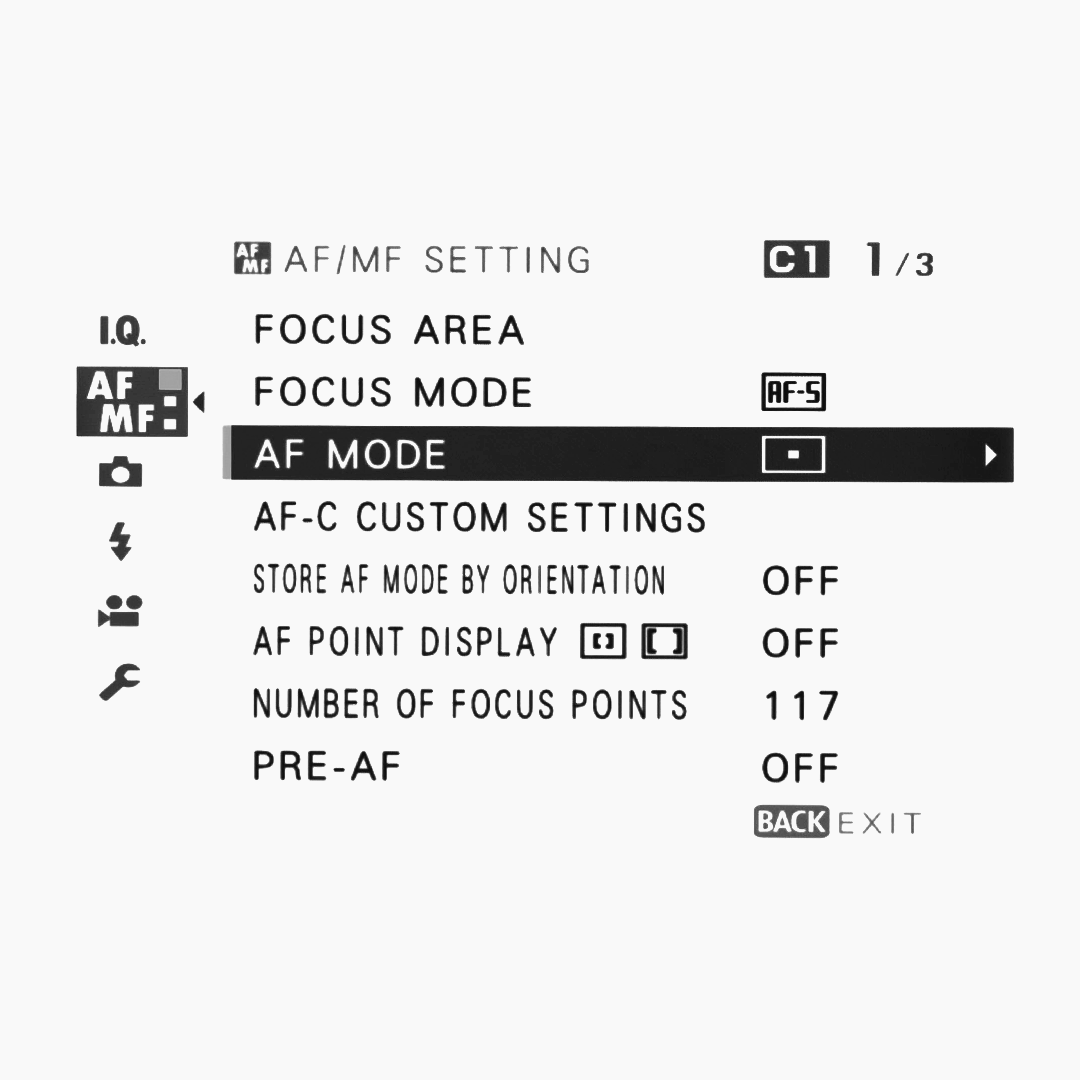
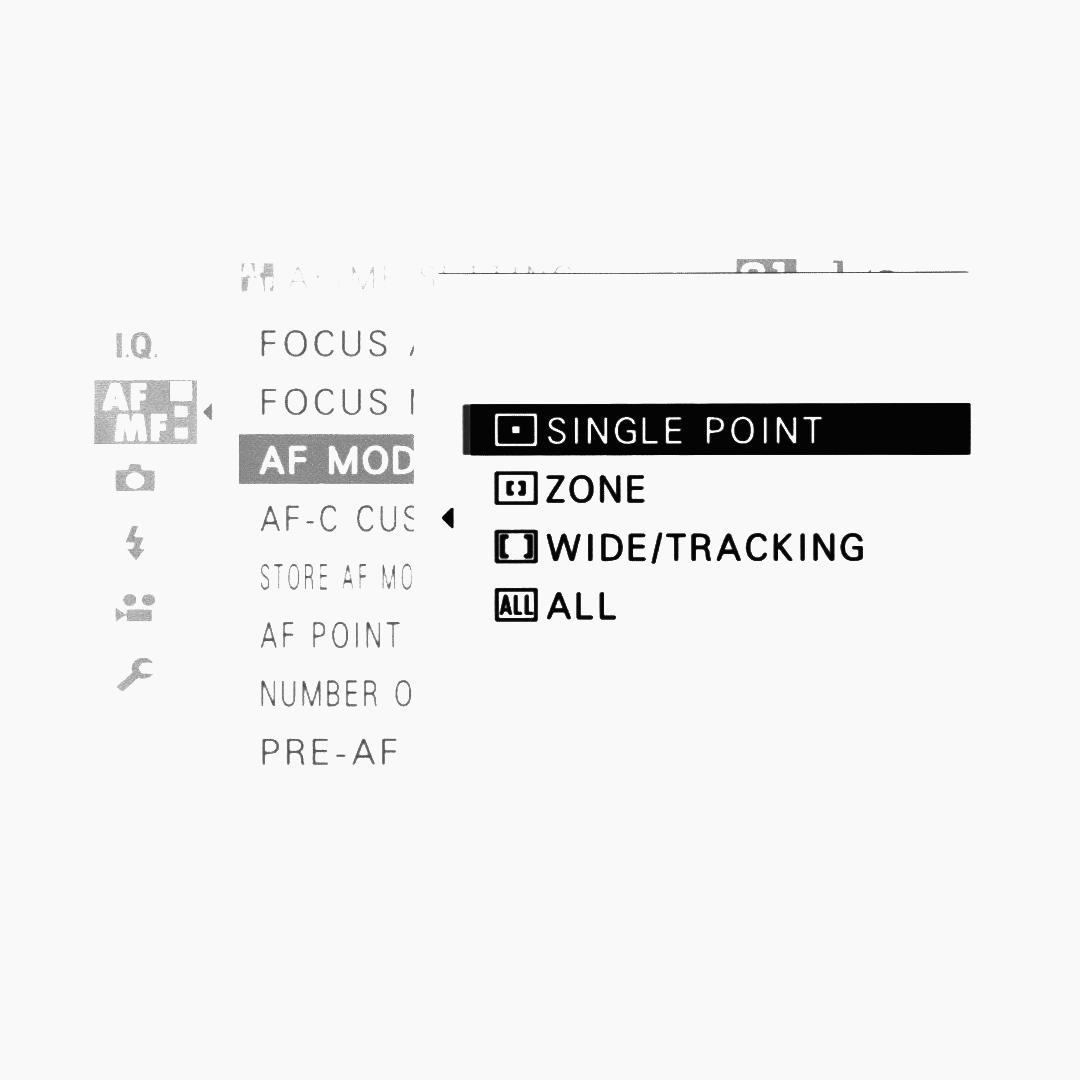
AF MODE
For the AF mode, I use Single Point.
As mentioned, I want to take a deliberate and personal approach to focusing. I like being able to half-press the shutter to focus, recompose the scene if necessary, and then take the photograph.
I don't use the various buttons on the camera to lock exposure because I have always found that process too mechanical and unnatural.
I prefer to adjust focus when necessary, change the focal length if I'm using a zoom, adjust the aperture, and take the picture.
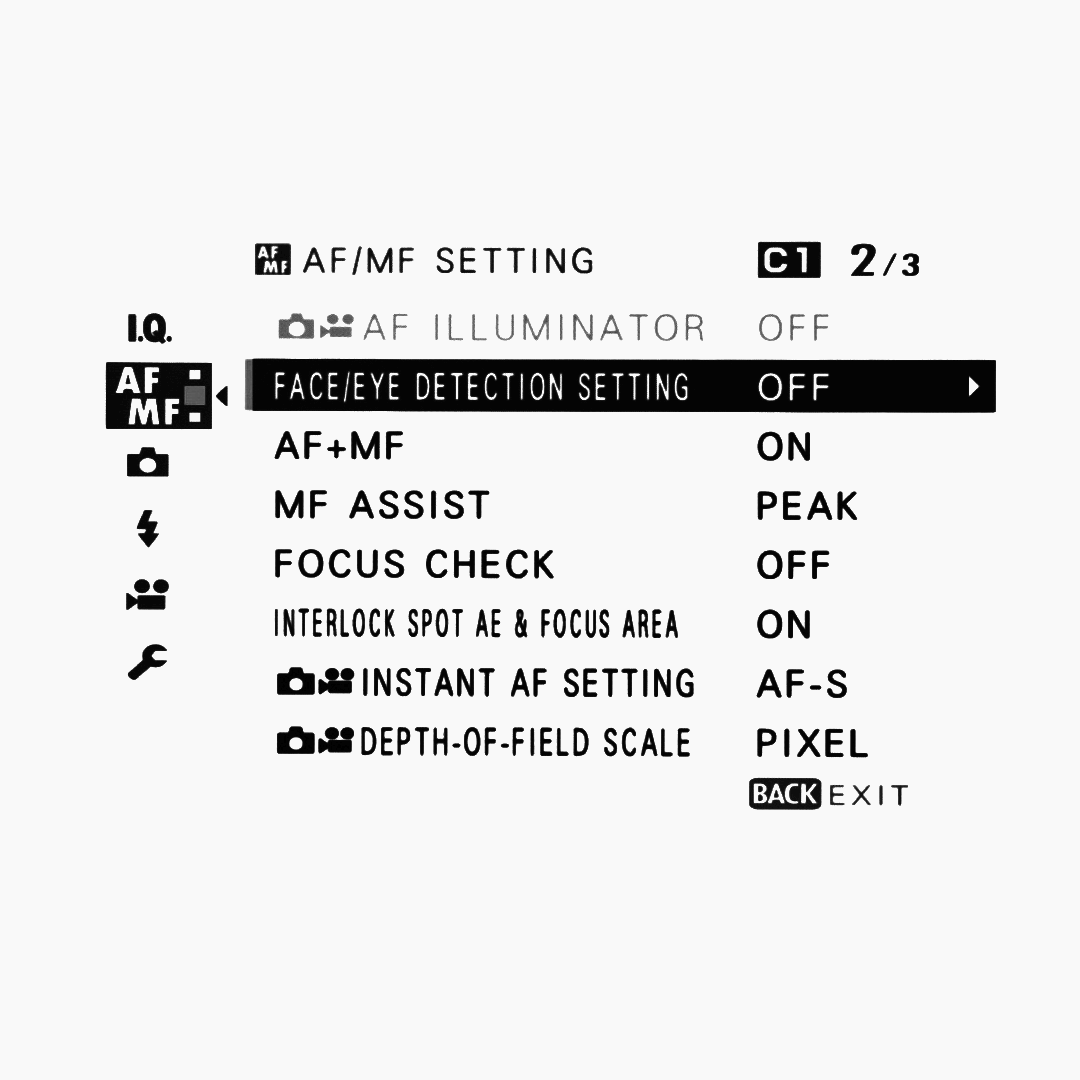
FACE/EYE Detection Setting
Off. Absolutely.
The subject of a photograph isn't always a face or an eye. Sometimes you want to concentrate on something else within the scene, even when there is a clearly visible person in it.
What you choose to focus on can completely change the meaning and outcome of a photograph.
As I said earlier, I don't want the camera to influence what I choose to photograph or what I see with my own eyes.
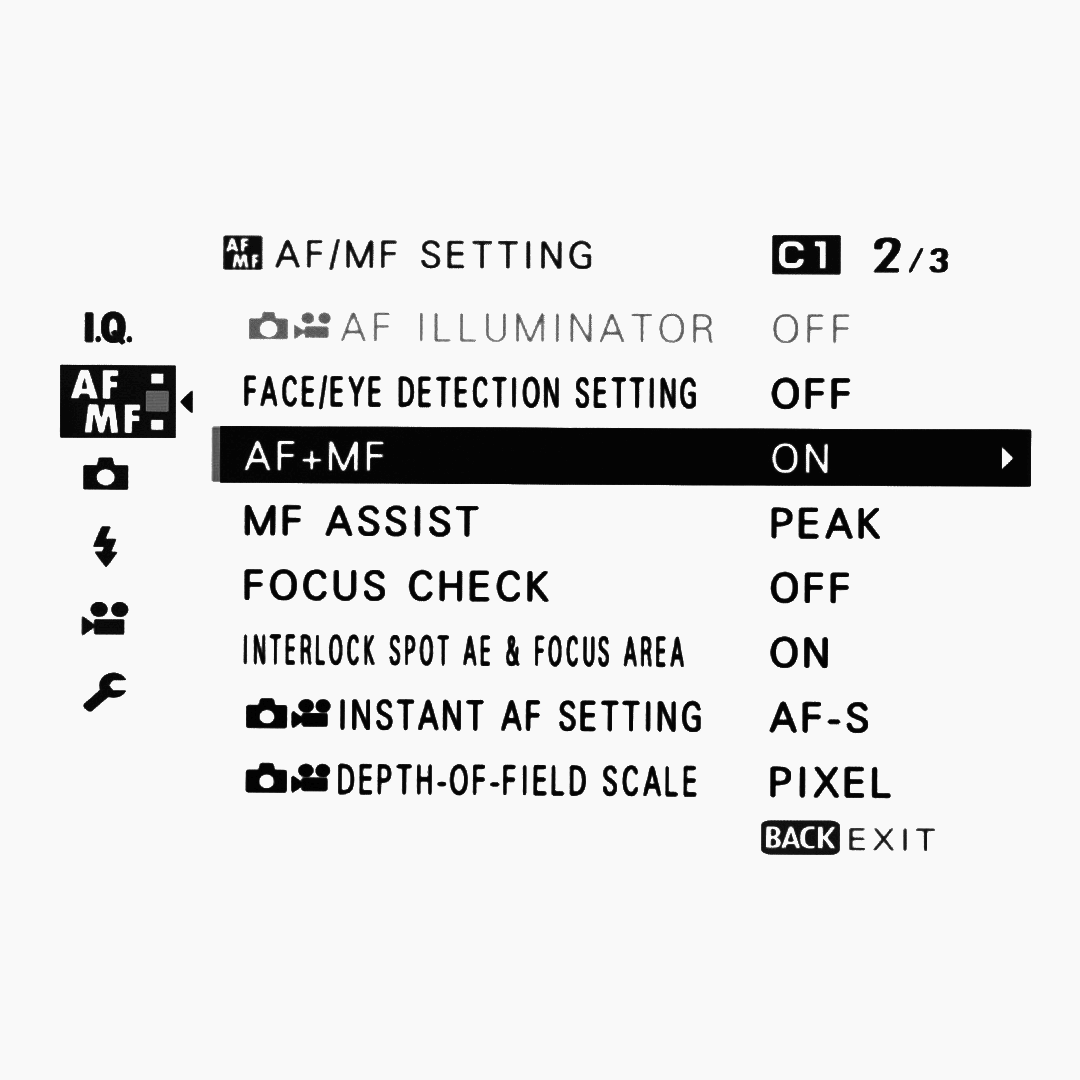
AF+MF
ON.
Even with autofocus lenses, it is extremely convenient to be able to focus on a specific point and then use that focus position as a starting point to fine-tune your focus manually.
There is really no reason for me to keep it OFF.
FOCUS MODE 2 / MANUAL
I shoot in full manual focus whenever I use vintage lenses.
However, there is one specific setting you need to change before you can properly use them on your Fuji.
Let's take care of that first, before moving on to the actual focus settings.
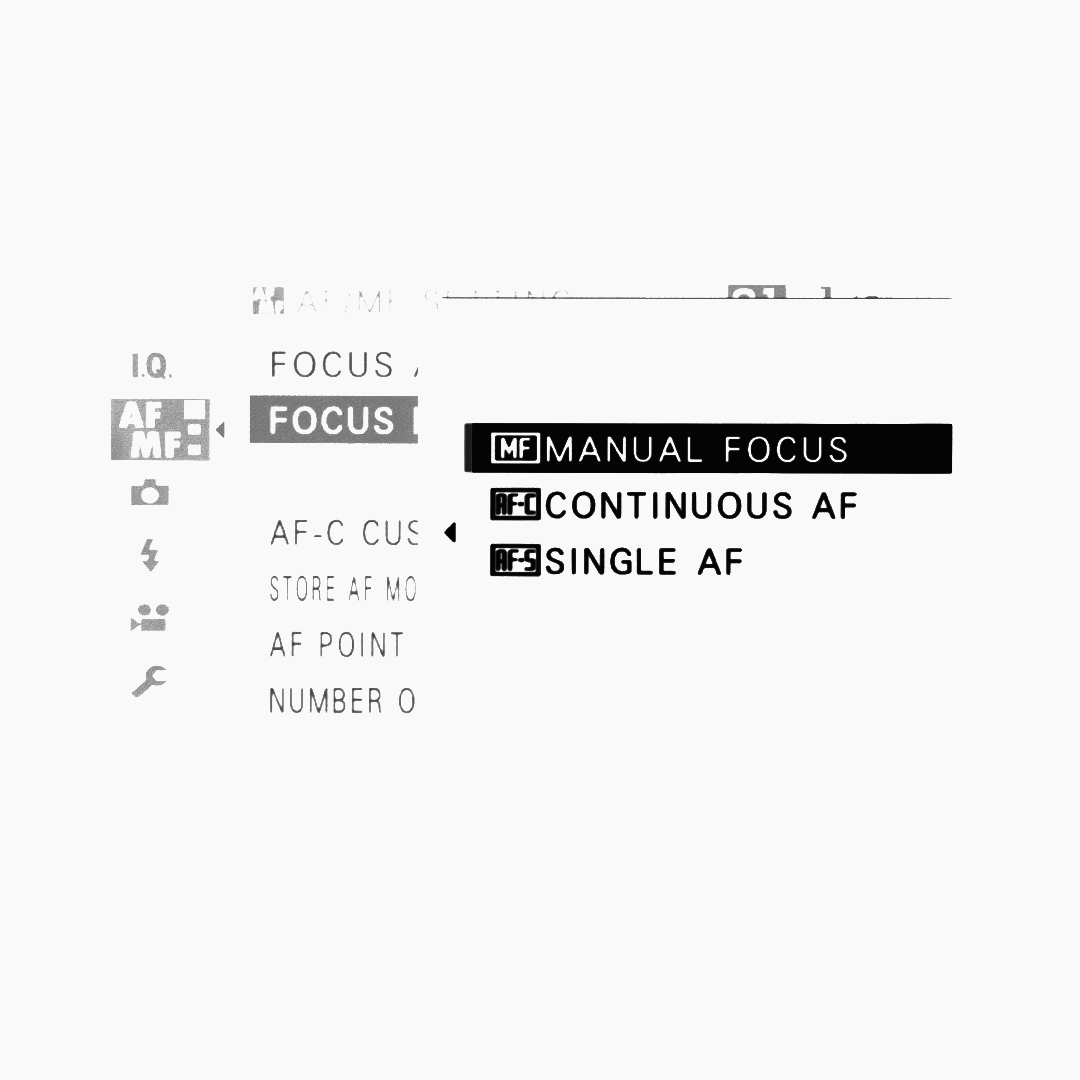
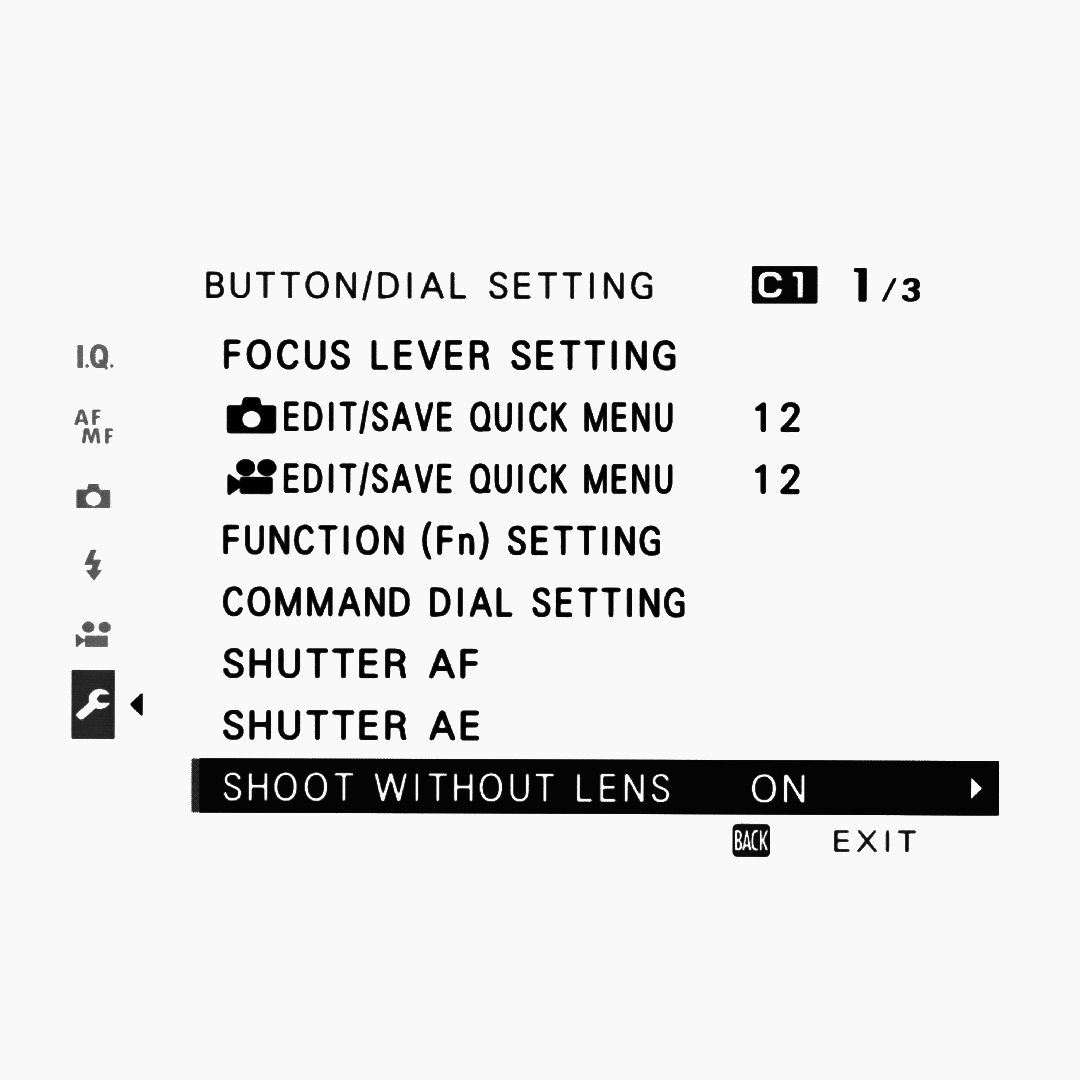
Go to the Set Up menu, the one with the wrench icon, then go to BUTTON/DIAL SETTING and turn SHOOT WITHOUT LENS ON.
When using vintage lenses, you will need an adapter. This adapter is purely mechanical and does not communicate with the camera's electronics, meaning the camera will not recognize the lens.
That is why this setting needs to be turned ON.
MF ASSIST
Once that's done, we can go back to the AF/MF menu and select MF ASSIST.
Personally, I use FOCUS PEAK HIGHLIGHT as my focus assist.
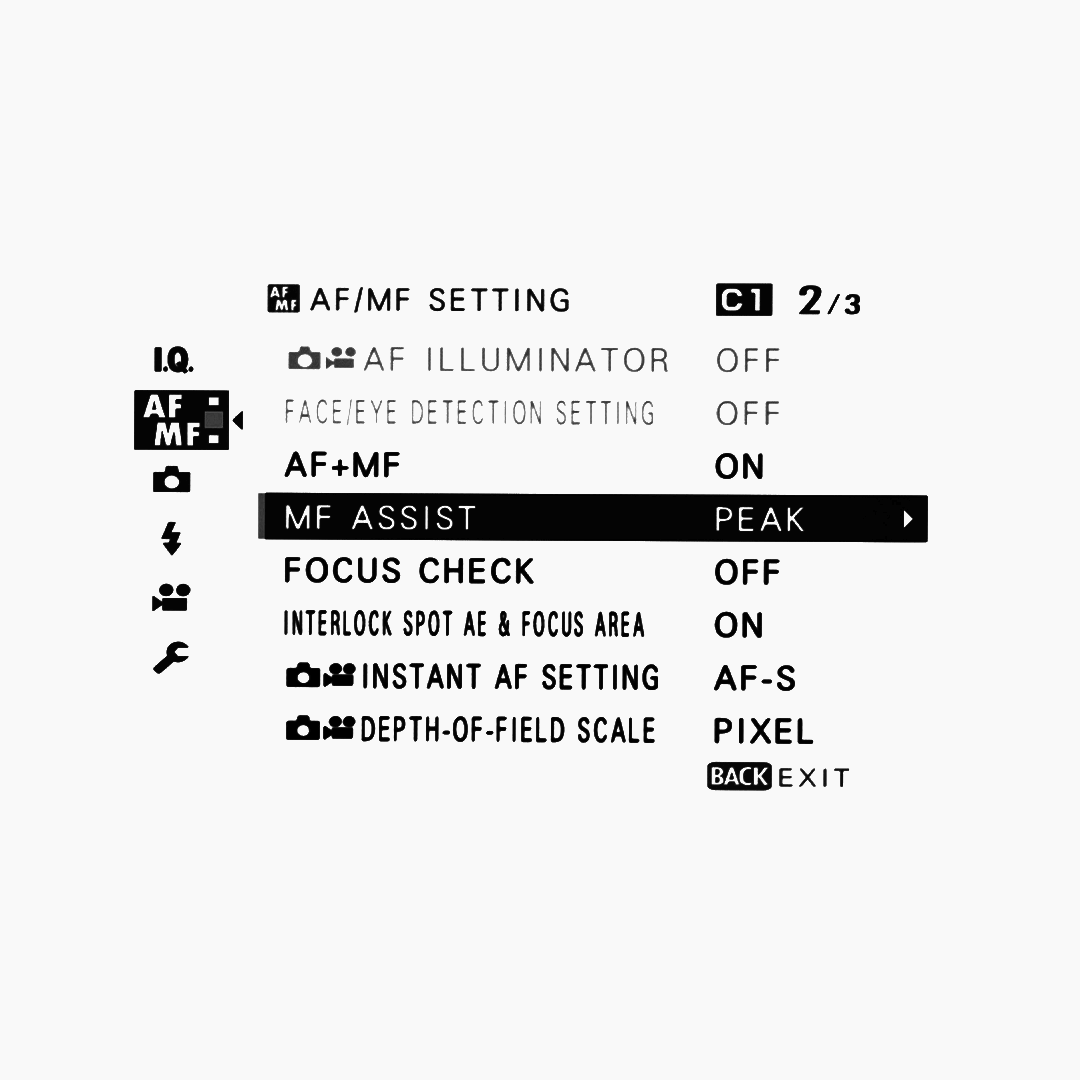
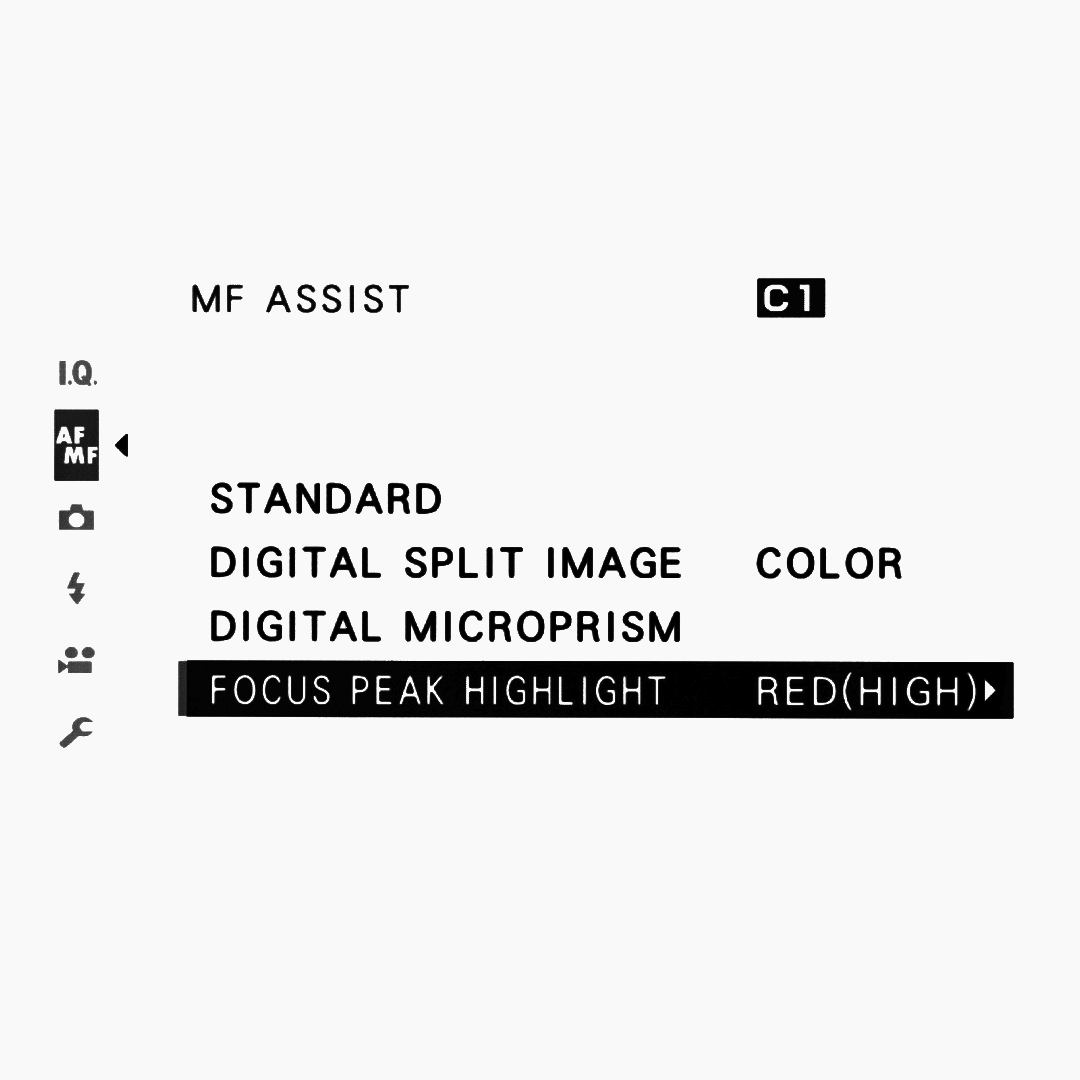
Here we get into a couple of completely subjective preferences that don't really affect the final result: the peaking color and the intensity of the peaking.
Let me explain.
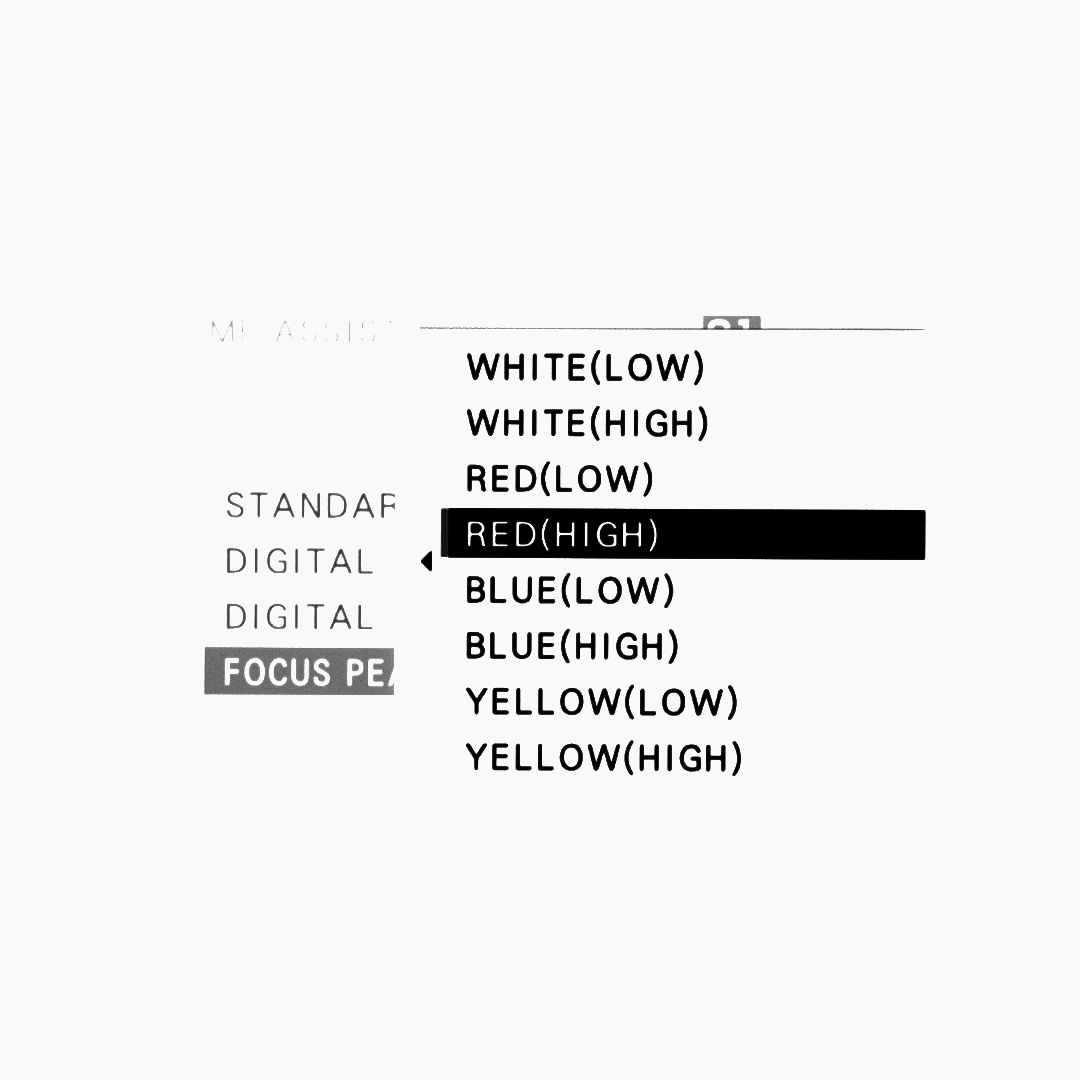
HIGH and LOW are simply two different levels of peaking intensity.
When set to LOW, you will see what is actually in focus with greater precision. When set to HIGH, you get more of an overall indication of what is in focus and what is slightly outside the focus plane. Think of it more as a gradient.
This ultimately depends on how you use the camera.
For street photography, I personally leave it on HIGH.
As for the color, that is purely personal.
However, when using the black-and-white Film Simulation, I find that having red peaking helps me visualize what is in focus and what isn't much more easily.
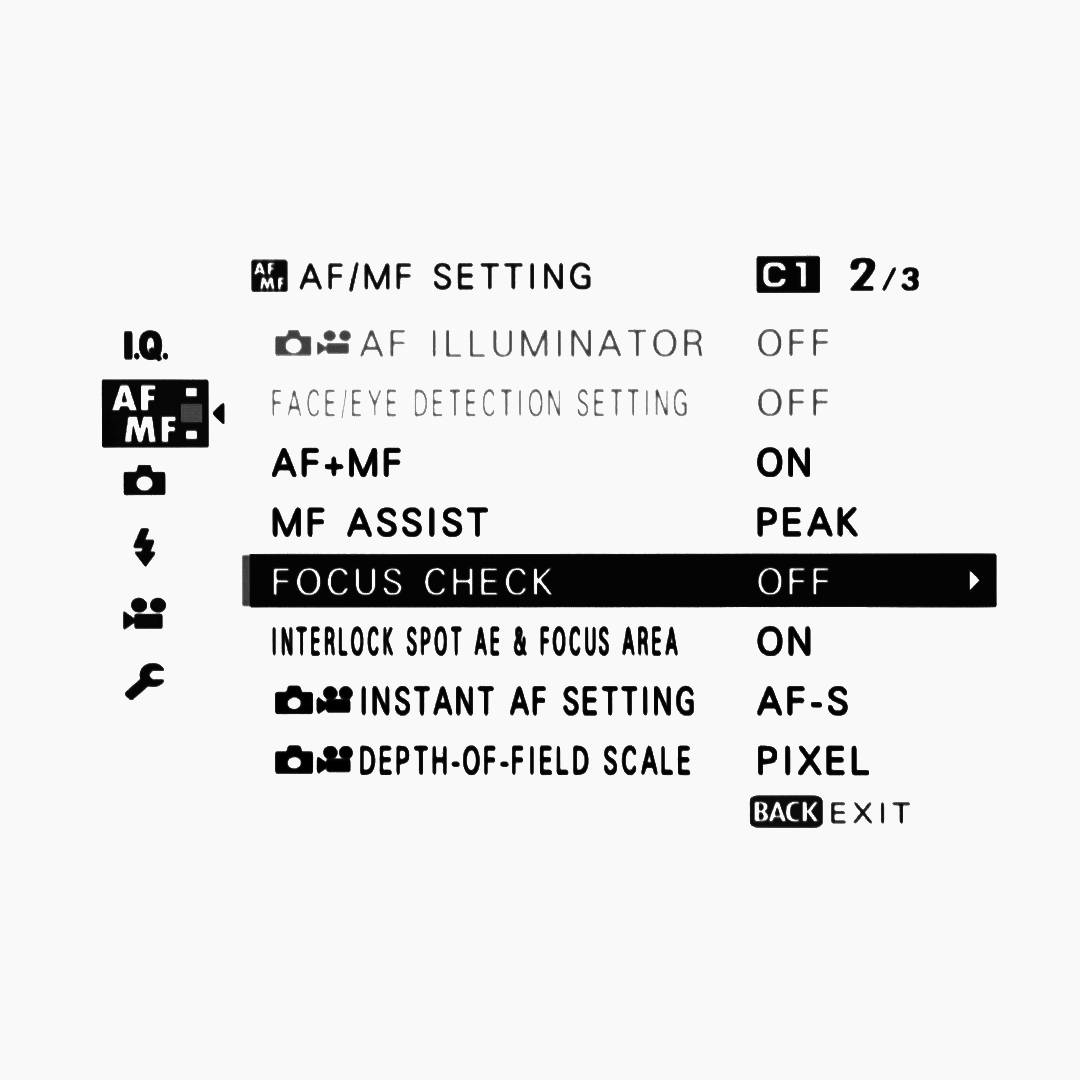
FOCUS CHECK
Off.
Even though I've noticed that many people leave this set to ON.
When enabled, it essentially displays a magnified frame of what you are shooting so you can check whether it is in focus or not.
Personally, I find it extremely distracting and annoying, especially when you're shooting on the street and need to focus and take the shot instinctively.
Besides, I find the Focus Peaking settings we just went through more than sufficient.
PT.III
Shooting Setting
We've reached the final section before getting to an interesting and useful extra.
PHOTOMETRY
Personally, I keep Photometry set to MULTI, simply because I find it the least intrusive option and the one that gives me more room for editing in post.
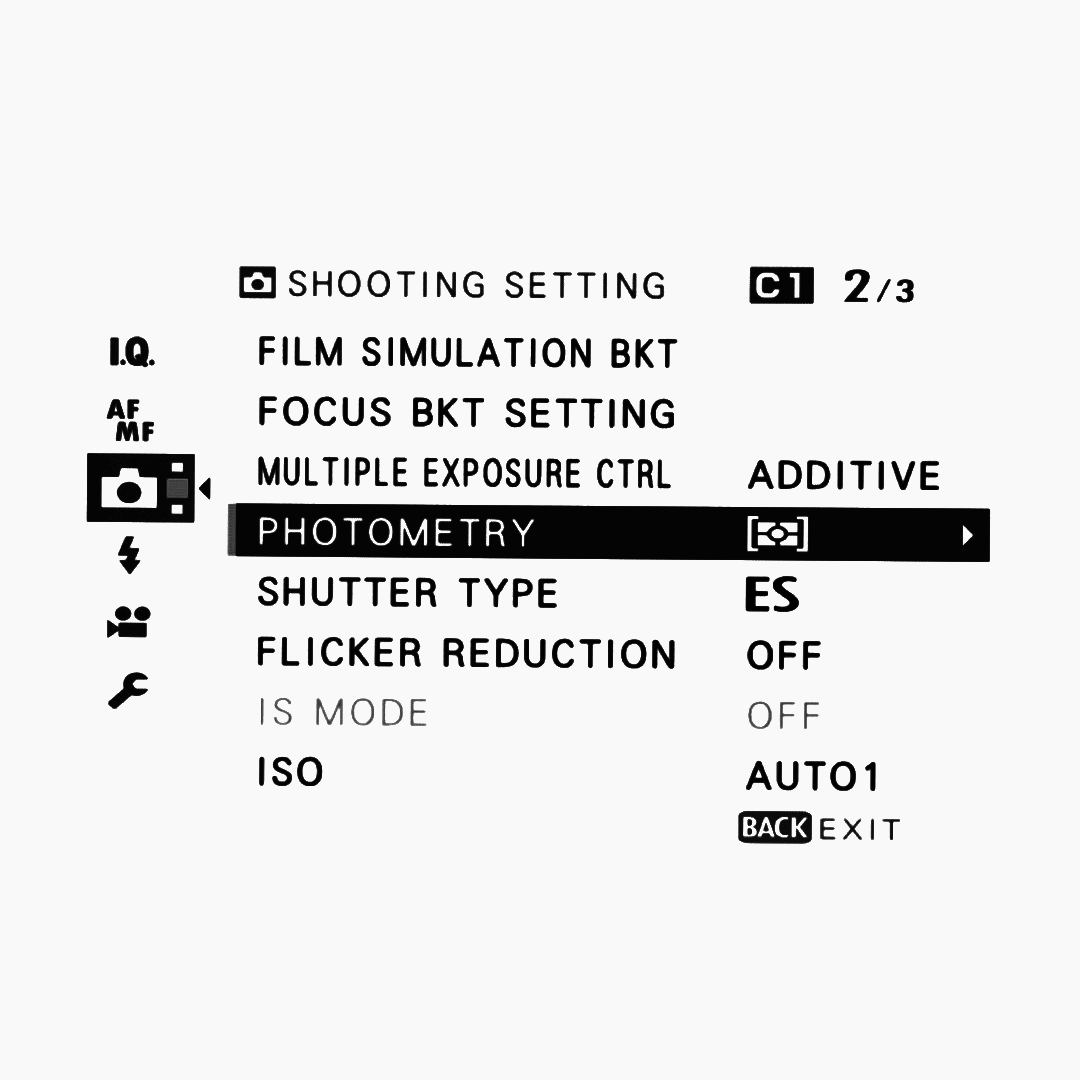
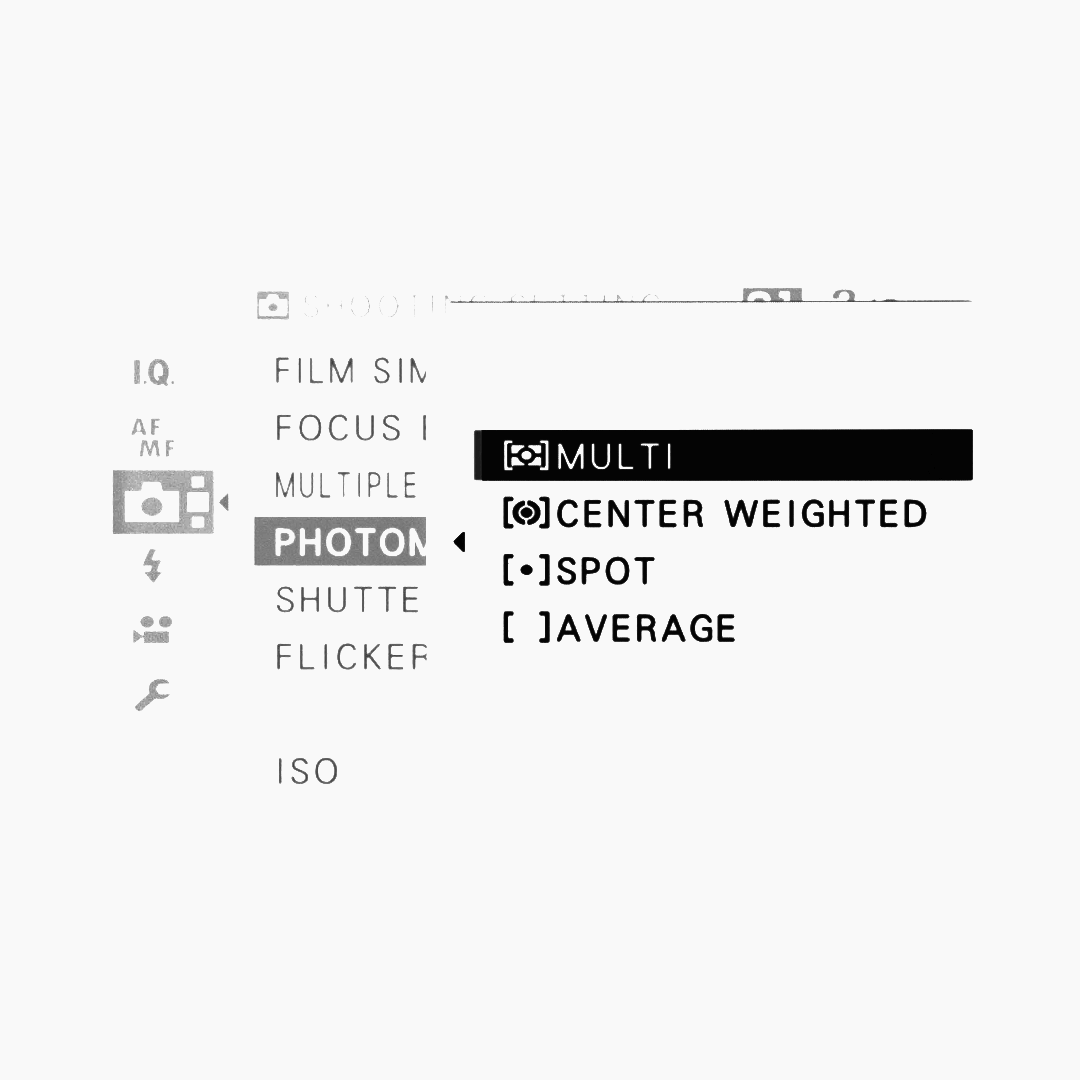
SPOT can be useful for high-contrast scenes where you want to concentrate on silhouettes and things like that, but I don't think there's much that cannot be achieved in post if you shoot using MULTI.
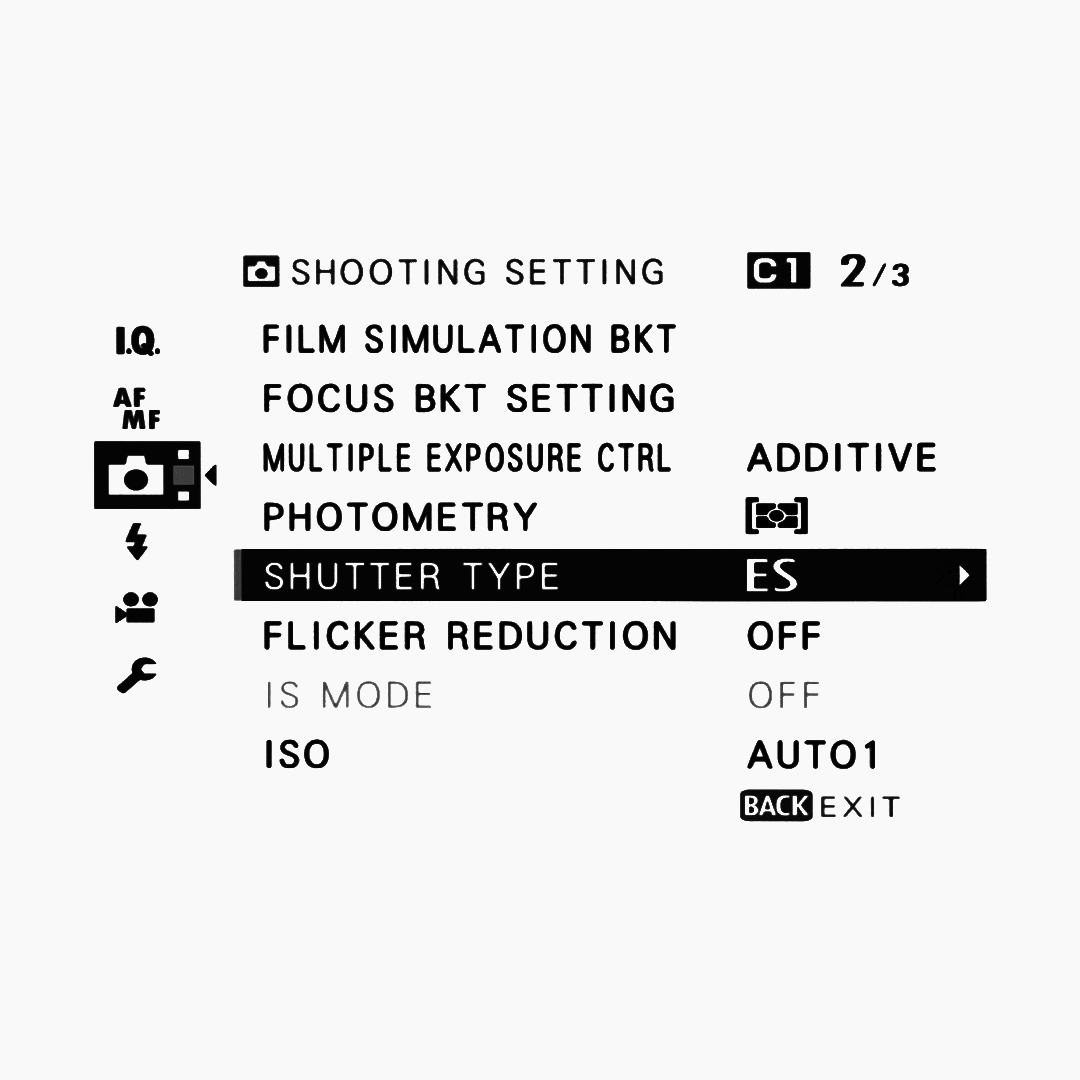
SHUTTER TYPE
This is where we have to make a small sacrifice.
Although I love the sound of a mechanical shutter, the same cannot always be said for the people you're photographing.
A mechanical shutter can draw attention to you and make it obvious that you are taking a photograph, even if you're shooting from the hip.
I still have flashbacks from when I used the Ricoh KR-5. Firing a rifle would have made less noise.
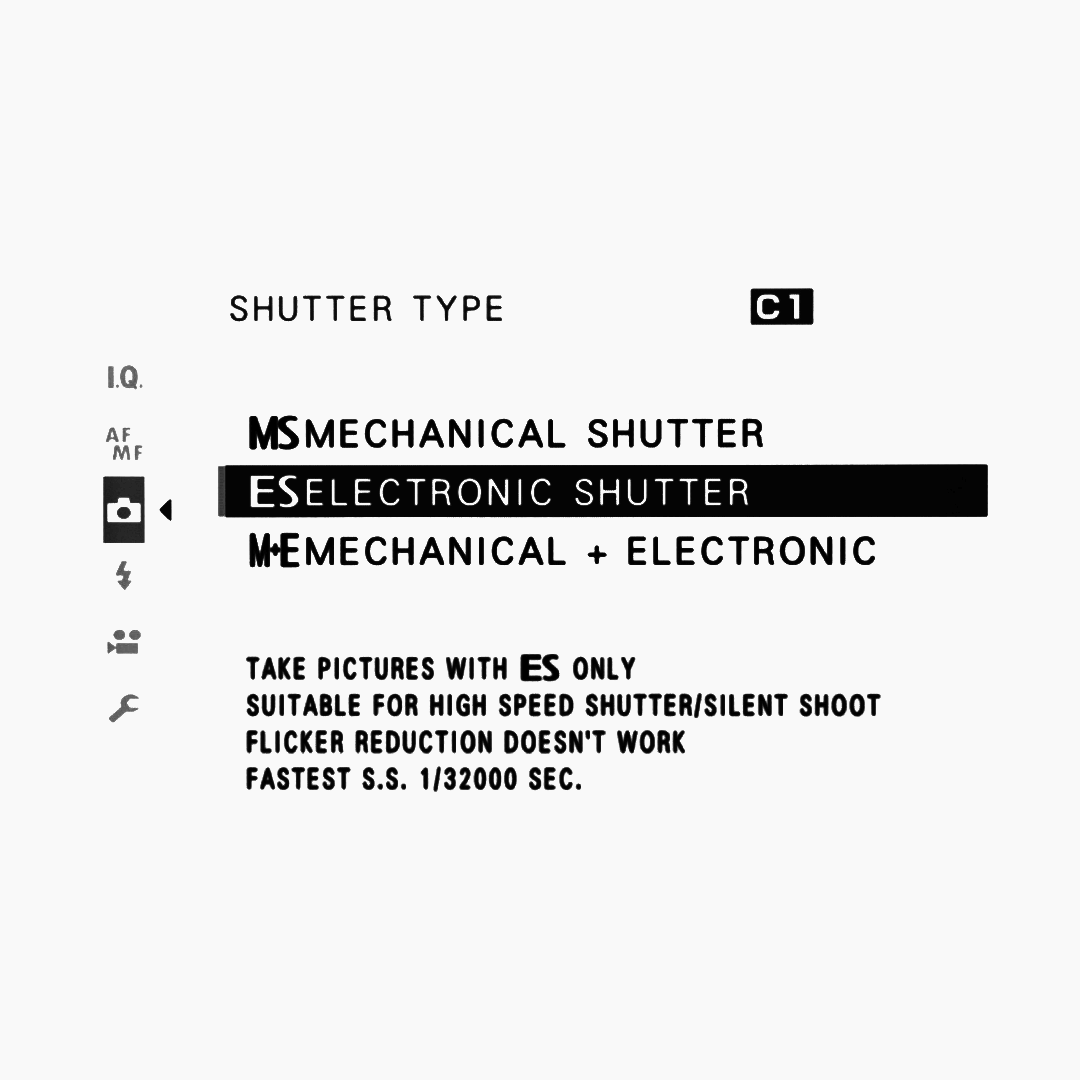
So, I recommend shooting in Electronic Shutter mode.
Not only will you be completely silent, but you won't even have to use the mechanical shutter.
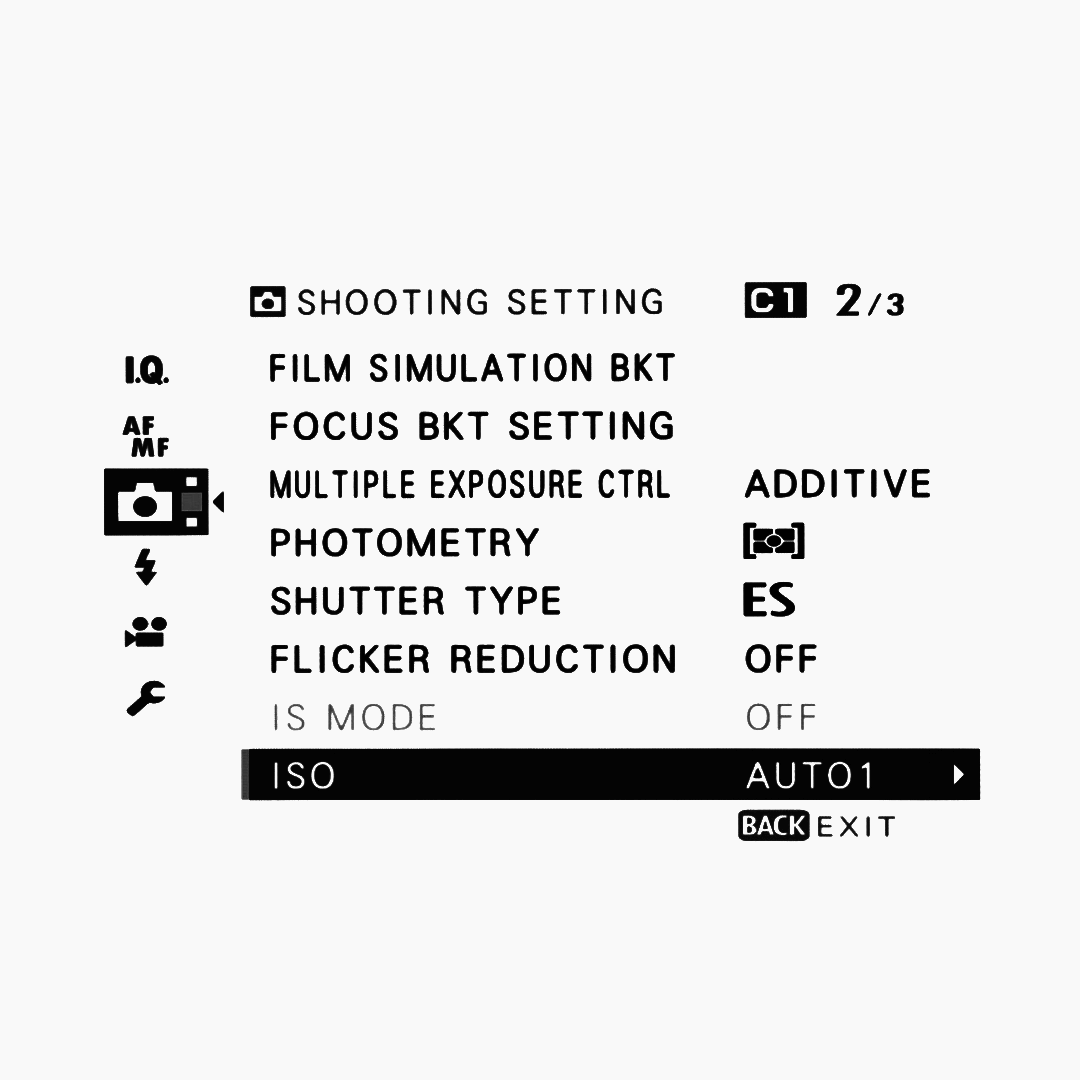
My ISO settings are the following:
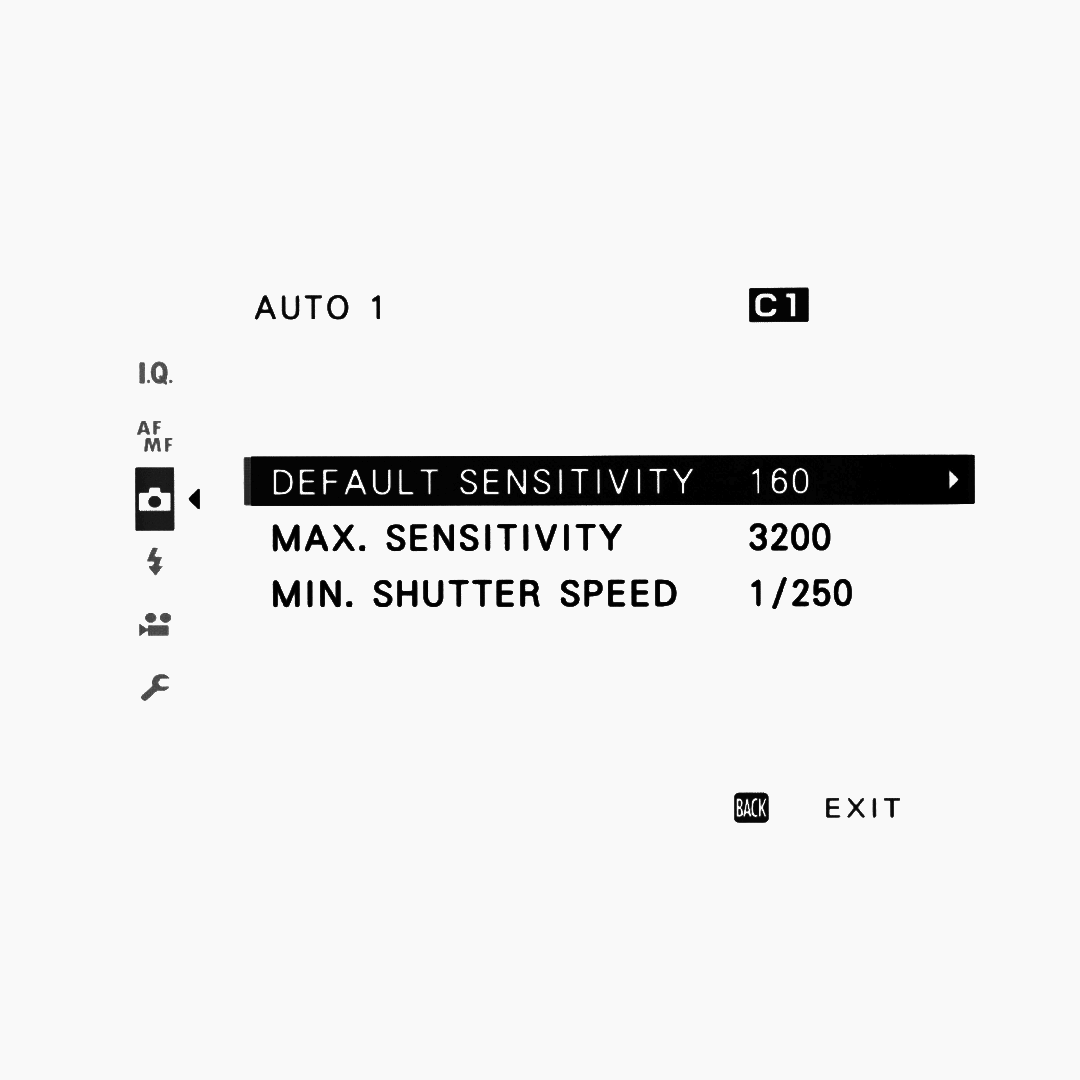
Default Sensitivity: 160, the lowest possible value.
Maximum Sensitivity: 3200. I've noticed that beyond this value, the photos become increasingly difficult to appreciate and improve in post.
Minimum Shutter Speed: I always use 1/250.
This is the compromise that allows me to retain a sense of movement in the photograph without sacrificing the ability to stop down to f/8 or f/11, for example, without ending up with everything blurred and missing the moment.
If, under the shooting conditions created by these settings, the ISO needs to go beyond the limit you have set, the camera will automatically adjust the shutter speed to stay within the parameters you've chosen.
How? With the help of a dial...!
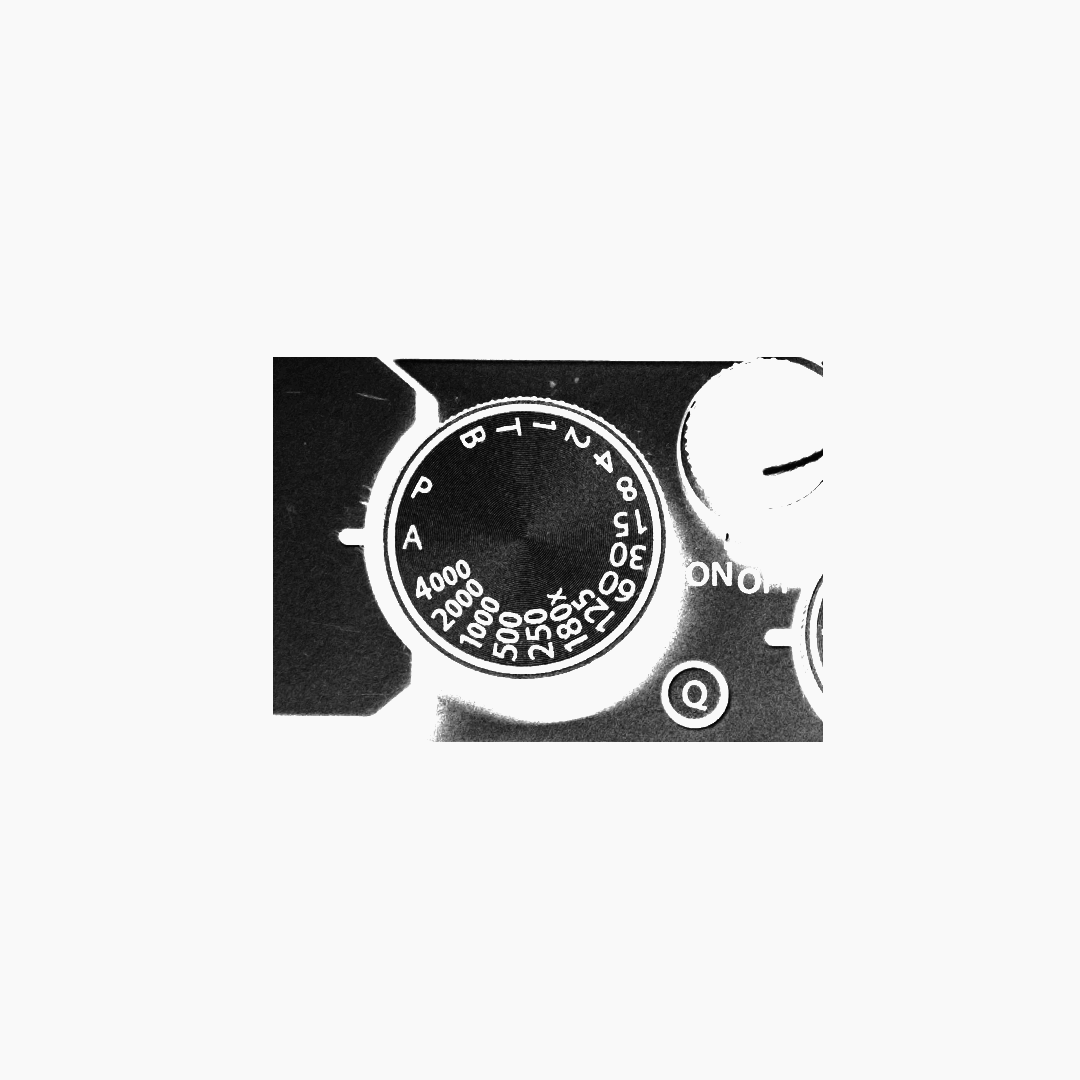
The Dial
The shutter speed dial is almost permanently set to A (Auto), unless I specifically want to use a slower shutter speed to create a particular effect.
The approach I take with this camera is one of the most direct and least technical you can have.
If I can simplify the photographic experience, I do it. Obviously, within certain limits.
I think it is essential to have enough room to build your own settings and parameters around your personal preferences.
We shouldn't be slaves to the conveniences and technologies our cameras offer us. We should be allies with them.
And that's one of the reasons I love the X-E4.
PT.IV
Save Your Settings
Once you've reached the end of this guide, you might be wondering:
"Okay, but how do I save all these settings?"
Very simple.
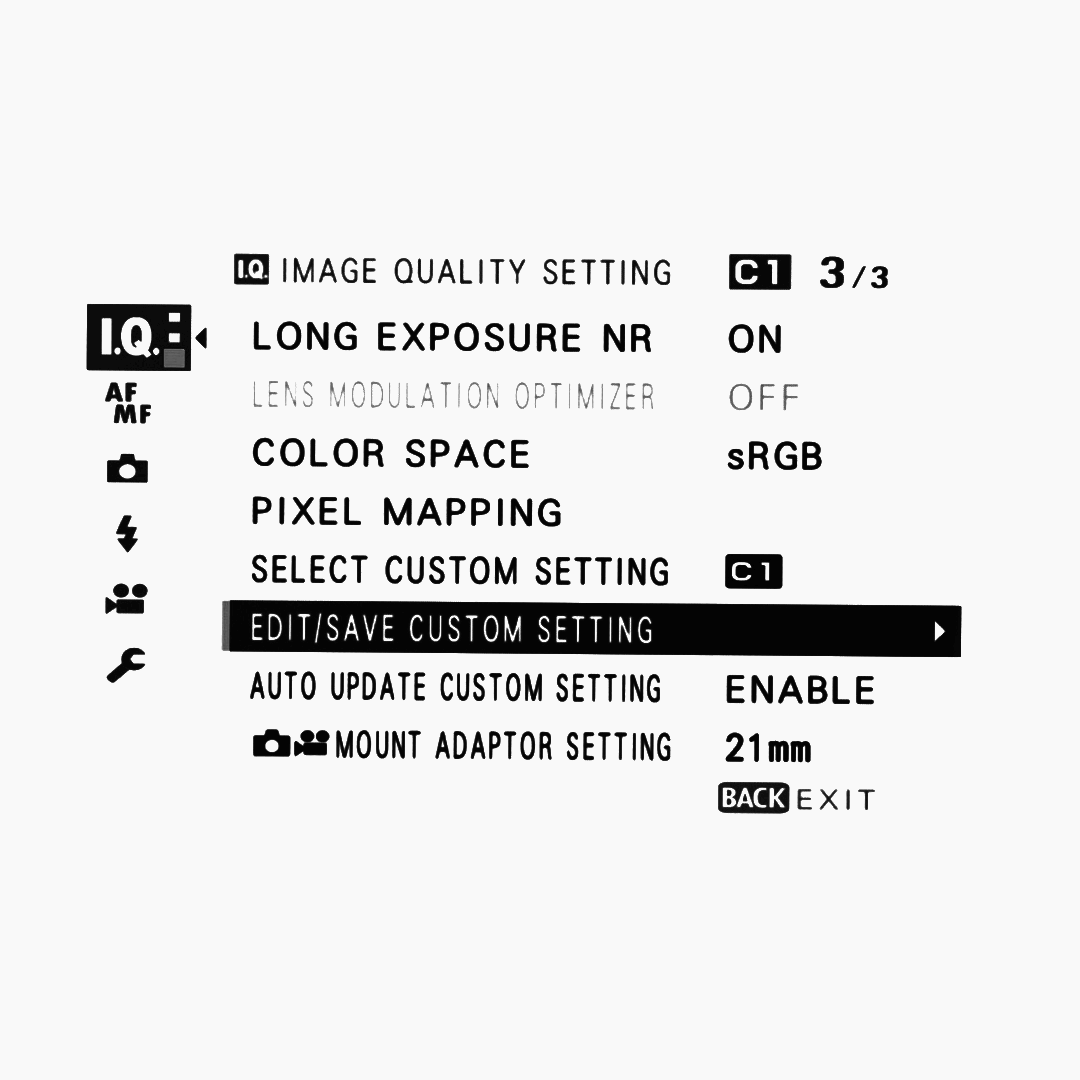
Go back to the first window, Image Quality Settings, and scroll down until you find EDIT/SAVE CUSTOM SETTING.
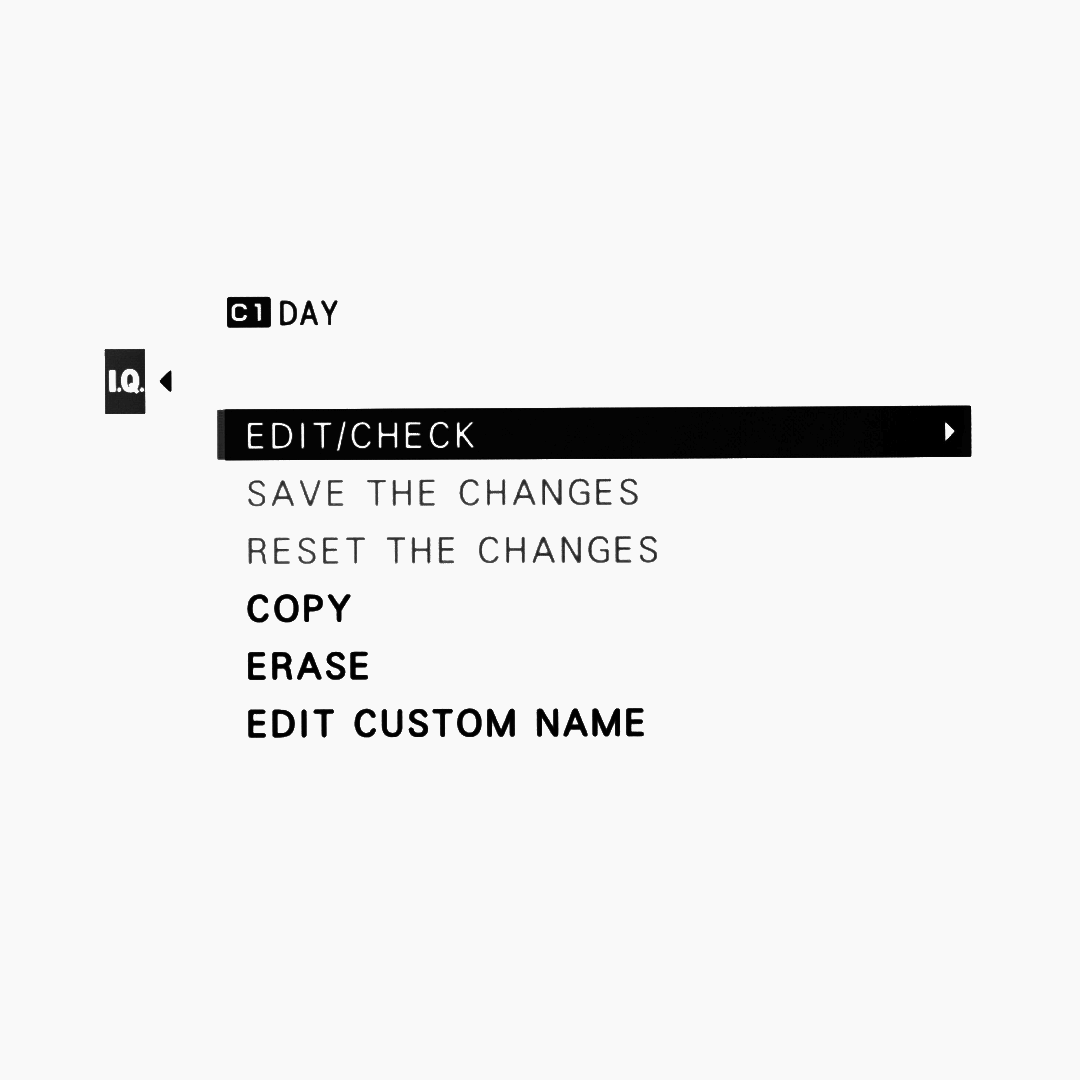
Choose a name for your settings and save them.
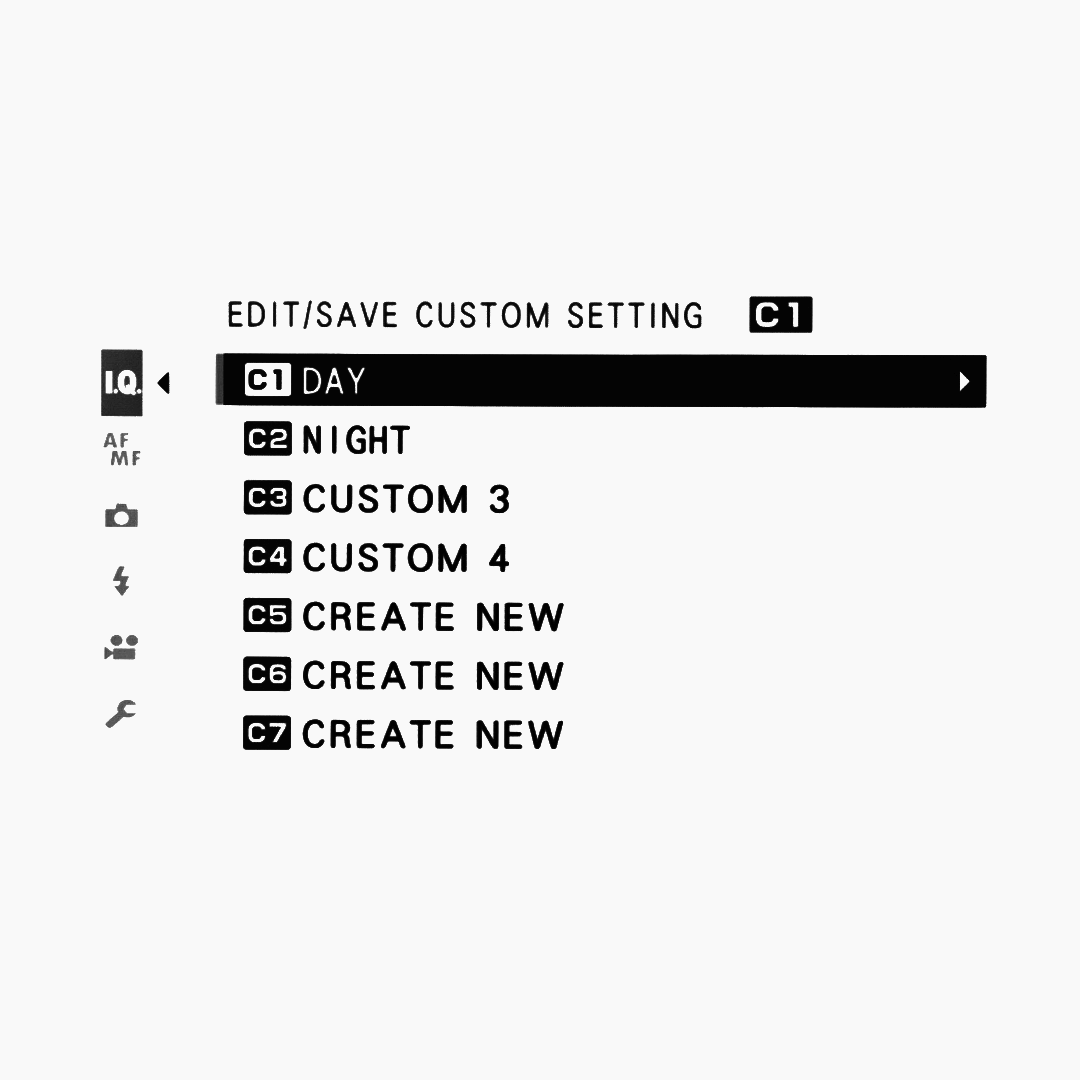
In my case, I have created separate Day and Night settings, each with their corresponding parameters.
Final Thoughts
If you've made it all the way to the end, thank you for taking the time to read this guide.
I genuinely hope it has helped simplify your experience with the Fujifilm X-E4 or, at the very least, given you a few ideas for building a setup that feels more natural and intuitive.
The less time you spend thinking about your camera, the more time you can spend paying attention to the world around you.
If this guide helps you achieve that, then it has done exactly what I hoped it would.
Thank you!
This blog will always remain ad-free.
If you enjoy my blog and would like to support my work, consider leaving a tip or visiting my shop, where you'll find my personal Lightroom presets, zines & camera guides.
Every bit of support goes directly back into creating new photography content, including YouTube videos, blog posts, camera guides, and, of course, more presets and zines, with the occasional freebie for everyone along the way.
Thank you for reading. <3
I created this guide to share my personal approach to street photography with the Fujifilm X-E4, breaking down the essence of how I use this camera and showing the settings that I consider truly essential, as well as the ones I believe can be ignored in order to achieve a faster, simpler and more intuitive shooting experience.
This was my first Fujifilm camera, and probably the only one I will never get rid of. I have dedicated a video and a blog post to explaining why, as well as another video and blog post where I go through the accessories that made this camera so versatile that it became the only Fujifilm camera that has truly convinced me so far.
Before we begin, there is something important to clarify.
This is not meant to be a complete Fujifilm X-E4 manual.
The settings I will show you are not necessarily the ones that will perfectly match your style, habits, or creative process.
They are simply the choices that, after spending a significant amount of time with this camera, have become essential to my own workflow.
Think of this as a personal recipe rather than a universal instruction manual.
Take what works for you, ignore what does not.
⚠️ As this is a digital product, refunds are not available. However, if you have any questions or experience any issues with your purchase, feel free to email me at karisma.business.inquiries@gmail.com. I'll get back to you as soon as possible!
🌱 Thank you for considering a purchase. Every bit of support goes directly back into creating new photography content, including YouTube videos, blog posts, camera guides, and, of course, more presets and zines, with the occasional freebie for everyone along the way.
I genuinely appreciate your support. Thank you for being part of the journey.